
Introduction to DJI RC Pro Controller
Understanding the Basics
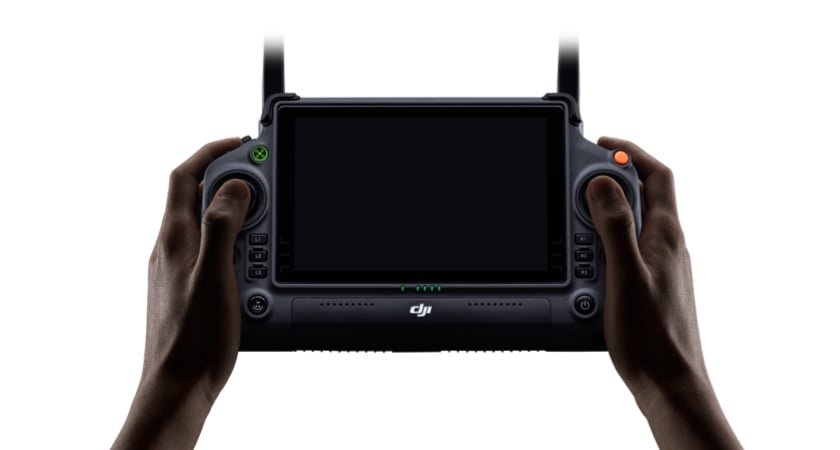
Whether you’re a seasoned drone pilot or just getting started, the DJI RC Pro Controller stands out as a powerful tool that enhances your flying experience. The controller is designed to be intuitive and user-friendly, making it easier for you to focus on what matters most—the flight and the breathtaking footage you’ll capture. First, let’s break down the basic components.
- Ergonomics: The design is sleek and comfortable. You can fly for hours without feeling fatigued.
- Screen: With a built-in ultra-bright display, visibility is never an issue, even under direct sunlight. You won’t find yourself squinting while trying to check your drone’s status.
- Buttons and Controls: The layout allows quick manual adjustments, letting you stay in control without unnecessary distractions.
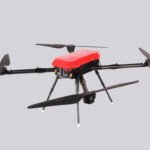
Given that the controller operates seamlessly with a variety of DJI drones, including the Mavic series, it’s a universal companion for your flying adventures. As a personal anecdote, I remember the first time I flew my Mavic Air 2 using the RC Pro Controller. Thanks to the smooth controls and responsive performance, I was able to capture stunning aerial footage while easily maneuvering through tricky areas.
Overview of Key Features
The DJI RC Pro Controller is packed with features that make it stand out in the crowd. Let’s explore the standout elements that elevate your flying experience.
- High-Performance Transmission: It utilizes OcuSync 3.0, which ensures a seamless connection with your drone. This high-performance transmission allows for a range of up to 15 km (9 miles), providing you the freedom to explore even the furthest reaches of your surroundings. Imagine soaring high above a mountain range, capturing impressive shots while maintaining a stable connection!
- Customizable Control Layout: The RC Pro Controller lets you assess the needs of your flight and customize the configuration accordingly. Whether you prefer a specific setup for quick actions like taking photos or adjusting the camera’s tilt, this feature ensures that your workflow is always optimal.
- Intelligent Flight Modes: With options like ActiveTrack, Point of Interest, and Waypoints, these modes allow for dynamic filming possibilities. I often use ActiveTrack to keep moving subjects in focus—it adds a professional touch to my content without requiring advanced piloting skills.
- Comprehensive Monitoring: The controller’s display offers real-time telemetry data, giving you insights into altitude, speed, and battery life. If you’re into videography or photography, you can also see camera settings at a glance.
- Built-In Functionality: No need to stress about running low on power. The RC Pro Controller comes with a large-capacity battery that can sustain you for several hours of usage—ideal for those all-day shooting marathons.
- Enhanced Editing Features: Integrated editing tools make it easier to compile footage right from your controller. This means less hassle when it comes to post-production; you can already have your clips ready while you’re still in the air!
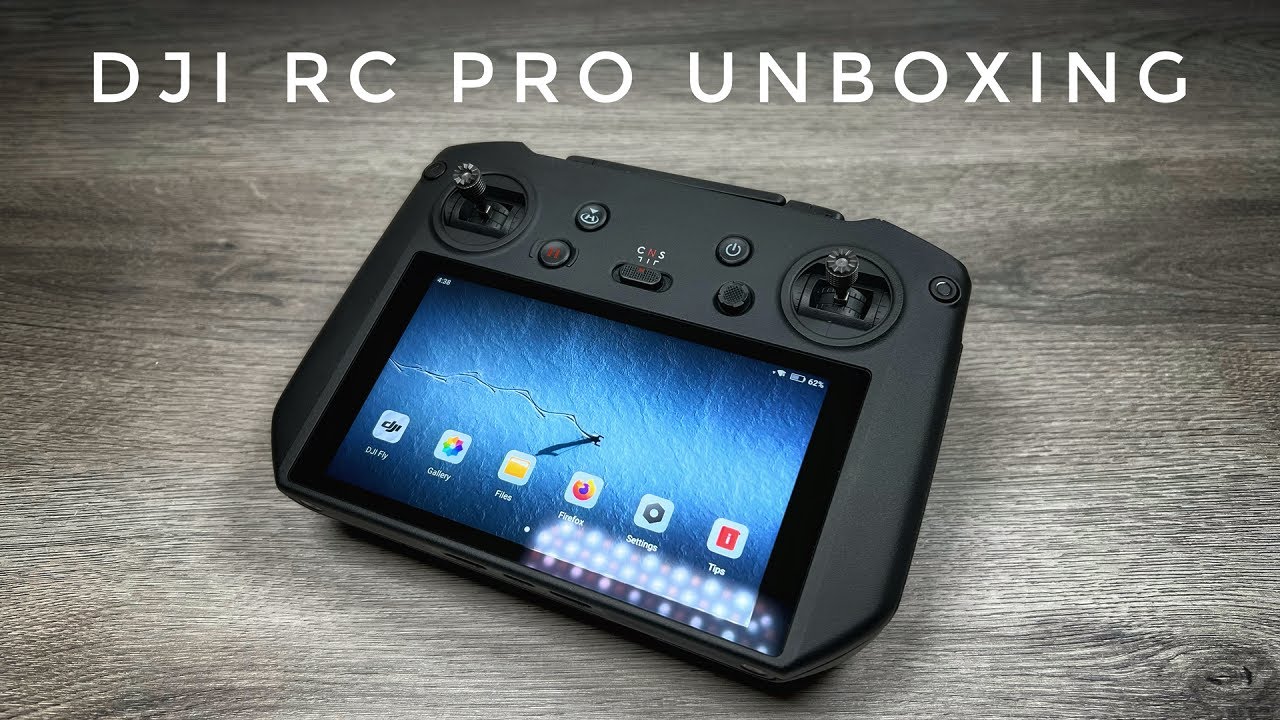
- User-Friendly Interface: Everything about the RC Pro is designed for ease of use. With an intuitive touchscreen interface, you’ll find it easy to navigate menus and settings. The brightness level can also be adjusted to ensure optimal visibility under different lighting conditions.
- Accessory Compatibility: Additional accessories, like extra batteries or ND filters for your camera, can be seamlessly integrated into your flying experience. They enhance your control and offer flexibility for various shooting scenarios.
Each feature serves a purpose that caters to different flying styles and needs. As you gain experience, you’ll appreciate the depth the DJI RC Pro Controller brings to your flights. Whether you’re looking to create cinematic shots or explore new terrains, it puts the control into your hands while simplifying the overall process. Using the DJI RC Pro Controller transforms your flying experience into something that feels very much like an extension of yourself. It allows for creative expression in the skies without overcomplicating your setup. Next up, we’ll delve into how to set up your DJI RC Pro Controller, from pairing it with your drone to customizing the settings to match your unique flying style. So let’s get into it!
Setting Up Your DJI RC Pro Controller
Pairing with Your Drone
Now that you understand the basics of the DJI RC Pro Controller and are excited about the features it offers, it’s time to set it up and get your drone in the air. The first step in this process is pairing the RC Pro with your drone, and let me tell you, it’s simpler than you might think!
Step-by-Step Pairing Process
- Powering on Both Devices: Begin by turning on your DJI RC Pro Controller and your drone. It’s important that both devices are charged, so you don’t have to worry about any interruptions while you’re in the pairing process.
- Accessing the Remote Control Settings:
- On the RC Pro Controller, swipe down to access the settings menu.
- Look for the “Remote Control” option, which will guide you to the next steps.
- Selecting the Pairing Option:
- You will see the option to “Link” or “Pair” in the remote settings. Tap on it, and your controller will enter pairing mode.
- At this point, take your drone’s power button and press it briefly to activate pairing mode. You’ll notice LED lights beginning to blink—this indicates that the drone is ready to connect.
- Confirming the Connection:
- Once the controller identifies your drone, it will prompt you to confirm that you want to establish a connection.
- Simply follow the on-screen instructions, and you should see a message indicating that the pairing was successful.
A Personal Tale
On my first try, I was so eager to get my drone off the ground that I didn’t fully read the instructions. I remember frantically clicking buttons and stressing out when I couldn’t get them to connect. But after taking a deep breath and following the steps one by one, I finally got it linked. It’s one of those moments that reminds you to slow down and enjoy the process! Once paired, you’ll appreciate how quickly and effectively the RC Pro communicates with your drone, allowing for a much more enjoyable flying experience.
Customizing Settings
With your drone now paired with the RC Pro Controller, let’s dive into customizing settings to suit your flying style. Every pilot has unique preferences, and the controller allows considerable flexibility to adjust features to meet your needs.
Key Customization Options
- Control Sensitivity:
- Go to the settings menu and adjust the stick sensitivity. This allows you to fine-tune how responsive the controls are. I personally prefer a moderate sensitivity for smoother cinematic shots, but many pilots like a more reactive feel.
- Button Functionality:
- Customize buttons for quick access to functions you use most frequently. For example, if you often switch between photo and video modes, reassign a button for that action to save time mid-flight.
- You can select buttons for “Return to Home,” “Take-off,” and other useful functions. This personalization can significantly improve your flying efficiency.
- Camera Settings:
- In this section, you can adjust camera parameters like ISO, shutter speed, and exposure settings.
- By setting up the camera controls to your liking, you can capture the best possible footage without fumbling with settings mid-flight.
- Telemetry Data Display:
- Choose the info you want prominently displayed on your screen while flying. This could include altitude, distance from home point, or flight speed.
- Personally, I like keeping altitude and battery life on-screen, as it helps me make informed decisions during flight.
- Creating Flight Profiles:
- If you use your drone for different activities—like recreational flying vs. professional videography—you can set up different flight profiles. Each profile can store unique settings such as speed, altitude limits, and return home points.
- Software and Firmware Updates:
- Make sure you check for software updates through the DJI Fly app. Keeping your controller and drone updated ensures you have access to the latest features and performance improvements.
Enhancing the Experience
As you customize your settings, explore different combinations and see what works best for you. Experimenting is part of the fun! I remember playing around with my settings for hours, sometimes even taking test flights just to see how small changes affected my haptic feedback or stick movement. Setting up and customizing your DJI RC Pro Controller is not only about functionality; it’s about creating a unique flying experience tailored for you. It enhances your connection with the drone, making each flight a more enjoyable adventure. Now that you have your controller paired and personalized, the next step is calibration and maintenance tips to ensure everything runs smoothly. Let’s continue the journey!

Calibration and Maintenance Tips
Calibrating the Sticks
After you have successfully set up and customized your DJI RC Pro Controller, it’s time to dive into calibration. Calibration is essential because it ensures that your controller’s sticks respond accurately. Proper calibration can significantly enhance your control and stability while flying.
Why Calibration Matters
Calibration is crucial for ensuring precision in your movements and helps avoid issues like unintentional drifting. You want to be in complete command of your drone during those challenging maneuvers or when you’re capturing that perfect shot.
Steps for Calibration
Here’s a straightforward guide to calibrating the sticks on your DJI RC Pro Controller:
- Access the Calibration Menu:
- On your controller, tap the settings gear icon, typically found in the upper right corner of the screen.
- Navigate to “Control Settings” and look for the “RC Calibration” option.
- Follow the On-Screen Instructions:
- The controller will prompt you to begin the calibration process. Follow the on-screen instructions carefully.
- You may be required to move the left and right sticks in circular motions and from corner to corner.
- Check the Calibration:
- After completing the initial setup, a confirmation screen will appear showing the results of your calibration.
- Make sure the values displayed do not fluctuate wildly. If they do, you may want to recalibrate to ensure accuracy.
- Test Your Controls:
- Take your drone for a brief test flight to see how it responds to your commands.
- What I usually do is hover the drone at a short distance and make gentle movements with the sticks to see if it maintains stability. This is a great way to verify everything is functioning properly.
Tips for Future Calibration
- Regular Checks: It’s advisable to recalibrate the sticks whenever you sense any unusual behavior during flight or after making adjustments to your controller settings.
- Environmental Factors: Sometimes, different environments (like flying your drone at high altitudes) may require you to recalibrate. Keep this in mind during your adventures.
Proper Storage and Care
Once you’ve calibrated your sticks, it’s equally important to discuss the proper care and storage for your DJi RC Pro Controller. Taking good care of your equipment prolongs its life and ensures your flying experience remains enjoyable.
Storage Tips
- Use a Protective Case: Invest in a quality case that fits your controller snugly, protecting it from impact, dust, and moisture. I personally love having a dedicated case because it organizes everything and adds some extra peace of mind during transport.
- Keep Away from Extreme Temperatures: Avoid leaving your controller in a car during hot or cold weather. Extreme temperatures can damage the internal components and batteries.
- Avoid Direct Sunlight: Prolonged exposure to direct sunlight can cause screen damage or screen glare. Keep it shaded or covered when you’re not flying.
- Remove Batteries: If you’re storing your controller for an extended period, it’s best to remove the batteries. This prevents potential leakage and corrosion, which may ruin the battery compartments.
Care Tips
- Regular Cleaning: Dust and debris can accumulate over time. Use a microfiber cloth to gently wipe down surfaces, paying special attention to the buttons and screens.
- Inspect for Wear and Tear: Frequently check for signs of wear, such as loose buttons or frayed wires, especially if you often take it out on adventures. Address any issues early to avoid bigger problems.
- Battery Management: If you notice a decrease in battery life, it may be time to replace the batteries. Keeping your controller’s battery healthy is crucial for optimal performance.
A Personal Touch
I have to share a little trick I learned the hard way. Once, I forgot to store my controller properly after a long day of flying, and during a rainstorm overnight, it got a bit wet. Thankfully, I caught it in time, and nothing was damaged. Since then, I’ve made it a habit to put my gear away safely right after each flight. It altogether lessens stress and avoids potential mishaps! Caring for your DJI RC Pro Controller, both through regular calibration and proper storage, ensures that you’ll enjoy an exceptional flying experience every time. It all comes down to a little maintenance, allowing you to focus on the magic of capturing those stunning aerial scenes. Now that your controller is calibrated and well cared for, let’s move on to discussing advanced controls and functions that can elevate your flying skills!

Advanced Controls and Functions
Using Intelligent Flight Modes
Now that your DJI RC Pro Controller is calibrated and cared for, it’s time to take your flying to the next level by exploring the intelligent flight modes that this powerful controller offers. These modes not only simplify flying but also allow you to capture stunning visuals with minimal effort.
Overview of Intelligent Flight Modes
Intelligent flight modes are designed to enable various automated flying options, making aerial photography and videography easier than ever. Let’s take a closer look at some of the key modes you can utilize:
- ActiveTrack:
- This mode allows the drone to automatically follow and keep a moving subject in-frame, whether you’re biking, running, or doing some extreme sports.
- You just select the subject on the screen, and the drone will do the rest! I still remember when I first used ActiveTrack to film a friend on a mountain bike trail. It was mind-blowing to see the drone effortlessly follow and frame him beautifully.
- Point of Interest (POI):
- The drone circles around a specific point at a set distance, allowing for impressive cinematic shots.
- Perfect for capturing architecture or natural landmarks, this mode lets you easily create a dramatic effect in your footage. For instance, when filming a stunning waterfall, I used POI to maintain the waterfall in the center of the frame as my drone circled around it—it looked spectacular on camera!
- Waypoints:
- Set a pre-defined flight path using GPS coordinates, and your drone will automatically follow it while you focus on capturing photos or videos.
- It’s a game-changer for landscape photography because it allows for repeated flights without manual inputs. Once, I planned a scenic route over a vineyard, marking points of interest along the way. The results were breathtaking, and it also saved me valuable time!
- QuickShots:
- QuickShots are a set of pre-programmed cinematic moves that include Rocket, Dronie, Circle, and Helix. Each move captures stunning videos without needing advanced flying skills.
- I love using Dronie for dramatic pull-away shots when showcasing beautiful scenery; it gives an epic feel to the footage with just a few taps.
Tips for Using Intelligent Flight Modes
- Scout Locations: Before activating these modes, it’s wise to scout the location. Knowing where to capture your shots can make all the difference.
- Adjust Altitudes: Depending on the mode, you might want to fine-tune the drone’s altitude settings to improve your shots further.
- Practice: These modes are fantastic, but practicing will help you understand their nuances. Familiarizing yourself with the controls and settings leads to better outcomes.
With these intelligent flight modes at your disposal, you can unleash your creativity and capture incredible footage effortlessly. Now, let’s transition to another essential aspect of flying—the camera settings.
Mastering Camera Settings
Having a solid understanding of the camera settings within your DJI RC Pro Controller can dramatically elevate the quality of your photos and videos. The controller acts as the nerve center, enabling you to adjust numerous settings on-the-go.
Key Camera Settings to Utilize
- ISO:
- Adjusting your ISO impacts the camera’s sensitivity to light. Lower ISO values (like 100-400) are perfect for sunny days, while higher settings (800 and above) can be beneficial in low-light conditions.
- Personally, I prefer to keep my ISO as low as possible to maintain image quality, especially when capturing landscapes in broad daylight.
- Shutter Speed:
- This setting controls how long the camera’s sensor is exposed to light. For smooth video footage, aim for a shutter speed that’s double your frame rate (e.g., if you’re shooting at 30 fps, set your shutter speed to 1/60th of a second).
- I learned this the hard way during an evening shoot, and my footage turned out choppy because I didn’t adjust the shutter speed properly. Now, I can’t stress enough how important it is for achieving that smooth cinematic look!
- White Balance:
- Adjusting white balance settings can dramatically enhance the colors in your shots. Use specific presets (like Daylight, Cloudy, or Shade) based on your shooting environment.
- I often switch between presets when filming during golden hour to capture the warmth of the sunset—you can really see the difference!
- Manual Exposure:
- Taking control of your exposure allows you to balance ISO, shutter speed, and aperture for the desired effect. While it requires practice, mastering manual exposure can elevate your photography to a professional level.
- Using ND Filters:
- Neutral Density (ND) filters are a fantastic way to manage light without compromising quality. They essentially act like sunglasses for your camera, allowing you to maintain slower shutter speeds even in bright conditions. I frequently use them during the day and have found they make gorgeous videos!
Practicing Your Skills
Don’t hesitate to experiment with different settings and lighting conditions. Capturing various environmental types, like a bright sunny day versus late evening, will help you understand how each setting works. A few test flights where you adjust different parameters based on real-time feedback will sharpen your ability to shoot like a pro. Mastering both the intelligent flight modes and camera settings will ensure that you not only fly well but also capture breathtaking visuals. With this knowledge in hand, you’ll soon be on your way to creating stunning aerial footage that stands out! Next, we can explore tips to enhance your flying experience, from precision flying techniques to leveraging additional accessories. Let’s keep soaring!

Enhancing Your Flying Experience
Tips for Precision Flying
Having mastered the advanced controls and camera settings of your DJI RC Pro Controller, you are now well-equipped to take your drone flying to new heights. However, to truly enhance your flying experience, mastering precision flying is key. Whether you’re capturing breathtaking aerial shots or simply enjoying the thrills of piloting, precision is everything.
Key Strategies for Precision Flying
- Smooth Control Inputs:
- One of the most crucial aspects of precision flying is how you move the control sticks. Instead of making abrupt movements, practice gentle, slow inputs.
- Think of it like playing a musical instrument; smoother transitions result in more harmonious outcomes. I still remember my early days of flying, where I would jerk the sticks and end up with shaky footage. Now, I focus on deliberate, smooth inputs, and the results speak for themselves.
- Using the Right Stick Mode:
- Familiarize yourself with the stick modes available. Mode 2 is the most popular setup, where the left stick controls altitude and rotation, while the right stick controls direction.
- If you’re new to flying, practicing in lower stick sensitivity settings can really help you get a feel for it. It gives you room to adjust your movements without going overboard.
- Practice in Open Spaces:
- Choose open areas for practice to get comfortable with your drone’s response. Adjusting to your drone’s speed and agility is easier when space is abundant, letting you focus on flying techniques without obstacles.
- I often utilize local parks or sports fields when I want to perfect my flying techniques. It’s a great way to learn without the stress of nearby trees or buildings.
- Utilize Visual Reference Points:
- While flying, use landmarks or visual cues for better directional control. This technique helps maintain spatial awareness, allowing you to understand your drone’s position relative to the ground.
- Initially, I relied on visual references—a tree branch or a specific roof—so I could fly accurately while capturing my shots. With enough practice, you’ll develop an instinct for spatial orientation.
- Train with Flight Simulators:
- If you want to take your skills further, consider using drone flight simulators. They are a fantastic way to build muscle memory without any risk of crashing your drone.
- I started using a simulator when I felt stagnant; it worked wonders, helping me refine my control without the stress of potential crashes.
Practicing Precision Flying
- Set Specific Goals: During your practice flights, set small goals such as flying through more challenging narrower spaces or maintaining a steady altitude. Gradually increase the difficulty as you grow confident.
- Record Your Flights: Consider recording your practice sessions. Reviewing your flights can help highlight areas where you may need improvement, ultimately refining your skills over time.
By following these tips for precision flying, you’ll find that not only will your control improve, but your enjoyment of flying will increase tremendously.
Leveraging Additional Accessories
Now that you’re on the path to becoming a more precise pilot, let’s discuss how additional accessories can further enhance your flying experience. The right accessories can not only make flying easier but also elevate your photography and videography game.
Essential Accessories to Consider
- ND Filters:
- As mentioned earlier, Neutral Density filters are fantastic when shooting in bright conditions. They allow you to manage light exposure while maintaining smooth shutter speeds, ensuring high-quality footage.
- Extra Batteries:
- Always have extra batteries on hand. Battery life can be unpredictable, especially on windy days. Having spares ensures that you can stay in the air longer to capture all those great shots.
- Carrying Case:
- Invest in a quality carrying case designed specifically for your DJI RC Pro Controller and drone. It ensures that your gear is well-protected, making transportation convenient.
- Propeller Guards:
- If you are flying in tight spaces or near obstacles, propeller guards are a smart addition. They protect the drone from minor collisions while also providing peace of mind.
- Mobile Device Holder:
- A secure mobile device holder can help stabilize your smartphone or tablet while using the DJI Fly app. It’s crucial for smooth navigation and screen visibility.
- Sunshade for Mobile Devices:
- A sunshade can enhance visibility on your device’s screen in bright daylight, helping you assess your flight and camera settings more clearly.
When to Use Accessories
For instance, if you’re planning a day of shooting in varied environments, make sure to bring your ND filters, extra batteries, and carrying case. I have found that setting up before the flight helps streamline the process and allows for a smooth experience, eliminating any last-minute snags! Accessorizing your flying experience doesn’t stop with performance; it can also include fun items such as drone stickers or decals that represent your style or personality. By honing your precision flying skills and incorporating relevant accessories, you’ll truly enhance the overall experience. Your confidence will grow, and you’ll find new ways to capture stunning images and videos from the sky. As we look ahead, let’s dive into troubleshooting common issues that may arise during your flights. Whether it’s connection problems or software updates, we’ll cover all that and more!

Troubleshooting Common Issues
Connection Problems
Even the most skilled drone pilots can face unexpected hurdles during flights, and connection problems can be among the most frustrating. These issues may prevent your DJI RC Pro Controller and drone from communicating effectively, which could lead to safety concerns or hindered filming opportunities.
Common Connection Issues
- Weak Signal Strength:
- You might notice the connection fluctuating if you’re flying in areas with tall buildings, trees, or other obstacles obstructing the direct line of sight between your drone and controller.
- If you experience poor signal strength, try changing your location or moving to a higher elevation. I remember being in a beautiful valley once, and my signal weakened due to nearby hills. Moving to a slight elevation not only improved the signal but also provided a stunning view!
- Interference from Other Devices:
- Wi-Fi signals and other wireless devices can interfere with your drone’s connection. Before takeoff, it’s a good idea to check your surroundings for potential interference.
- If you can, switch your controller to a less crowded channel in the wireless settings. This prevents channel congestion and improves your overall experience.
- Low Battery on Either Device:
- If either your drone or your RC Pro Controller has a low battery, the connection can become unstable. Always ensure both devices are adequately charged before flying.
- I find it helpful to check the battery levels while setting up. On one occasion, I was too eager to fly and neglected this only to see my drone’s battery drop faster than expected during flight. Now, making this a ritual helps me avoid headaches!
- Firmware Incompatibility:
- Sometimes, outdated firmware on either the controller or drone can lead to connection issues. It’s essential to keep both devices up to date.
- If you’ve recently updated one device, ensure you do the same for the other.
How to Troubleshoot Connection Issues
- Restart Both Devices:
- Often, simply restarting both the drone and the controller can resolve minor connectivity issues.
- Reconnect:
- Go through the pairing process again if you encounter consistent connection problems. Sometimes reestablishing the bond can clear up any temporary glitches.
- Monitor the Environment:
- When you notice a weak signal, land the drone immediately and reassess the environment. Look for any new obstacles or interference sources that may be affecting the signal.
With a few troubleshooting techniques at hand, you can manage and resolve many connection issues effectively. Now, let’s transition to another important aspect: software updates and fixes.
Software Updates and Fixes
Staying on top of software updates is vital for maintaining the performance and safety of your DJI RC Pro Controller and drone. Regularly checking for updates ensures you have the latest features, fixes, and optimizations that DJI provides.
Why Software Updates Matter
- Enhanced Features: Updates can introduce new functionalities that make flying more intuitive. You wouldn’t want to miss out on the latest capabilities just because you didn’t update.
- Bug Fixes: Occasionally, bugs may impact performance or cause unexpected behavior. Updates can resolve these issues, enhancing your flying experience and reducing frustration.
- Improved Security: Keeping your systems updated also helps patch any security vulnerabilities that may have been identified. It’s all about protecting your investment!
How to Perform Software Updates
- Using the DJI Fly App:
- Make sure your mobile device is connected to the internet before launching the app.
- Upon launching the DJI Fly app, it will automatically prompt you if there are updates available. Just follow the on-screen instructions to download and install them.
- Updating Firmware:
- For firmware updates specifically, connect your RC Pro Controller to the app.
- Go to the settings menu and check the “Firmware” option. If an update is needed, a prompt will guide you through the installation process.
- Backup Settings:
- Prior to performing an update, consider backing up your control settings. This ensures you can easily restore your preferred configurations if changes occur post-update.
Best Practices for Software Management
- Regular Checks:
- Set a routine to check for updates once a month or before each flying session. This keeps your equipment running smoothly and ensures no surprises mid-flight.
- Firmware Change Logs:
- When you update, make sure to read the change logs. Knowing what’s new can help you maximize your drone’s potential during your flying adventures.
- Avoid Updating Right Before a Flight:
- Finally, avoid updating right before your planned flight. It’s wise to update whenever you aren’t flying. This way, you can catch and resolve any post-update bugs without stress.
By being proactive about updates and addressing connection issues, you can greatly enhance your overall flying experience. Remember, every smooth flight begins with preparation. As we wrap up this guide, it’s essential to feel confident in your ability to troubleshoot and maintain your DJI RC Pro Controller and drone. Whether you’re soaring through the skies or capturing breathtaking moments, being prepared keeps the fun alive! Happy flying!