
Understanding the Gyroscope in Drones
When you think about flying a drone, the first things that come to mind might be the breathtaking views from above or the technical prowess required to pilot one. However, one of the most critical components making flight smooth and stable is often overlooked: the gyroscope.
What is a Gyroscope in a Drone?
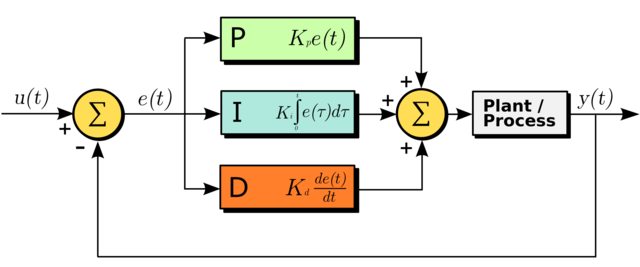
At its core, a gyroscope is a sensor that helps measure and maintain orientation. In drones, gyroscopes use angular momentum to sense rotation and changes in movement. They play a significant role in stabilizing the drone, enabling it to respond accurately to changes in the environment. Imagine this: you’re flying your drone outside on a sunny day, and suddenly a gust of wind strikes. Without a gyroscope, controlling your drone becomes a challenge. However, with that little marvel onboard, the gyroscope detects the drone’s tilt and sends this information to the flight control system. This allows the drone to self-correct and maintain a stable flight path. To give you a proper understanding, here are a few key points about gyroscopes in drones:
- Types of Gyroscopes: Most commonly, drones use MEMS (Micro-Electro-Mechanical Systems) gyroscopes which are small, lightweight, and suitable for mobile applications.
- Combining with Other Sensors: Drones often incorporate gyroscopes alongside accelerometers and magnetometers to create a more accurate and responsive flight control system.
- Real-Time Feedback: The gyroscope allows your drone to adapt in real-time, making corrections almost instantly so that you can enjoy smooth flying, whether you’re capturing stunning images or competing in drone races.
In essence, a gyroscope does more than just stabilize your drone; it enhances the overall piloting experience.
Importance of Gyroscope Calibration
Now that you’ve grasped the basic definition, you might wonder: why is calibration so crucial for the gyroscope? Calibration might sound technical, but it simply refers to the process of fine-tuning the gyroscope to ensure it reads and responds accurately. Picture yourself calibrating a level. If it’s slightly off, everything else built upon it, whether it’s a shelf or a construction project, could end up misaligned. Similarly, when your drone’s gyroscope isn’t calibrated properly, it can lead to erratic flight behavior. Here are a few reasons why calibrating your drone’s gyroscope is crucial:
- Accuracy: Without proper calibration, your gyroscope can provide incorrect orientation data, leading to unpredictable flight paths.
- Improved Stability: A well-calibrated gyroscope ensures that your drone can maintain a level flight path, regardless of external factors such as wind.
- Enhanced Flight Performance: Calibration optimizes drone performance, making it easier for you to execute maneuvers or capture professional-quality video footage.
- Battery Efficiency: A calibrated gyroscope allows for smoother operation, which can reduce the power needed for stabilizing corrections, thereby extending battery life.
Calibrating your gyroscope isn’t just a good practice; it’s necessary for achieving the best flying experience. In my experiences, I’ve seen how neglecting this critical step results in shaky footage and a frustrating flight. I remember one sunny afternoon out in the park, eager to capture some aerial shots. Without proper calibration, though, my drone kept tilting to one side, ruining my chances of getting that perfect shot. A swift recalibration and I was good to go!
How Often Should You Calibrate?
You should primarily consider calibrating:
- After a crash or a hard landing
- When changing locations (especially if there’s a significant difference in elevation)
- When you notice erratic behavior during flight
Many drones come with built-in calibration routines that can be initiated through the remote control or companion app. Taking a few minutes to complete this step can save you from potential headaches later on. In conclusion, understanding what a gyroscope is in your drone and recognizing the importance of calibration are vital steps toward becoming a proficient drone pilot. As you delve deeper into the nuances, you’ll appreciate the fine balance between technology and aviation skills that gyroscopes bring to the drone experience. ✈️ Next time you fly, take a moment to consider the gyroscope working tirelessly in the background, helping you achieve stability and control. Trust me; the benefits will be evident in your flight performance!
Calibrating Your Drone’s Gyroscope
Once you’ve understood the importance of the gyroscope in your drone and how crucial calibration is for smooth flying, it’s time to get hands-on with the actual process. Before you know it, you’ll have your drone calibrated and ready for stable flights.
Step-by-Step Guide to Gyroscope Calibration
Calibrating your drone’s gyroscope can seem daunting, especially for beginners. But don’t worry! It’s quite a straightforward process when broken down into easy steps. Here’s how to do it:
- Read the Manual:
- Always a good first step! Your drone’s manual often contains specific instructions for gyroscope calibration. Knowing your model’s requirements can save you time.
- Prepare Your Drone:
- Place your drone on a flat surface to eliminate any tilting or wobbling. Ideally, this surface should be stable (not too soft or muddy).
- Power On the Drone:
- Ensure the drone is powered on but remain on the flat surface. Watch out for any warnings or prompts on the controller.
- Access Calibration Mode:
- Most drones have a specific calibration mode. This is often activated by pressing a combination of buttons on your remote control or through a companion app. Look for options like “Gyro Calibration” or “IMU Calibration.”
- Follow On-Screen Prompts:
- If you’re using a smart app, it may provide real-time instructions. Follow these prompts closely to ensure successful calibration. For older models, you might need to rely on visual cues from LED indicators on the drone.
- Perform Axis Calibration:
- Once in calibration mode, you’ll need to rotate the drone in various directions (such as yaw, pitch, and roll). Ensure you’re following the directions provided by your drone, indicating how to maneuver it.
- Complete Calibration:
- After completing the rotations or movements required, the drone will typically indicate successful calibration via sounds or lights. Turn off the drone and then power it back on.
- Test Flight:
- Always conduct a test flight in an open area to ensure the calibration was successful. Observe how the drone behaves. Does it hover steadily? Is it responsive to controls?
Here’s a quick checklist to keep handy:
| Calibration Step | Notes |
|---|---|
| Read the manual | Know your drone’s specifics |
| Prepare the drone | Use a flat, stable surface |
| Power on the drone | Ensure all systems are active |
| Access calibration mode | Follow prompts carefully |
| Perform axis movements | Rotate according to instructions |
| Complete calibration | Look for success indications |
| Conduct a test flight | Ensure stable and responsive flight |
Just last summer, I took my drone to a local park after neglecting to calibrate it for a while. It flew off in strange directions during my test, which reminded me of how critical the procedure is! A simple calibration fixed the issue, and I got that smooth flight back.
Common Mistakes to Avoid
While calibrating your drone’s gyroscope can be straightforward, there are several common pitfalls that pilots tend to encounter. Being aware of these can save you from a potential flying disaster.
- Calibrating on Uneven Surfaces:
- Avoid calibrating your drone on grass, gravel, or any surface that’s uneven. Drones require a perfectly flat surface for accurate calibration.
- Ignoring Manufacturer Guidelines:
- Each drone is unique! Skipping the recommended calibration steps for your specific model can lead to inaccuracies.
- Calibrating Too Frequently:
- While it’s good to calibrate after crashes or significant location changes, doing it too often without cause can wear down the sensors. Balance is key.
- Failing to Test After Calibration:
- Just because you followed the steps doesn’t mean it always works perfectly! Always perform a test flight after calibrating to ensure everything is functioning correctly.
- Being in a Crowded or Windy Area:
- Calibrating in crowded places can lead to distractions, and windy conditions can interfere with accurate readings. Find a calm, open space to focus solely on setting up your drone.
- Overlooking Battery Levels:
- Make sure your drone has sufficient charge before calibration. Calibrating with low battery levels can lead to erroneous readings or even shut down mid-process.
In my early days of flying, I made the error of calibrating on a slightly sloped driveway. The result? My drone dived to the side as soon as I took off! It was a hard lesson, but thankfully nothing was damaged; just my pride. As you continue to refine your drone piloting skills, mastering gyroscope calibration will become second nature. You’ll find that with each successful flight and stunning aerial shot captured, the importance of calibration truly shines. Next up, we’ll dig even deeper. You’ll want to understand how to adjust gyroscope settings for improved performance and reliability in varying flight conditions. Happy flying! 🛩️
Mastering Gyroscope Settings
Having covered the essentials of calibrating your drone’s gyroscope, you’re now in a prime position to take your flying skills to the next level. Let’s dive into the nitty-gritty of mastering gyroscope settings, particularly in adjusting sensitivity and optimizing performance. These settings can mean the difference between a shaky flight and a smooth, controlled experience.
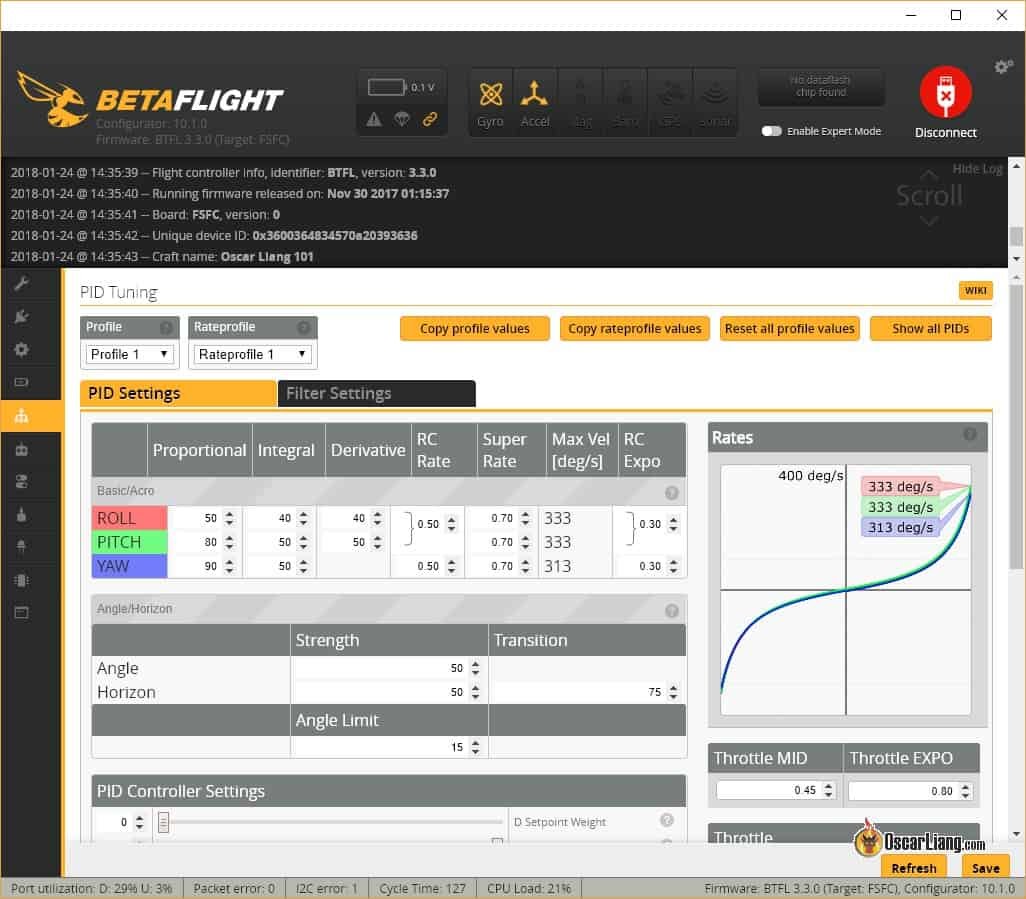
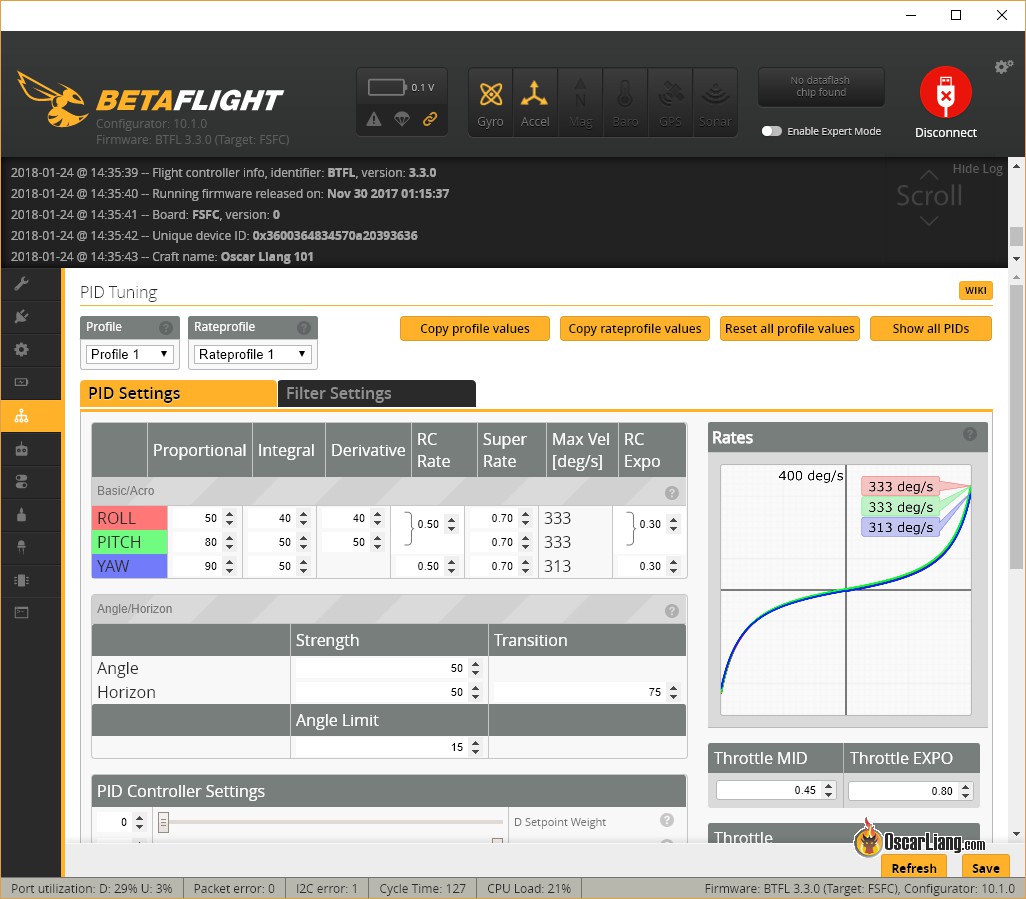
Adjusting Gyroscope Sensitivity
Gyroscope sensitivity refers to how responsive your drone is to changes in orientation. It’s a critical parameter that affects how “twitchy” or stable your drone feels during flight. Adjusting this setting is key to achieving the perfect balance for various flying styles, whether you’re zooming through obstacle courses or capturing tranquil landscapes.
Why Sensitivity Matters
- High Sensitivity:
- A high sensitivity setting means your drone will react quickly to your control inputs. This responsiveness can be very useful for racing or performing aerial tricks, but it can also lead to overcorrection, resulting in jerky movements.
- Low Sensitivity:
- Lower sensitivity creates a more stable flight experience, as your drone won’t react as dramatically to small inputs. This is beneficial for photography and videography, where smooth movements are crucial.
Step-by-Step Guide to Adjusting Sensitivity
- Access Gyroscope Settings:
- Open the settings on your drone control app or via the remote control interface. Navigate to the gyroscope/dynamics settings section.
- Find Sensitivity Controls:
- Look for sensitivity sliders or numerical settings. You might find options labeled with terms like “Pitch Sensitivity,” “Roll Sensitivity,” or “Yaw Sensitivity.”
- Make Incremental Adjustments:
- Start with small adjustments. If you increase the sensitivity, try moving it up by 10% increments at first. If you find it’s too twitchy, back it off gradually until you hit that sweet spot.
- Test in Flight:
- Conduct a test flight to assess how the new settings feel. Pay attention to how the drone responds to your controls. Is it too sensitive? Too slow? Adjust accordingly.
- Repeat:
- Keep tweaking until you find the ideal sensitivity settings that match your flying style. It can take time to discover what feels right, so be patient!
When I first started dabbling with my drone, I cranked the sensitivity up to its max, hoping for a thrilling racing experience. What I got instead was a wild rollercoaster ride, almost crashing into a tree! After a few flights, I learned to dial it back and found a sweet spot that suited my more leisurely photography style.
Optimizing Gyroscope Performance
After you’ve adjusted sensitivity, the next step is to optimize overall gyroscope performance. This is about ensuring your drone operates efficiently and smoothly during flight, regardless of conditions or maneuvers.
Key Factors in Gyroscope Performance
- Environmental Influences:
- Temperature, humidity, and even altitude can affect gyroscope performance. If your flying conditions vary significantly, it’s worth checking how your settings hold up in different environments.
- Weight Distribution:
- The way you load your drone matters. Uneven weight can lead to unreliable gyroscope readings. Always balance your drone evenly, especially when attaching additional equipment like cameras or lights.
- Firmware Updates:
- Drones often receive updates that can improve the gyroscope’s performance. Regularly connecting your drone to a computer or using app updates ensures you’re flying with the latest modifications.
Steps to Optimize Performance
- Regular Environment Checks:
- Before each flight, assess the environment. Is it windy? Is the temperature significantly different from when you last flew? Knowing these factors can help guide your sensitivity settings.
- Balance Your Load:
- If you’re adding a camera or extra batteries, double-check how the weight is distributed. Make small adjustments by moving equipment around if you notice any tilt when the drone is idle.
- Update Drone Firmware:
- Log into your drone manufacturer’s site or app regularly. Look for firmware releases and read the update notes—sometimes they include specific gyroscope performance enhancements.
- Conduct Test Flights:
- After making adjustments or updates, it’s essential to do a test flight. Check if the drone sways or reacts unpredictably. Depending on the outcome, you may need to tweak your settings again.
- Record Your Settings:
- Keep a log of sensitivity settings and flight experiences. This can help you to remember what works best in which conditions and can be invaluable for future reference.
There was a day I decided to test my drone during a light drizzle, not realizing how the moisture would affect its performance. The gyroscope became sluggish, and I quickly learned that optimizing for conditions is as important as settings. I later adjusted my sensitivity and weight distribution, leading to a much more favorable experience. As you dive deeper into your drone flight adventures, learning to master these gyroscope settings will pay dividends. You’ll find your drone is not just a flying gadget but a trusted extension of your creative vision. Next up, we’ll explore how to use that finely-tuned gyroscope to achieve stable flight, smooth hovering, and maintain control even in challenging conditions. So, let’s gear up for advanced flying techniques! 🚀
Using Gyroscope for Stable Flight
Now that you’ve mastered gyroscope settings, it’s time to uncover how to leverage these advanced configurations for stable flight. Whether you’re capturing breathtaking aerial photography or piloting through tricky weather, utilizing the gyroscope effectively is key to achieving smooth and controlled flight. Let’s explore techniques for smooth hovering and maintaining control in windy conditions.
Techniques for Smooth Hovering
Smooth hovering is not just a matter of luck; it’s a skill that you can develop with practice and the right techniques. A reliable gyroscope plays a crucial role in achieving this level of control. Here are some effective methods to enhance your hovering skills:
1. Fine-Tune Your Throttle Control
Managing your drone’s throttle is essential for achieving that perfect hover. Instead of making abrupt throttle adjustments, opt for gentle increases or decreases. This allows your drone to settle into a stable hover rather than bouncing around in the air.
- Tip: Use your throttle stick like a dimmer switch instead of an on/off switch. Small, gradual movements will provide smoother adjustments.
2. Utilize GPS Mode
Most modern drones come equipped with GPS capabilities. When you activate GPS Mode, the gyroscope, accelerometer, and GPS data work together to maintain your position in the air.
- Benefits of GPS Mode:
- Hold your position accurately.
- Reduce the pilot’s workload when hovering.
- Enable better stability against minor winds.
Establish a habit of using GPS mode whenever you’re flying in open spaces. It can significantly reduce your stress, especially while focusing on capturing that perfect shot.
3. Practice in Different Weather Conditions
If you want to excel at hovering, practice is key. Try hovering in different environments—indoors, outdoors, and even in light wind conditions. Each setting can teach you how to adjust your controls effectively.
- Indoor Hovering: Safe from wind, but be mindful of obstacles!
- Outdoor Hovering: Start in calm conditions, then challenge yourself with light wind.
Once, I set out to capture some photos in a nearby meadow, only to realize the wind picked up more than I anticipated. However, the practice of hovering in various conditions made it easier for me to adjust mid-flight, and I ended up with some fantastic shots!
4. Monitor Your Drone’s Battery Levels
Low battery levels can cause unstable flight performance. Drones tend to act unpredictably under a low charge, which affects your ability to hover steadily. Always check your battery status before takeoff!
- Best Practices:
- Keep an eye on battery life using your app or remote display.
- Abide by the 20% battery rule—land safely before reaching this threshold to avoid flight disruptions.
By monitoring these factors and making the right adjustments, smooth hovering will soon become second nature.
Maintaining Control in Windy Conditions
Flying in windy conditions can present a significant challenge, but knowing how to harness your drone’s gyroscope can help you maintain control. Let’s explore strategies to handle your drone confidently even when the breeze picks up.
1. Adjust Sensitivity on the Fly
When wind becomes a factor, you might need to tweak your sensitivity settings to adapt to the conditions. Lowering your sensitivity can help cut down on erratic movements caused by gusts of wind.
- How to Do It:
- Before flying in windy weather, reduce the sensitivity settings you previously configured for smoother flights.
- Test fly briefly to ensure the changes feel comfortable before fully engaging in flight.
2. Use Dynamic Flight Modes
If your drone supports dynamic flight modes (like Sport Mode), be cautious. These modes often increase responsiveness at the cost of stability when battling wind. Opt for stability-focused modes like Position Hold, which will leverage the gyroscope’s capabilities to fight against wind effects effectively.
- Dynamic Modes: Great for speed and agility but may compromise stability.
- Stability Modes: Perfect for maintaining consistent flight paths amidst challenging conditions.
I’ve found that using Position Hold saved me during a flight where the wind suddenly picked up strength. My drone remained hovering steady and stable, allowing me to capture breathtaking footage without fear of losing control.
3. Aim for Lower Altitude
As a general rule of thumb, keep your drone at a lower altitude when flying in windy conditions. Wind strength can increase with elevation, so staying closer to the ground enables better control.
- Recommendation: Try to keep flights under 100 feet when you expect sustained winds.
4. Anticipate and React Quickly
Being proactive is crucial when flying in wind. Watch how the drone behaves in response to gusts. If you notice it drifting, make small corrections to address the change without overreacting.
- Remember:
- Stay calm and maintain steady control.
- Focus on smooth, gradual adjustments rather than sudden movements.
One windy day, I found myself flying over a construction site. My drone started to drift in the wind, and instead of panicking, I made small adjustments—with practice, my instincts kicked in, and I regained control without losing any precious footage. In summary, mastering the gyroscope for stable flight takes patience and practice. With techniques for smooth hovering and strategies for windy conditions at your fingertips, you’ll gain confidence as a pilot. Next, let’s dive into advanced tips and tricks to further enhance your flying and photography skills, leveraging the gyroscope like a pro! 🚁

Advanced Gyroscope Tips and Tricks
Having developed a solid understanding of how to use the gyroscope for stable flight and the techniques required for smooth hovering and windy conditions, it’s now time to advance your skills. There’s so much more that you can gain from your drone’s gyroscope. Let’s dive into some advanced tips and tricks, focusing on leveraging the gyroscope for precision photography and enhancing maneuverability.
Leveraging Gyroscope for Precision Photography
If you’re passionate about drone photography, mastering the gyroscope can take your shots from average to jaw-dropping. The gyroscope is your best friend when ensuring that your drone remains steady while capturing images or videos.
1. Use Gimbal Stabilization
Most drones equipped with photo and video capabilities come with a gimbal, which works hand-in-hand with the gyroscope. The gimbal compensates for even the slightest movements, creating buttery-smooth footage and sharp images.
- Set it Up:
- Calibrate your gimbal according to the manufacturer’s instructions before every flight to ensure optimal performance.
- Adjust Settings:
- Check the responsiveness settings on your gimbal, may it be slow tracking for cinematic footage or fast for capturing quick action.
One time, I captured a stunning sunset using my drone. It was all about the gimbal—and sure enough, the images were crisp and clear. If I hadn’t relied on the gimbal along with the gyroscope, those shots could have easily turned out blurry, ruining the essence of the moment.
2. Experiment with Slow Shutter Speeds
When shooting under low-light conditions like dawn or dusk, using a slow shutter speed can create beautiful effects—such as softer details or light trails. Here’s where the gyroscope excels.
- Tip:
- To prevent unwanted movement during long exposures, ensure you’re in GPS Mode to maintain a stable hover.
- Post-Editing:
- Embrace post-processing tools to enhance your images. You can tweak brightness and contrast but be mindful not to oversaturate the colors.
One evening, I decided to experiment with long exposures while transitioning from day to night. The results were magical! The city lights created trails across the horizon. And all thanks to my solid hovering skills and help from the gyroscope, each image was beautifully captured!
3. Utilize the “Follow Me” Mode
If your drone features a “Follow Me” or similar mode, you can capture stunning shots while in motion without having to control the drone manually. The gyroscope plays a crucial role in keeping the drone steady as it follows your path.
- How to Maximize It:
- Test the mode in a safe environment—a park or a wide-open space. Be sure you’re aware of your surroundings.
- Adjust Follow Distance:
- Customize the follow distance based on your needs. If you’re shooting a video, a longer distance tends to provide a more cinematic feel.
Just the other week, my friends and I were hiking when I decided to shoot a quick “action” clip of us traversing the trail. The gyroscope enabled smooth footage as my drone glided through the air, capturing not only us but the scenic views surrounding us.
Enhancing Drone Maneuverability with Gyroscope Adjustments
Maneuverability is just as critical as photography skills; it’s about how you control the drone’s movements and responsiveness. Leveraging gyroscope adjustments can significantly enhance your drone’s agility, allowing for impressive stunts and precise navigation.
1. Adjust Yaw Sensitivity for Precision Turns
The yaw sensitivity setting controls how quickly your drone can rotate on its vertical axis. Fine-tuning this can significantly impact your control, making turns more precise.
- Adjusting Tips:
- Lower the yaw sensitivity for slower, smoother turns, ideal for scenic flights.
- Increase it for faster, agile maneuvers, particularly useful in racing scenarios.
I recall a racing competition where every second counted. Slowing down my yaw sensitivity helped me navigate sharp turns without losing control, improving my overall performance. Having that capability transformed my race strategy, letting me plan moves ahead of my competitors.
2. Utilize the “Sport Mode” Wisely
Many drones come with a Sport Mode for variations in speed and agility. While it enhances maneuverability, it’s essential to use it judiciously. The gyroscope will work to provide stability, but unexpected land obstacles may pose a danger.
- When to Use:
- Use Sport Mode when you’re confident in your drone’s responsiveness and overall control.
- Practice Makes Perfect:
- Always practice in open spaces before attempting aerobatics or competition flights in this mode.
In my earlier drone racing days, I jumped into Sport Mode without hesitation, only to bump into a tree due to overzealous maneuvers! Now, I take the time to gauge my surroundings and ensure I can handle the increased pace.
3. Incorporate Waypoints for Precision Flight Paths
Using waypoint navigation allows you to set specific flight paths in advance. Gyroscopes help maintain stable flight paths while the drone moves between set points.
- Setting Up Waypoints:
- Plan in advance where you want your drone to go, setting waypoints using your app.
- Monitor During Flight:
- Even with waypoints, keep an eye on your drone to make sure the gyroscope is functioning correctly and can adapt to environmental changes.
Recently, I planned a shoot around a local lake with multiple waypoints to capture each scenic angle. The ability to focus on the camera instead of the actual flying allowed me to dedicate my energy to getting the best shots possible. In conclusion, as you continue to explore the world of drones, leveraging your gyroscope for precision photography and enhancing maneuverability will set you apart as a skilled pilot. Next, we’ll explore the next steps you can take in your drone journey, ensuring you’re well-equipped for the adventures ahead! 🛸