
Introduction
Overview of DJI Mavic Fly More Combo
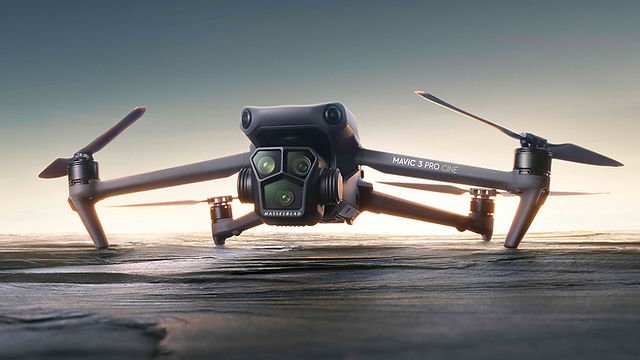
If you’re diving into aerial photography, the DJI Mavic Fly More Combo should be at the top of your list. Why? Because it combines advanced drone technology with user-friendly features, making it perfect for both beginners and seasoned photographers. The Fly More Combo includes everything you need to get started:
- DJI Mavic Drone: Compact and portable, this drone is designed to be taken anywhere. It folds up neatly, making it easy to slip into a backpack.
- Extra Batteries: You won’t have to worry about missing that perfect shot due to battery life. With additional batteries included, you can extend your flight time substantially.
- Props and Carrying Bag: Keeping your drone safe during travel is a breeze, thanks to the included prop guards and a sturdy carrying case.
When I first unboxed mine, I couldn’t believe how lightweight and easy it was to handle. With the Mavic’s robust design, it effortlessly handled wind resistance, allowing for stable and gorgeous shots from above. 🛸
Benefits of Using DJI Mavic for Photography
There’s no denying that DJI Mavic drones have made a significant impact on how we capture stunning images. Here are some noteworthy benefits of using the DJI Mavic for photography:
- High-Quality Imaging: With a 4K camera and advanced stabilization technology, your photos and videos will come out incredibly crisp and clear. You can even shoot in HDR and capture vibrant colors that pop!
- Intelligent Flight Modes: Features like ActiveTrack, QuickShots, and Waypoints make it easier than ever to get those cinematic shots. For example, I often use ActiveTrack while hiking, allowing my drone to follow me as I navigate through beautiful landscapes, giving me a stunning perspective!
- User-Friendly Controls: Whether you’ve never flown a drone before or are a pro, the user interface is intuitive. The DJI Fly app makes adjusting settings a breeze, even on the go!
- Portability: Unlike larger drones, the compact design of the Mavic means you can bring it along on your travels without feeling weighed down. One time, I took mine on a road trip, and capturing aerial views of the coastline was a game changer.
With its impressive capability and versatility, the DJI Mavic Fly More Combo truly enhances your photography experience. Whether you’re looking to shoot breathtaking landscapes, cityscapes, or memorable events, having a reliable and innovative drone like the Mavic can elevate your photography to new heights! 🌄

Getting Started with DJI Mavic
Unboxing and Setup Process
Once you’ve made the big leap and purchased the DJI Mavic Fly More Combo, it’s time for the fun part: unboxing! Pulling that box out of the shipping package felt like opening a treasure chest. Inside, you’ll find everything neatly packed, which is always a good sign of quality. Here’s a quick rundown of what to expect during the unboxing:
- Drone Body: Obviously, the star of the show! The sleek design of the Mavic truly stands out.
- Remote Control: You’ll be excited to see the thoughtfully designed controller that connects with your smartphone. No more fumbling around!
- Extra Batteries: As promised, there are additional batteries for extended flying time.
- Propellers and Multitude of Accessories: You’ll have spare propellers, a charging hub, cables, and a handy carrying bag.
Setting up the Mavic is a breeze. Start by fully charging your batteries using the included charging hub, as a fully charged drone equals more adventure! Once charged, you simply need to attach the propellers and pair the drone with the remote. It took me mere minutes to have everything ready to roll. And don’t forget to download the DJI Fly app on your smartphone. The app walks you through initial setup and offers tutorials that are handy for those new to drone photography. Overall, the unboxing and setup process was straightforward and user-friendly, making it a delightful experience! 🎉
Understanding the Features of DJI Mavic
Now that your drone is ready for takeoff, let’s dive into the features that make the DJI Mavic a must-have for any photographer. The following functionalities are game-changers:
- Camera Specs: The 4K camera with a three-axis gimbal allows for stunning stability and clarity, capturing images at 12 MP and video up to 4K at 30 frames per second. To see those vivid landscapes come to life in your images is simply breathtaking!
- Obstacle Avoidance: One of my favorite features is the obstacle detection system. The Mavic can sense obstacles in real-time, allowing you to focus on composition without stressing about crashing; it’s like having a co-pilot!
- Intelligent Flight Modes: Here’s where the fun really kicks in. Modes like QuickShots and Dronie allow for creative shots at the push of a button. I often use the Helix feature to create incredible cinematic fly-arounds; it’s easier than it sounds!
- GPS and Return-to-Home: Flying away from home base? No worries! The GPS system keeps track of where you are, and the Return-to-Home feature ensures the drone comes back safely when you want it to. It’s comforting to know you won’t lose your investment!
Ultimately, understanding these features will not only improve your flying experience but also inspire your creativity as you begin capturing stunning aerial photos. With all these advanced functionalities at your fingertips, the DJI Mavic opens up a world of possibilities. Get ready to unleash your inner artist! 🌈

Capturing Stunning Aerial Shots
Tips for Aerial Photography
Now that you have your DJI Mavic all set up and ready to go, it’s time to focus on capturing those breathtaking aerial shots! Aerial photography offers a unique perspective that’s unlike anything else, and with the right tips, you can elevate your photography game significantly. Here’s how to get the best out of your Mavic:
- Plan Your Shots: Just like any other form of photography, planning is key. Before you fly, scout your location and visualize your shots. Using apps like Google Earth can help identify the best angles and compositions.
- Use Natural Light: Early morning and late afternoon are golden hours for photography. The soft, diffused light during these times will add warmth and depth to your images. I tend to wake up early on weekends to catch those stunning sunrises—totally worth it!
- Experiment with Angles: Don’t hesitate to tilt your drone at various angles. A straight-down shot can give a unique top-down perspective, while a slightly angled view can create dynamic images. You’ll be surprised at what you can capture simply by adjusting your flight path!
- Keep It Steady: While the Mavic is equipped with a gimbal to stabilize footage, maintaining a steady flight path will greatly enhance the quality of your photographs. Try flying in smooth, controlled movements rather than jerky ones.
- Use the Rule of Thirds: This classic photography principle applies to aerial shots too! When composing your images, mentally divide the frame into a 3×3 grid. Position interesting elements along these lines or at their intersections for a more balanced shot.
With these tips in your toolkit, you’ll be set to capture the stunning imagery you have in mind. 🚀
Utilizing Intelligent Flight Modes
One of the standout features of the DJI Mavic is its intelligent flight modes, which can take your aerial photography from good to jaw-dropping! These modes allow for creative shooting experiences that would be tough to achieve manually. Let’s break down some of the most popular ones:
- ActiveTrack: This mode is perfect for capturing moving subjects, like people or vehicles. Just select your subject on the controller, and the drone will automatically track it. I’ve used this mode while hiking with friends, and it effortlessly captured dynamic footage without any extra effort on my part!
- Point of Interest: Want to capture a landmark? This mode lets you set a point that your drone will circle while keeping the camera focused on the subject. It’s like having your own personal cinematographer!
- QuickShots: With options like Dronie, Rocket, and Circle, these preset flight paths allow you to achieve cinematic shots with minimal input. On my last trip to the beach, I used the Dronie mode to pull back and reveal the stunning landscape behind me—such a showstopper!
- Waypoints: This feature allows you to pre-plan a route for your drone to follow automatically, letting you focus on framing your shots instead of piloting. I once flew my Mavic around a scenic lake, capturing a series of beautiful angles, all while enjoying the view myself!
Incorporating these intelligent flight modes will not only save time but will also enhance your creative potential. With the tools available to you through the DJI Mavic, capturing stunning aerial shots has never been easier or more enjoyable! 🌄

Enhancing Your Photography Skills
Mastering Composition Techniques
With your DJI Mavic soaring high and capturing stunning footage, it’s time to delve into the art of composition to ensure that each shot tells a story. Proper composition not only enhances the beauty of your images but also draws viewers in, making them feel connected to the scene. Here are some essential composition techniques to consider:
- Leading Lines: Use natural lines in your environment to guide the viewer’s eyes toward the focal point. Whether it’s a river, a road, or a line of trees, leading lines create a sense of direction and depth. I recently captured a photo of a winding path through the woods; it was mesmerizing!
- Framing: Incorporate elements in your surroundings to frame your subject. This could be anything from branches to buildings. It adds context and helps emphasize the main focus. For example, shooting through an archway can create a captivating view of what lies beyond.
- Symmetry and Balance: A well-balanced composition can be striking. Look for symmetrical scenes, such as reflections on water or perfectly aligned structures. Odd-numbered groupings can also create visual interest; I often try to place three subjects in my foreground for that perfect asymmetry.
- Negative Space: Sometimes less is more. Including areas of negative space in your shots can isolate your subject and create a minimalist aesthetic. I love incorporating wide-open skies or vast landscapes in my photos to highlight the subjects in focus.
- Rule of Odds: This is a secret weapon among photographers. Grouping subjects in odd numbers (like three or five) is generally more visually appealing and can create a more dynamic image. Just think about balancing your elements effectively.
By mastering these composition techniques, you’ll not only take stunning aerial shots but also enhance your storytelling through photography! 📷
Editing and Enhancing Photos
Once you’ve captured that perfect image, the next step is editing. The right tweaks can transform a good shot into a breathtaking masterpiece! Here are some handy tips to guide you through the editing process:
- Choose the Right Software: From Adobe Lightroom to Photoshop, there are countless editing tools available. Adobe Lightroom is great for beginners, offering user-friendly features, while Photoshop provides advanced capabilities for more complex edits.
- Adjust Exposure and Contrast: Start with basic adjustments. Play around with exposure and contrast to bring out details. A well-balanced exposure can significantly improve the depth and vibrancy of your photo.
- Color Correction: Tweak the colors to make them pop! Adjust white balance, saturation, and vibrance to enhance the hues without overdoing it. If you want to create a moody atmosphere, lowering saturation or adding a cool filter can work wonders.
- Crop for Composition: Don’t hesitate to crop your images for stronger compositions. Even slight adjustments can dramatically change a photo’s impact. Ensuring focal points adhere to the rule of thirds often leads to more engaging and aesthetically pleasing shots.
- Sharpen and Reduce Noise: Sharpening helps to enhance details, while noise reduction can smooth out grainy images, especially in low-light conditions. But be careful not to over-sharpen; that can lead to unnatural-looking photos!
- Experiment with Filters: A quick and stylish way to enhance a shot is to add filters. Whether you’re aiming for a vintage look or a vibrant burst of colors, filters can give your images a fresh touch. I usually experiment with various presets to find the one that best fits the mood of the shot.
Editing is where you can truly let your creativity shine. By learning these techniques and finding your unique style, you’ll see your photography skills soar. So grab your favorite editing software, and let’s bring those aerial shots to life! 🎨

Maximizing the Fly More Combo
Using Additional Accessories
Owning the DJI Mavic Fly More Combo is just the beginning of your aerial adventure. To truly maximize your drone’s potential, consider incorporating additional accessories that can elevate your flying and photography experience. Accessorizing not only enhances functionality but can also provide you with new creative options. Here are some must-have accessories to think about:
- ND Filters: These filters reduce the amount of light entering your lens, allowing you to utilize slower shutter speeds on bright days. I recently paired my drone with ND filters for a smooth 30-second long exposure shot over a waterfall, creating that dreamy mist effect.
- Landing Gear Extensions: These handy accessories raise your drone a bit higher off the ground, which is perfect for taking off and landing on uneven surfaces. I can’t tell you how often these extensions have saved my drone from unexpected rocks or tall grass!
- Tablet Holder: While the smartphone interface works well, a tablet can give you a larger screen for viewing and editing your shots in real-time. Plus, it makes you feel like a professional pilot while navigating those stunning landscapes!
- Sunshade: On sunny days, glare can diminish your visibility and hinder performance. A sunshade for your remote controller can make a big difference, allowing you to focus on framing your shot, rather than squinting at the screen.
- Carrying Cases: Protecting your investments is crucial. An extra padded carrying case can keep your drone and accessories safe during travel. I always choose a case that allows me to organize props and spare parts easily for quick access on shoots.
Investing in these additional accessories can transform your Mavic experience, making each flight more enjoyable and productive! ✈️
Extending Flight Time with Extra Batteries
One of the most significant concerns for drone enthusiasts is flight time. The DJI Mavic generally offers up to 30 minutes per battery, but those minutes can fly by faster than you think—especially when you’re caught up in the thrill of capturing that perfect shot. Fortunately, extending your flight time is easier than you might think with extra batteries included in the Fly More Combo. Here’s how to optimize your batteries and increase your flying time:
- Keep Spare Batteries Charged: The best strategy is to always have extra batteries charged and ready to go. I typically recharge my batteries overnight before a big shoot, ensuring I have enough power for the day.
- Monitor Battery Levels: Use the DJI Fly app to keep an eye on battery status while flying. You can also set alerts to notify you when it’s time to head back. I make it a habit to check my battery levels regularly so I never find myself returning home sooner than planned.
- Utilize Battery Life Wisely: Be mindful of how you fly! Aggressive maneuvers and high-speed flying drain batteries faster. Instead, cruise at a steady pace, and you’ll likely achieve longer flight times.
- Battery Discharge Planning: Make sure to follow the recommended discharge levels for your batteries. Storing batteries at optimal levels prolongs their lifespan. Over time, I’ve learned to keep them around 40-60% charged between flights for ideal performance.
- Choose the Right Weather: If possible, avoid flying in windy conditions. High winds can drain batteries quickly as the drone compensates for the movement. On calmer days, I’ve noticed that my battery life stretches significantly!
By taking these steps to extend flight time and using additional accessories, you’ll never miss capturing the moments that matter most. Embrace the full potential of your DJI Mavic Fly More Combo, and let your creativity take flight! 🌟

Tips for Travel Photography
Capturing Landscapes and Architecture
Travel photography opens up a world of possibilities, especially when it comes to showcasing stunning landscapes and impressive architecture. With your DJI Mavic, you can elevate these shots to a whole new level. Let’s explore some tips to help you perfectly capture the beauty around you.
- Scout Your Location: Before you shoot, take a moment to explore your surroundings. Walk around, find unique angles, and don’t be afraid to venture off the beaten path. I remember roaming through a national park and discovering a hidden viewpoint that offered the most breathtaking vista—those impromptu locations often turn out to be the best!
- Use Golden Hour for Natural Lighting: The soft, warm light during the early morning or late afternoon creates magical landscapes and architectural highlights. I’ve often gotten on-site at dawn to catch the sun rising just behind a mountain, and the results are always worth the early wake-up call. 🌄
- Prioritize Composition: Establish a strong composition using techniques such as leading lines, the rule of thirds, or framing. When capturing architecture, try incorporating elements like the surrounding landscape or interesting foreground items to create depth. I love placing an intriguing object in the frame while focusing on architectural details—it adds context and makes the shot more engaging.
- Aerial Perspectives: Your drone gives you the advantage of unique perspectives that ground-level photographers may not achieve. Experiment with altitude and angles. A high-altitude shot can encompass vast landscapes, while lower angles can accentuate textures and details in buildings.
- Show Scale: To emphasize the size of magnificent architecture or vast landscapes, include people or objects as reference points in your shots. For instance, I once captured a massive ancient temple while ensuring a tiny figure was walking towards it, thus creating a sense of scale that truly told a story.
By focusing on these techniques, you can create captivating images that showcase the world’s beauty while traveling. 📸
Taking Unique Shots of Local Culture
While landscapes and architecture are visually stunning, capturing local culture adds a personal touch to your travel photography. This can be one of the most rewarding parts of your journey, allowing you to tell the stories of the people and traditions you encounter. Here’s how to capture those authentic moments:
- Engage with Locals: Take the time to chat with local residents. They often have fascinating backgrounds and can offer insights about their culture. When capturing street scenes or daily life, ask for permission to photograph them—it can lead to more authentic interactions. I once spent an afternoon in a bustling market in Marrakech, chatting with vendors before capturing genuine moments.
- Look for Daily Life: Focus on the routines, traditions, and activities of the locals. Snap photos of people cooking, children playing, or artisans at work. These candid moments tell powerful stories. During one of my travels, I captured a traditional dance performance; the energy and vibrancy in those images convey the essence of the culture.
- Attend Festivals or Events: Local festivities are treasure troves for vibrant photos and unique cultural experiences. If you can, plan your travels around local events or celebrations. I attended a colorful street festival once and was able to capture lively costumes, music, and the joy of the community. The energy in these shots is palpable!
- Incorporate Cultural Symbols: Whether it’s traditional clothing, local cuisine, or handicrafts, these elements can enrich your images. When photographing these items, aim to tell a story—think about the history and significance behind them.
With these tips, not only will your portfolio be enriched, but you’ll also create a deeper connection with the places you visit. Travel photography is about celebrating and sharing experiences, and now you’re prepared to showcase local culture in vibrant detail! 🌍

Safety Precautions and Regulations
Understanding Drone Laws and Regulations
As thrilling as flying your DJI Mavic can be, it’s crucial to keep safety and regulations in mind. Navigating the drone laws may feel overwhelming at first, but following them is vital for both your safety and the safety of others.
- Know Your Country’s Regulations: Each country has its own set of rules regarding drone usage. Before you fly, make sure to familiarize yourself with regulations specific to your location. For example, in the U.S., the FAA outlines rules such as flying below 400 feet, keeping your drone within visual line of sight, and avoiding flying over people.
- Register Your Drone: Some countries, like the USA, require you to register your drone if it weighs above a certain threshold (usually 0.55 lbs for the U.S.). This process is relatively straightforward and can usually be completed online. I registered mine online in just a few minutes, and it gave me peace of mind knowing I was compliant.
- Airspace Awareness: Always check the airspace restrictions in the area you plan to fly. Look out for no-fly zones, hospitals, airports, and military installations. I once flew in an area close to a small airport, and a quick check on my app alerted me to restricted airspace—saving me from a hefty fine!
- Respect Privacy: Flying a drone comes with a responsibility to respect the privacy of others. If you’re in a populated area, make sure you’re not intruding on anyone’s personal space. Ask for permission if you want to film someone’s property or home. It’s better to be respectful and courteous!
Grasping these regulations will not only enhance your flying experience but will also help foster a positive image for drone enthusiasts everywhere.
Safety Tips for Flying DJI Mavic
Flying your DJI Mavic safely ensures that you not only protect your drone but everyone around you as well. Here are some essential safety tips to keep in mind during each flight:
- Pre-Flight Checks: Always perform pre-flight inspections on your drone. Check for damaged propellers, ensure the battery is charged, and that the firmware is up to date. Once, I skipped this step, and my drone struggled to take off due to a loose propeller—it was a lesson learned!
- Weather Conditions: Be mindful of the weather before heading out. Wind, rain, or fog can significantly impact your drone’s performance. If the forecast is unfavorable, it’s better to reschedule your shoot. I’ve had to wait out a storm on more than one occasion, but patience often leads to clearer skies!
- Maintain Line of Sight: Always keep your drone within visual line of sight while flying. It can be tempting to push the distance limits, but maintaining visual contact ensures you’re aware of your drone’s surroundings. I rely on maintaining that “eyes on” mentality; it never fails!
- Fly at Safe Altitudes: Stick to flying below the regulatory altitude of 400 feet. Flying too high increases the risk of colliding with manned aircraft. Plus, staying lower allows for better photographs and videos without the complication of altitude restrictions.
- Have an Emergency Plan: Before taking off, consider what actions you’ll take if something goes wrong. Be prepared for emergencies, including low battery levels, loss of signal, or technical issues. I always have a predefined area to land my drone if I encounter difficulties during my flights.
By following these safety precautions and regulations, you’ll not only enhance your flying experience but will also make a tremendous contribution to maintaining safety in the skies. Now, you can enjoy using your DJI Mavic, knowing you’re flying responsibly! 🌤️

Showcasing Your Work
Building an Online Portfolio
Once you’ve captured stunning aerial shots and expressed your creativity through photography, it’s time to share that work with the world. An online portfolio serves as your digital resume, showcasing your skills and style while attracting potential clients and collaborators. Here’s how to create an impactful online portfolio:
- Choose the Right Platform: Several user-friendly platforms like Wix, Squarespace, and WordPress allow you to create beautiful portfolios easily. I personally used Squarespace for its aesthetic templates—it made designing my portfolio enjoyable and straightforward!
- Select Your Best Work: Quality trumps quantity. Rather than filling your portfolio with every shot you’ve taken, choose a collection of your best images (and keep it diverse!). Highlight your strengths, whether that’s sweeping landscapes, intricate architectural shots, or captivating cultural moments. Aim for about 10-20 of your standout pieces.
- Create Categories: Organize your portfolio into categories such as “Landscapes,” “Architecture,” “Cultural Photography,” etc. This makes it easy for visitors to navigate through your work and find what interests them. When I did this, I noticed visitors spent more time on my site exploring different types of photography.
- Tell Your Story: Include a short bio and an “About Me” section. Share your journey, your passion for photography, and what inspires you. This personal touch connects viewers to your work. I always include a fun anecdote about my first experience with aerial photography—it humanizes the portfolio and engages people.
- Include Contact Information: Make it easy for potential clients or collaborators to reach you. A simple contact page with a form or your email address allows interested parties to inquire about your services or partnerships.
Building a thoughtful online portfolio will not only enhance your visibility, but it will also position you as a professional in the photography realm! 🌟
Sharing on Social Media Platforms
In today’s digital age, sharing your work on social media is crucial for connecting with a broader audience. Social platforms can serve as a fantastic complement to your online portfolio, helping you build a community and gain exposure. Let’s dive into effective strategies for sharing on social media:
- Choose the Right Platforms: Focus on platforms that suit visual content like Instagram, Pinterest, and Facebook. Instagram, in particular, is a powerhouse for photographers. I’ve seen significant engagement on my Instagram posts simply because it’s built for showcasing beautiful imagery.
- Engage with Your Audience: Don’t just post your photos—engage with your audience! Reply to comments, ask questions, and share behind-the-scenes stories. For instance, when I share a new shot, I often ask followers about their favorite locations for drone photography. Interacting builds community and encourages more interaction on your posts!
- Use Relevant Hashtags: Leveraging hashtags can significantly increase your visibility. Use a combination of broad hashtags (like #DronePhotography) and niche ones (like #AerialAdventures). I’ve found that including location-based hashtags helps me reach more viewers interested in specific areas.
- Share Stories and Reels: Use Instagram Stories and Reels to share snippets of your creative process or tips for capturing aerial shots. These formats allow for increased creativity and can lead to higher engagement. I often share quick tutorials or editing tips that resonate with my audience!
- Collaborate with Other Creators: Partnering with other photographers or influencers can enhance your reach. By hosting challenges or featuring each other’s work, you tap into new audiences. I once collaborated with a travel blogger, and we both gained fantastic engagement!
By actively sharing your work on social media and building an online portfolio, you’ll create a strong presence in the photography community, inviting new opportunities and connections along the way. So, get out there, showcase your passion, and let your creativity shine! 📸✨

Q&A: Common Questions about DJI Mavic
Troubleshooting Guide
As with any technology, there can be hiccups along the way while flying your DJI Mavic. Thankfully, many common issues have simple solutions. Here’s a handy troubleshooting guide to help you navigate those pesky problems:
- Drone Won’t Take Off: If you encounter issues at takeoff, double-check the following:
- Ensure the battery is fully charged and properly installed.
- Check for damaged propellers. A cracked or loose prop can prevent takeoff.
- Make sure you’re not in a no-fly zone. The app will usually provide an alert if you’re trying to take off in a restricted area.
- Loss of Signal: If your drone suddenly loses signal with the remote:
- Stay calm and don’t panic! Ensure you are within the transmission range (2.5 miles for Mavic).
- Turn off any interference sources, such as strong Wi-Fi signals in the area.
- Utilize the “Return to Home” feature if signal loss persists. It’s a lifesaver!
- Unresponsive Controller: If your remote’s controls feel unresponsive:
- Ensure its batteries are charged.
- Restart both the remote and the Mavic to help reset the connection.
- Check for firmware updates in the DJI Fly app that might resolve glitches.
- Camera Issues: If your camera isn’t functioning as expected:
- Restart the drone, as this can often solve minor software issues.
- Check that the gimbal is clean and unobstructed. Dust or debris can impede movement.
If problems persist, refer to DJI’s official support forum or contact their customer service for further assistance. I once had to reach out to support for a minor camera issue, and I was pleasantly surprised by their rapid response and helpfulness! 📞
FAQs about Photography Settings
Now that your drone is flying smoothly, let’s tackle some frequently asked questions about photography settings to ensure you’re getting the best possible images!
- What Resolution Should I Shoot In?
- For still images, shoot in 12 MP or even 48 MP (if your Mavic model supports it). Higher resolutions provide more detail, especially for large prints.
- For video, 4K at 30 frames per second is a great standard for beautiful clarity.
- What ISO Settings Are Best?
- Keep ISO low (100-400) in well-lit conditions for quality images without grain.
- In low-light situations, you may need to raise the ISO, but I recommend not exceeding 1600 to avoid noticeable noise.
- When Should I Use Manual vs. Automatic mode?
- Use Automatic mode for quick shots or when you’re still learning. The Mavic does a great job handling settings!
- Switch to Manual mode when you want full control, especially during sunset or sunrise shots, where you might need to adjust exposure settings and shutter speed for optimal results. I personally love the creative freedom of Manual mode while shooting at dusk!
- What is the Best Shutter Speed?
- Generally, stick to at least 1/60 sec for video to avoid artifacts, and for stills, try to match the shutter speed to the frame rate if you’re shooting in low light.
- Utilize the ‘Sunny 16 Rule’ during bright days, which suggests using f/16, ISO 100, and a shutter speed of 1/100 sec for perfectly exposed images.
With this troubleshooting guide and FAQs about photography settings, you’re well-equipped to navigate any challenges you face while flying your DJI Mavic. The journey to capturing breathtaking aerial photos is filled with learning and excitement, so embrace the process and enjoy every flight! 🌈✨

Conclusion
Recap of Benefits of DJI Mavic
As we wrap up our exploration of the DJI Mavic Fly More Combo, it’s essential to highlight just how beneficial this drone can be for both budding and seasoned photographers. The Mavic has redefined the way we capture the world from above, making aerial photography more accessible than ever. Here are some key benefits that truly stand out:
- Stunning Image Quality: With a 4K camera, you’re able to capture breathtaking images that are sharp and vibrant. This is perfect for everything from travel photography to event coverage.
- User-Friendly Design: The intuitive controls and features offered by the DJI Fly app make it incredibly simple to fly, even for beginners. I remember my excitement during my first flight—I was surprised at how quickly I felt confident maneuvering the drone!
- Portability: Its compact, foldable design means you can easily take it on all your adventures. Whether it’s a hiking trip or a beach getaway, bringing the Mavic along ensures you capture those stunning vistas.
- Intelligent Flight Modes: These features like ActiveTrack and Point of Interest not only provide professional-looking shots but also enhance your creativity. I’ve found that the QuickShots feature transforms ordinary moments into cinematic experiences; it’s a joy to use!
- Extendable Flight Time: The Fly More Combo provides extra batteries, allowing for longer flying sessions without interruption. Nothing beats the peace of mind that comes with knowing you have backup power!
Overall, the DJI Mavic offers a perfect blend of functionality and fun, making it an outstanding investment for any photography enthusiast! 🎉
Final Thoughts and Recommendations
As you dive into your new aerial photography journey, remember that practice and experimentation are key. Each flight presents an opportunity to refine your skills and discover new techniques. Here are some final thoughts and recommendations to keep in mind:
- Stay Current on Regulations: As rules and regulations concerning drones evolve, make sure to stay updated. Being informed not only keeps you within legal guidelines but also promotes safer flying for everyone.
- Create a Workflow: Once you’ve captured those stunning images, establish a post-processing workflow that suits your style. Whether utilizing Lightroom for batch edits or diving deep into Photoshop for detailed tweaks, organizing your workflow can streamline the editing process.
- Participate in the Community: Engage with other drone enthusiasts online or locally. Share tips and tricks, ask questions, and participate in challenges. I’ve found that interactions within the community often lead to collaborations and friendships—my Instagram following grew exponentially when I started participating in photo challenges!
- Keep Learning: Photography is an ever-evolving art form. Stay curious and always look for new techniques to enhance your skills. Whether it’s through online courses, YouTube tutorials, or books, continuous learning is the key to growth.
Happy flying! Take to the skies with your DJI Mavic and embrace the artistic exploration that aerial photography offers. Capture those moments and share them with the world—you never know who you might inspire along the way! 🌍✨