Introduction
Overview of Aerial Photography
Aerial photography has revolutionized the way we perceive and capture our world. Gone are the days when you needed a helicopter or a tall building to shoot breathtaking overhead shots. Today, with the advent of drones, capturing stunning vistas from above has become accessible to everyone, whether you’re a seasoned photographer or a hobbyist. When you look at an aerial photograph, what do you feel? It’s like getting a bird’s-eye view of an expansive landscape, providing context and an understanding of the scene that ground-level photography simply can’t achieve. From sweeping views of cities to intricate details of nature, aerial photography opens up a new realm of creativity. You can capture:
- Landscapes: Rolling hills, valleys, and mountain ranges.
- Urban environments: City skylines, streetscapes, and architectural marvels.
- Events: Festivals, weddings, and community gatherings from a unique perspective.
There’s something about seeing the world from above that adds magnificence to everyday scenes. As an aerial photographer myself, I recall my first time using a drone to capture a sunrise over a lake. The colors were vibrant, and the reflections on the water were mesmerizing. It made me appreciate nature in ways I hadn’t before! Harnessing this power requires the right equipment, and that’s where drones like the DJI Phantom 4 Pro come into play.
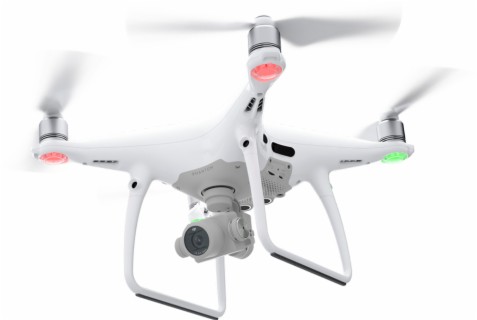
Importance of Using DJI Phantom 4 Pro
The DJI Phantom 4 Pro is a game-changer in the world of aerial photography. If you’re serious about capturing stunning images or videos, this drone brings a lot to the table. Here’s why this piece of equipment is so crucial for both professionals and enthusiasts:
- Exceptional Image Quality: With its 20MP camera and 1-inch sensor, the Phantom 4 Pro can capture crystal-clear images and 4K videos at 60fps. Every detail pops! If you’re like me, you’ll appreciate the ability to produce images that look as if they were taken with much larger, more expensive equipment.
- Intelligent Flight Modes: This drone features several intelligent flight modes, such as Draw and ActiveTrack, which allow you to focus more on composition rather than piloting the drone. These modes help you create mesmerizing footage without complications.
- Robust Build: The Phantom 4 Pro is built to last and withstand different weather conditions. Its smart battery provides an impressive flight time of up to 30 minutes, enabling you to capture ample footage without constantly worrying about recharging.
- User-Friendly Interface: Even if you’re new to drones, DJI’s app is intuitive and easy to navigate. It allows you to adjust camera settings, access maps, and plan your flight path seamlessly.
- Safety Features: With features like obstacle sensing and return-to-home options, flying becomes a more secure experience, letting you focus on getting those killer shots.
I remember a weekend trip I took to a national park. My Phantom 4 Pro effortlessly captured sweeping views of valleys and breathtaking cliffs. The experience was unlike any I had before. Weather wasn’t perfect that day, but the drone’s capabilities delivered impressive results that I proudly shared online. In summary, aerial photography is a fascinating artistic medium, and the DJI Phantom 4 Pro is an indispensable tool for anyone looking to explore it creatively. Whether you’re shooting landscapes, events, or architectural wonders, this device can elevate your photography skills to new heights. Embrace the journey, and get ready to capture the world from a whole new perspective!
Getting Started with DJI Phantom 4 Pro
Unboxing and Setup
Once you’ve got your DJI Phantom 4 Pro in hand, the excitement builds, and you can’t wait to fly! The unboxing experience itself is a treat. As you carefully peel back the packaging, you’ll find the drone nestled snugly inside, along with essential accessories. Here’s what you can expect when you first open the box:
- Drone Body: The sleek design, coupled with that elegant matte finish, truly screams quality.
- Camera and Gimbal: Fully assembled, ensuring you’re ready to capture incredible imagery right out of the box.
- Remote Controller: Ergonomically designed, it fits comfortably in your hands for extended flying sessions.
- Batteries: Typically, you’ll find one or two with the package, giving you enough power for several flights.
- Additional Accessories: These often include propellers, a charger, and a carrying case or pouch.
Once everything is laid out, it’s time to set up! Follow these steps to prep your drone for its maiden flight:
- Charge the Batteries: Fully charge the drone’s battery and the remote controller. This way, you won’t be rushed during your first flight.
- Install the Propellers: Securely snap the propellers onto the motors, ensuring they’re tightly in place.
- Download the DJI Go 4 App: Whether on an Android or iOS device, connecting to the app opens up a world of features and personalizations.
- Calibrate the Compass and IMU: Follow the prompts in the app to ensure your drone knows its bearings. This is crucial for safe flying!
After the setup is complete, it’s a nice moment to pause and appreciate your progress. Just imagining the soaring views ahead can be thrilling!
Understanding the Control System
Now that your drone is all set, it’s important to familiarize yourself with the control system. The DJI Phantom 4 Pro boasts a sophisticated yet user-friendly remote controller. Let’s break it down:
- Control Sticks: These allow you to maneuver the drone in various directions. The left stick controls altitude and rotation, while the right stick manages forward/backward and lateral movements.
- Pro Tip: Practice some basic movements on the ground to grasp how these sticks respond before taking to the skies.
- Buttons:
- Takeoff/Landing Button: One-touch takeoff and landing functions make it easier to bring the drone back safely.
- Return to Home (RTH): A vital safety feature that returns the drone to its last recorded home point. Pressing this button can save your drone in case it gets out of range.
- Camera Control: Capture photos and start video recording with easy access buttons, allowing you to focus on your composition.
- Display Screen: The built-in screen (or your mobile device if you’re using the app) shows essential information like altitude, speed, battery life, and even a live video feed from the camera.
- Gimbal Control Dial: This allows you to adjust the camera’s angle smoothly while in flight, providing added flexibility for diverse shooting angles.
I still remember my first flight with the DJI Phantom 4 Pro; it felt like controlling a magic carpet! After a few practice runs, I grew confident quickly. Understanding the controls transformed my experience, letting me focus on capturing stunning images instead of struggling to fly. With your drone unboxed and the control system understood, you’re already well on your way to mastering aerial photography. The journey ahead is filled with creativity and stunning visuals waiting to be captured. Let your adventures begin!
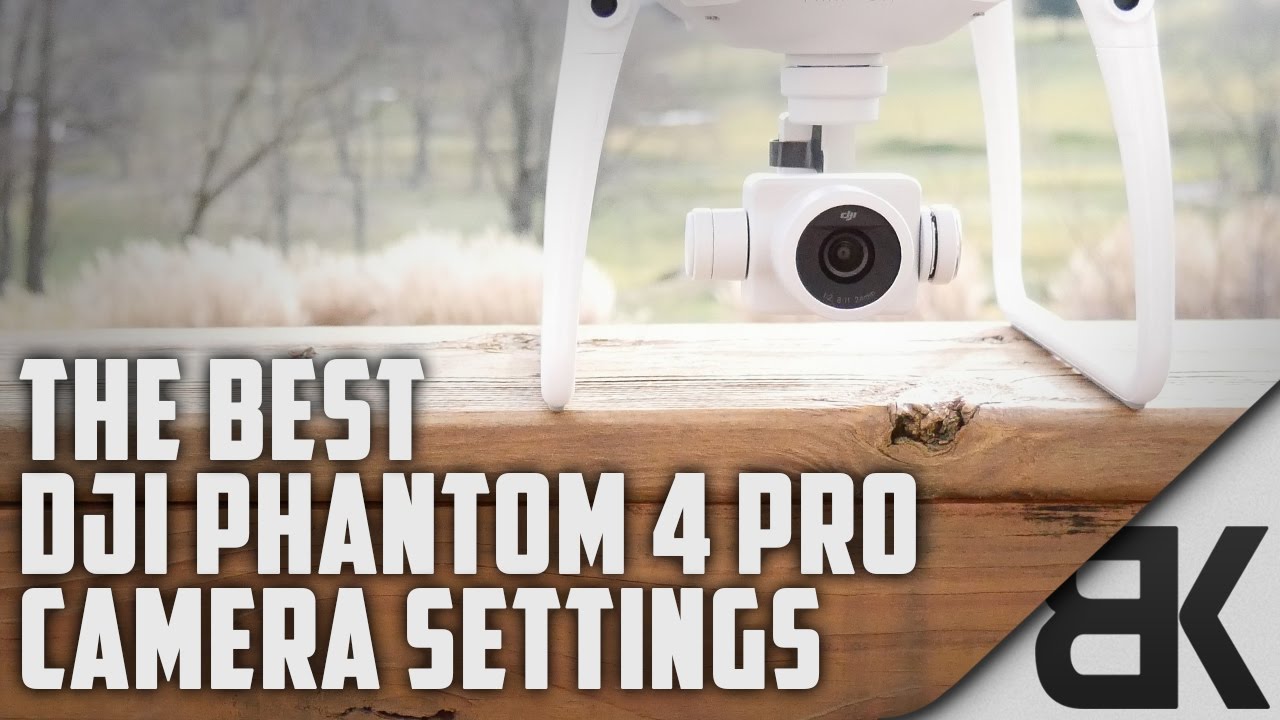
Mastering Camera Settings
Adjusting ISO, Shutter Speed, and Aperture
Now that you’ve got your DJI Phantom 4 Pro in the air and are becoming familiar with the control system, it’s time to dive into the heart of aerial photography: mastering your camera settings. Understanding ISO, shutter speed, and aperture is crucial for capturing stunning images and videos that stand out in your portfolio. ISO measures your camera’s sensitivity to light. Lower ISO settings (e.g., 100-400) are ideal for bright conditions and help minimize noise. In contrast, higher settings (e.g., 800-3200 and beyond) can be useful in low-light conditions but may introduce some grain. Here’s how to navigate ISO:
- Sunny Days: Set ISO to 100-200 to achieve sharp, clean images.
- Cloudy Days or Dusk: Adjust to 400 or 800 but be mindful of potential noise.
- Night Photography: You may need to experiment with higher settings, but consider using a lower shutter speed as well.
Shutter Speed determines how long your camera’s sensor is exposed to light. A faster shutter (e.g., 1/1000s) freezes movement, perfect for capturing fast-moving subjects, while slower speeds (e.g., 1/30s) create a sense of motion or allow more light in, which can result in beautiful, ethereal effects in your images.
- Action Shots: Use faster shutter speeds to capture quick movements. Imagine snapping a shot of birds taking off or waves crashing.
- Long Exposures: For smooth landscapes or light trails from cars at sunset, try slower speeds.
Aperture affects the amount of light entering your lens and the depth of field. Wider apertures (e.g., f/2.8) create a shallow depth of field, blurring the background and focusing attention on your subject. Conversely, smaller apertures (e.g., f/11) help keep more elements in focus, ideal for landscape shots.
- Portraits: Consider a wider aperture for that dreamy bokeh effect.
- Landscapes: Smaller apertures will help capture greater detail throughout the scene.
One time, I found myself shooting a waterfall during sunset, adjusting the aperture to f/8 for detail while lowering the shutter speed to create a silky water effect. It was pure magic! Play around with these settings in different lighting scenarios to see how they affect your images. That’s the beauty of aerial photography with the Phantom 4 Pro—you can get creative!
Utilizing Different Shooting Modes
Now that you have a grasp on the foundational camera settings, let’s explore the various shooting modes available on the Phantom 4 Pro that expand your creative possibilities.
- Single Shot Mode: Perfect for most situations, this mode captures one image at a time. Use this for steady scenes where you can compose your shot carefully.
- Burst Mode: When you need to capture fast action, burst mode takes multiple shots in quick succession. It’s invaluable in scenarios like sports events or wildlife photography where movement is constant.
- AEB (Auto Exposure Bracketing): This shooting mode automatically takes several shots at different exposures. Great for HDR photography, it captures the full dynamic range—especially stunning during sunsets or scenes with extreme contrast.
- Timelapse/Interval Shooting: Create extraordinary videos by taking a series of pictures over a set period. You can capture the movement of clouds, the changing seasons, or even bustling city life.
- Video Modes: Explore the different resolution and frame rate settings, including 4K at 60 fps or 1080p at 120 fps for slow-motion effects. Experimenting here can lead to some breathtaking footage.
A memorable moment for me was using time-lapse to document a busy market setting, capturing the dynamic flow of people and activities above. The end result was a mesmerizing video that truly brought the scene to life! By playing with these modes and establishing a solid understanding of your camera settings, your aerial photography will leap into new artistic territories. Each flight becomes an opportunity to experiment and refine your skills, ultimately allowing your unique vision to shine through every shot you capture. Keep exploring, and don’t be afraid to push your creative boundaries!

Perfecting Composition Techniques
Rule of Thirds and Leading Lines
Once you’re comfortable with your camera settings and have taken your first shots, it’s time to focus on composition techniques that will elevate your aerial photographs to the next level. Two of the most effective principles to consider are the Rule of Thirds and Leading Lines. The Rule of Thirds is a classic photography guideline that helps you create balanced and engaging images. Imagine your frame divided into a 3×3 grid, creating nine equal parts. The idea is to position your subject along these lines or at their intersections, rather than dead center. This small shift can create a more dynamic composition.
- Aerial Example: If you’re photographing a coastal scene, try placing the horizon along the top or bottom third of the frame, letting you emphasize either the sky or the ocean. This creates depth and makes your image more interesting.
- Tip: Use your drone’s camera grid overlay feature to help visualize the composition in real-time!
Leading Lines, on the other hand, are naturally occurring lines within the frame that lead the viewer’s eye toward a focal point. In aerial photography, these could be roads, rivers, train tracks, or even the edges of a field.
- Aerial Example: As you soar above a winding river, capture the curves as they guide the viewer’s gaze through the scene. This creates a sense of movement and leads the viewer into the photograph.
- Personal Anecdote: I once flew over a stunning vineyard, where the rows of grapes created perfect leading lines. Capturing the lines in my frame directed the viewer’s attention toward the beautiful hills in the background and added depth to the composition.
By combining the Rule of Thirds and Leading Lines, you can breathe new life into your aerial photography, creating images that draw the viewer in and hold their attention.
Using Symmetry and Patterns in Aerial Shots
Another powerful tool in your composition toolkit is the use of symmetry and patterns. This can create visually striking images that captivate your audience. Aerial photography often reveals amazing patterns and symmetrical structures that create a unique photographic opportunity. Symmetry often occurs in architecture, landscapes, and even human-made structures. When you find a scene that exhibits symmetry, capturing it straight on can lead to mesmerizing results.
- Example: Consider an aerial view of a modern building with a reflective facade. If you center the camera directly above it, you’ll capture a perfect reflection in the glass, providing a stunning sense of balance in your shot.
Patterns can be found everywhere, from agricultural fields and urban layouts to natural formations and landscapes. Here are a couple of ways to emphasize patterns in your aerial shots:
- Agriculture: Capture rows of crops or circular irrigation systems from above for intriguing visuals. The repetition offers a rhythmic quality that can be irresistible to the eye.
- Nature: When flying over forests, observe the patterns created by the canopy. The different types of trees or the undulating hills can present various textures and colors, creating layers in your photograph.
I remember capturing an aerial shot of a tulip field during spring. The vibrant colors and organized rows created a spectacular pattern that looked like a painter’s palette from the sky. This image became one of my favored examples of how powerful patterns can be—there’s something inherently satisfying about them! In concluding your exploration of composition techniques, remember to play with these concepts in each flight. By applying the Rule of Thirds and Leading Lines, alongside symmetry and patterns, you enhance your ability to compose stunning and impactful aerial images. Your aerial photography won’t just be about the view; it will tell a story that engages and captivates your audience every time! So, get out there, experiment, and enjoy the creative process!

Enhancing Image Quality
Tips for Post-Processing Aerial Photos
Now that you’ve captured some stunning aerial shots, it’s time to take your images to the next level through post-processing. This can be a game-changer in transforming a good photo into a great one. A little editing can enhance colors, adjust lighting, and bring out details that may not be apparent straight out of the drone. Here are some tips to consider when post-processing your aerial photos:
- Use Software You’re Comfortable With: Software like Adobe Lightroom, Photoshop, or even user-friendly options like Snapseed can work wonders. Choose one that matches your comfort level and dive in!
- Adjust Exposure and Contrast:
- Review your image for exposure issues. A slight bump in exposure can brighten up shadows without losing details in brighter areas.
- Increase the contrast to make your images pop. A bit of contrast adds depth and richness to the colors.
- Enhance Colors:
- Use the vibrance and saturation sliders carefully. It’s easy to overdo it, but a little enhancement can highlight the vibrant hues of fields, skies, and waterscapes.
- Adjust the white balance to ensure your colors are true to life. Warmer tones can create a cozy feeling while cooler hues can convey a serene atmosphere.
- Sharpen Details:
- Apply a bit of sharpening to enhance the textures in your aerial shots. Be thoughtful to avoid creating too much noise; sometimes, less is more!
- Crop and Straighten:
- Don’t forget to crop your images. It’s your chance to follow the Rule of Thirds or eliminate any distracting elements from the frame.
- Ensure your horizon is leveled, especially when capturing landscapes. A crooked line can detract from the photo’s professionalism.
- Utilize Presets:
- Experiment with presets that can provide consistent style in your edits. Whether it’s a specific color palette or mood, presets can save you time while delivering fantastic results.
I recall playing with one of my favorite photos taken over a vibrant Aqueduct. I adjusted the exposure, added contrast, and enhanced colors—what started as a decent shot transformed into a breathtaking image that I could hardly believe was taken with a drone!
Using Filters for Better Results
While post-processing is essential, don’t overlook the importance of using filters during your aerial shoots. Filters can help manage the lighting conditions directly in-camera, leading to stunningly improved images straight out of the drone.
- Polarizing Filters: These filters reduce glare from reflective surfaces like water and glass. They saturate colors and enhance contrast, making skies bluer and clouds pop.
- Example: When flying over a calm lake, a polarizing filter can add depth and clarity to the water’s surface, creating mesmerizing reflections — a trick I used during one of my lake outings.
- ND (Neutral Density) Filters: ND filters are akin to sunglasses for your lens. They help reduce the amount of light hitting your sensor, allowing you to shoot at lower shutter speeds in bright conditions.
- Benefits:
- Capture smooth, long-exposure effects even in daylight—imagine a waterfall that appears silky or clouds that trail ever so delicately across the sky.
- Achieve cinematic-looking video footage with motion blur when filming at a slower shutter speed.
- Benefits:
- Graduated ND Filters: These filters are perfect for balancing exposure differences between bright skies and darker landscapes. They have a clear bottom with a gradient that darkens gradually toward the top.
- Application: Perfect for sunrise or sunset shots where the sky is brighter than the ground, helping to keep the details in both areas.
Using filters has become a staple in my aerial photography toolkit. I’ve witnessed firsthand how they can dramatically elevate the final photograph. Remember, while tools like filters and post-processing software can enhance your photos, the best results stem from a mix of creativity, skill, and practice. Keep experimenting with different techniques and filters; this is where you will truly find your style and voice as an aerial photographer!

Advanced Aerial Photography Techniques
Capturing Panoramic Views
Now that you’ve mastered the fundamentals of aerial photography, it’s time to explore more advanced techniques. One of the most breathtaking techniques is capturing panoramic views. A panoramic photo is like a window to a broader perspective, allowing viewers to take in vast landscapes in a single frame. Here’s how to achieve stunning panoramic shots with your DJI Phantom 4 Pro:
- Plan Your Shots: Start by scouting the location. Look for sweeping landscapes, bodies of water, or city skylines that lend themselves well to wide views. Early mornings or late afternoons are ideal for soft lighting.
- Use the Panorama Mode: The Phantom 4 Pro comes equipped with a dedicated Panoramic shooting mode. Simply select this feature in the app, and the drone will automatically take a series of images while rotating in place.
- Stitching Images: While the drone can create an automated panoramic image, consider manually stitching images together in post-processing for added control. You’ll typically use software like Adobe Lightroom or Photoshop:
- Import your photos.
- Select and merge them into a single panoramic image using the “Photomerge” feature.
- Mind the Horizon: Ensure that your wind and the horizon are level when flying. An uneven horizon can ruin a panoramic shot, so it’s crucial to check the drone’s level before capturing.
- Practice Composition: Use the Rule of Thirds to place key elements in your panoramic shots. Position natural landmarks or significant structures along the grid lines for a more visually compelling image.
The first time I tried capturing a panoramic view over a valley, I was mesmerized. The images turned out to be a perfect representation of the majestic scenery, allowing friends to appreciate that vastness in a single frame. Panoramic shots can also make stunning prints for home decor!
Mastering HDR and Time-Lapse Photography
In addition to panoramic views, mastering HDR (High Dynamic Range) photography and time-lapse can significantly enhance your aerial photography portfolio. Let’s explore both techniques: HDR Photography involves taking several shots of the same scene at different exposure levels, allowing you to capture the full dynamic range of light in a scene. Here’s how to do it:
- Use Auto Exposure Bracketing (AEB): Set your drone to AEB mode. This allows it to capture multiple exposures automatically while you concentrate on composition.
- Shooting Settings: Aim for at least three to five exposures, ranging from underexposed to overexposed. This gives you the flexibility to capture details in both shadows and highlights.
- Post-Processing Merge: Use software like Lightroom to merge the exposures into a single image. Adjust settings to ensure that none of the details are lost while enhancing the overall appearance.
Personal Tip: On a trip to a national park, I captured an HDR image of a rocky outcrop during sunset. The colors in the sky and the details in the rocks were starkly distinct after processing, resulting in a stunning image that drew quite a few compliments! Time-Lapse Photography captures a sequence of images taken over a period, and when played in sequence, they create a smooth, high-speed representation of movement. Here’s how to get started:
- Select a Subject: Whether it’s clouds moving across the sky, waves crashing on a shore, or the hustle and bustle of a city, pick a dynamic scene that will exhibit movement over time.
- Set up your Drone: Use the time-lapse feature in your DJI Go 4 app to define the intervals in which your drone will capture images.
- Interval Timing: For fast-moving elements, use shorter intervals (1-3 seconds). For slower movement, intervals of 5-10 seconds work well.
- Post-Processing: After taking the shots, compile them into video editing software such as Adobe Premiere Pro or Final Cut Pro, and play them back at a high frame rate to create a fluid time-lapse video.
When I captured a time-lapse of traffic merging from various intersections during the evening rush hour, the outcome was mesmerizing! If you’ve ever watched a time-lapse video, you know the results can be stunning, showcasing the energy of a scene in a captivating way. Embrace these advanced techniques as you grow as an aerial photographer. Exploring HDR and time-lapse methods, paired with panoramic views, will enhance your artistic expression and allow you to tell a broader story through your images. Keep experimenting, stay curious, and enjoy the breathtaking journey of aerial photography!

Flying Safely and Legally
Understanding FAA Regulations
As thrilling as it is to soar through the skies capturing breathtaking vistas, flying your drone responsibly is just as important as mastering aerial photography techniques. Understanding the regulations set forth by the Federal Aviation Administration (FAA) is crucial for both your safety and that of others around you. The FAA has established specific rules for drone operators, and familiarizing yourself with these guidelines is a key step to flying legally.
- Register Your Drone: If your drone weighs more than 0.55 pounds, you must register it with the FAA. This can easily be done online, and it only takes a few minutes.
- Know Weight Classifications: Drones are categorized based on their weight, and different regulations may apply based on these classifications. Ensure you know which category your drone falls into and the stipulations that accompany it.
- Airspace Awareness: You need to understand the airspace around you. Drones cannot be flown:
- Near airports (within 5 miles without permission).
- Above 400 feet in controlled airspace.
- Over crowds or moving vehicles.
- Visual Line of Sight (VLOS): Keep your drone within your visual line of sight at all times. This rule is in place to ensure that operators can maintain control and respond to unexpected situations.
- Daylight Operations: Flying during daylight or civil twilight (30 minutes before sunrise or after sunset) is recommended. If flying at night, additional lighting is required on your drone.
- Check Local Laws: While the FAA provides overarching regulations, local municipalities may impose additional restrictions. Always double-check for local no-fly zones or regulations in your area.
I’ll never forget my first solo flight; I was buzzing with excitement! However, I had taken the time to research local regulations beforehand, and it paid off. I found a beautiful nearby park that allowed drone flights, and I was able to enjoy my day without any hassle.
Safety Precautions for Aerial Photography
Beyond understanding regulations, implementing safety precautions is vital to ensuring a smooth and responsible flying experience. Here are some essential tips to help you fly safely while capturing amazing aerial photographs:
- Conduct a Pre-Flight Check:
- Battery Levels: Ensure both your drone and remote controller are fully charged.
- Flight Controls: Test your drone by performing a basic check of the motors and controls before taking off.
- Firmware Updates: Make sure your drone’s software is up to date for optimal performance and safety features.
- Weather Conditions:
- Always check the weather before heading out. Wind, rain, and low visibility can make flying dangerous.
- Avoid flying in gusty conditions or during storms as it can lead to loss of control.
- Maintain a Safe Distance:
- Keep a safe distance from people, animals, and property. This not only protects those around you but also minimizes the potential for accidents.
- Respect the privacy of others. Avoid flying over private property without permission.
- Emergency Procedures:
- Familiarize yourself with your drone’s emergency features, such as “Return to Home” or how to safely land your drone if it encounters issues.
- Have a plan in place for what to do if an unexpected situation arises, like losing signal or a sudden change in wind speed.
- Learn About No-Fly Zones:
- Use apps like DJI’s GEO system or Airmap to identify no-fly zones. These apps help you stay informed about airspace restrictions based on your location.
Taking the time to consider safety precautions helped me immensely during my aerial photography sessions. Once, I was flying near a busy beach and noticed sudden gusts of wind picking up. Instead of risking it, I landed safely and waited for a calmer moment before resuming my shoot. In summary, while the adventure of flying your drone and capturing stunning aerial shots is exciting, it’s critical to do so safely and legally. Understanding FAA regulations and following essential safety precautions will keep you safe, protect those around you, and safeguard your valuable equipment. As you embark on this journey of aerial photography, remember that responsibility is key to a successful and enjoyable experience in the skies!
Tips for Professional Aerial Photography
Working with Different Lighting Conditions
As you’ve likely discovered through your aerial photography endeavors, lighting is one of the most critical elements in capturing stunning images. Whether you’re shooting in bright sunlight, soft dusk, or during dramatic overcast days, adjusting your techniques can yield remarkable results.
- Golden Hour Magic:
- The hour right after sunrise and before sunset, known as the golden hour, bathes the landscape in soft, warm hues. This light can enhance colors and reduce shadows, making it an ideal time for shooting landscapes.
- Tip: Plan your flights to coincide with these hours. The beauty and richness of the images taken during these times can be breathtaking.
- Bright Sunlight:
- Shooting during midday can create harsh shadows and blown-out highlights, which may detract from your image quality.
- To combat harsh conditions, use ND filters to control the light entering your camera. This allows for more balanced exposure and can help you achieve creative effects such as motion blur in flowing water.
- Shooting in Overcast Conditions:
- Cloudy days can provide a diffused light source, minimizing contrast and creating soft shadows. This light is perfect for capturing vibrant colors, albeit at lower saturation levels.
- Personal Tip: One of my favorite images was shot on an overcast day while flying over a dense green forest. The moisture in the air made the colors pop and created a mystical atmosphere.
- Dusk and Dawn:
- Shooting during twilight can produce stunning results, especially with urban scenes. The interplay of artificial lights from buildings and street lamps against the backdrop of fading natural light can create dynamic visuals.
- Consider using longer exposure settings and a steady horizon to capture the twinkling lights of the city below.
Understanding how different lighting affects your photos allows you to plan ahead, ensuring you’re ready to capture that perfect shot, no matter the conditions!
Incorporating Drones in Commercial Projects
As aerial photography becomes increasingly popular, incorporating drones into commercial projects is a fantastic way to provide unique content that stands out. Here’s how you can leverage your skills and drones for various commercial endeavors:
- Real Estate Photography:
- Drones can showcase properties from unique perspectives. Capturing aerial views of expansive lands or highlighting surrounding amenities can set listings apart.
- Tip: Create a package offering high-resolution stills and engaging video tours to entice potential buyers.
- Event Coverage:
- Drones offer a dynamic way to cover events such as weddings or festivals. Aerial shots capturing large gatherings can create compelling documentation and memories.
- Consider offering packages that combine drone footage with ground-level photography to give a comprehensive overview of the event.
- Promotional Content for Businesses:
- Businesses benefit from eye-catching promotional content that can be used across social media and website platforms. Capture stunning aerial shots of your client’s locations, products, or services.
- Think beyond just traditional advertising; creative drone footage can elevate a brand’s personality, making their storytelling more engaging.
- Land Surveys and Inspections:
- Drones are invaluable for industries like construction and agriculture, where aerial surveys provide crucial data.
- This use of drones can dramatically speed up processes, improve safety, and provide detailed overviews that ground-based inspections cannot.
- Collaborate with Creative Agencies:
- Networking with advertising or marketing agencies can lead to exciting opportunities for drone work. Creative collaborations can help you gain exposure while allowing you to apply your unique aerial perspective on various campaigns.
I remember capturing aerial shots for a coastal real estate project; the views from above showcased not just the property but also the stunning coastline of the area, adding value and appeal to the listing. Having those angles created an engaging story that traditional photography alone could not convey. In conclusion, whether working with varying lighting conditions or integrating drones into commercial projects, these tips will help elevate your aerial photography into a professional and impactful realm. The possibilities are vast, so continue exploring and experimenting to find what works best for you in your journey as an aerial photographer!