
Introduction to Drone Gyro Stabilization
Understanding the Basics
When you think about flying a drone, the first thing that comes to mind might be the excitement of piloting it through the skies. However, the technology behind that smooth, stable flight isn’t just rudimentary controls. Enter gyro stabilization! This critical component helps ensure your drone doesn’t turn chaotically in the wind or get thrown off course by sudden movements. So, what exactly are gyros, and how do they work? At their core, gyros are devices that measure orientation and angular velocity, helping drones respond to motion changes and maintain stability. For instance, if you were to tilt your drone slightly, the gyro detects this change and sends signals to the control system, which then makes rapid adjustments to keep the drone upright. It’s similar to how a tightrope walker uses a balance pole to stay stable – even the slightest shift can cause them to stumble! There are two main types of gyro stabilization technologies utilized in drones:
- Mechanical Gyros: These use physical components to detect orientation and usually involve spinning masses to measure changes in position.
- Inertial Measurement Units (IMUs): More commonly found in modern drones, IMUs combine accelerometers and gyros into a single unit, offering more precise stabilization solutions.
Understanding how these technologies function is crucial for anyone looking to enhance their flying experience or engage in aerial photography, racing, or drone mapping. Imagine capturing that perfect sunset photo without worrying about shaky footage! 🎥
Importance of Gyro Stabilization Technology
The significance of gyro stabilization technology in drones can’t be overstated. Without it, flying a drone would be nearly impossible, especially in environments where weather conditions can change rapidly. Here’s why gyro stabilization is essential:
- Improved Stability: By keeping the drone leveled and stable, gyro stabilization allows for smoother flights. This is particularly beneficial when capturing photos and videos. Imagine shooting a wedding or a landscape photo; without stabilization, your footage could look more like a roller coaster ride than a serene view!
- Enhanced Control: With stabilization technology in place, you have better control over your drone’s movements. This is crucial for pilots during challenging maneuvers or navigating tight spots, as it allows for more precise adjustments in real time.
- Increased Flight Safety: One of the primary challenges drone operators face is maintaining the drone’s balance. Gyro stabilization minimizes the risk of crashes and errors, especially when flying in outdoor settings where wind can be unpredictable. It acts like a safety net, ensuring that the drone responds accurately and promptly to your inputs.
- Broader Application Range: With reliable stabilization, drones now cater to various industries. From using drones for agricultural monitoring to conducting inspections on high-rise buildings, gyro stabilization lays the groundwork for unprecedented advancements and applications.
- User-Friendly Experience: If you’re new to flying drones, gyro stabilization makes the process much more manageable. It can feel daunting as a beginner, but drones with advanced stabilization systems reduce the learning curve significantly. You can focus more on enjoying the flying experience rather than battling the controls!
In real-life scenarios, consider pilots who use drones for search and rescue operations. The stability offered by gyro technology can mean the difference between spotting a missing person in challenging terrain or missing critical details due to turbulence in the air. It enhances effectiveness and saves lives. It’s remarkable to see how far drone technology has come, and gyro stabilization plays a pivotal role in that evolution. When deciding which drone to buy or which features are crucial for your flying needs, understanding the nuances of gyro stabilization can set you apart as a knowledgeable enthusiast. In conclusion, by grasping the basics of gyro stabilization and recognizing its importance, you’re already on the right path to elevating your drone flying skills. Whether you’re just starting your journey or looking to refine your skills, the combination of understanding and technology will help you achieve stable, controlled flights. Ready to know what types of gyro stabilization systems are available? Let’s dive deeper! 🚁

Types of Gyro Stabilization Systems
Having dived into the fundamentals of gyro stabilization, it’s time to explore the various types of gyro stabilization systems that power drones today. Understanding these systems allows you to make informed decisions about which technology aligns best with your flying needs. Let’s break down the two primary types: mechanical gyros and Inertial Measurement Units (IMUs).
Mechanical Gyros
Mechanical gyros have been around for quite some time and have played a crucial role in various stability technologies, not just in drones but also in aviation, marine navigation, and space applications. So, what makes mechanical gyros special?
- Basic Principle of Operation: Mechanical gyros rely on the principles of angular momentum. Simply put, they use a spinning mass (the rotor) that remains stable regardless of the motion of the base to which it’s attached. This stability is fundamental to determining the orientation of the drone.
- Types of Mechanical Gyros:
- Rate Gyros: These measure the rate of rotation and are often used in combination with other gyros for enhanced stability.
- Vibrating Gyros: They use the deflection of a vibrating mass to determine orientation changes.
While the concept behind mechanical gyros is relatively straightforward, they do come with some limitations:
- Size and Weight: Mechanical gyros can be bulkier than their digital counterparts. This can be a downside for drone pilots looking for lightweight equipment.
- Sensitivity: They can sometimes be less sensitive than IMUs, especially in rapid movements or highly dynamic environments.
- Calibration Needs: Mechanical gyros often require frequent calibration to ensure accuracy, which can be time-consuming.
However, let’s not overlook their advantages!
- Robustness: Mechanical gyros can withstand rough conditions and vibrations, making them ideal for certain industrial applications.
- Proven Track Record: Reliable and time-tested, mechanical gyros have a long history of helping stabilize aircraft and vessels.
Using a mechanical gyro might be a solid choice for someone investing in a drone specifically for rugged terrain or industrial use. I once used a drone equipped with mechanical gyros while filming in a heavily wooded area. Despite the wind and obstacles, my footage came out surprisingly stable!
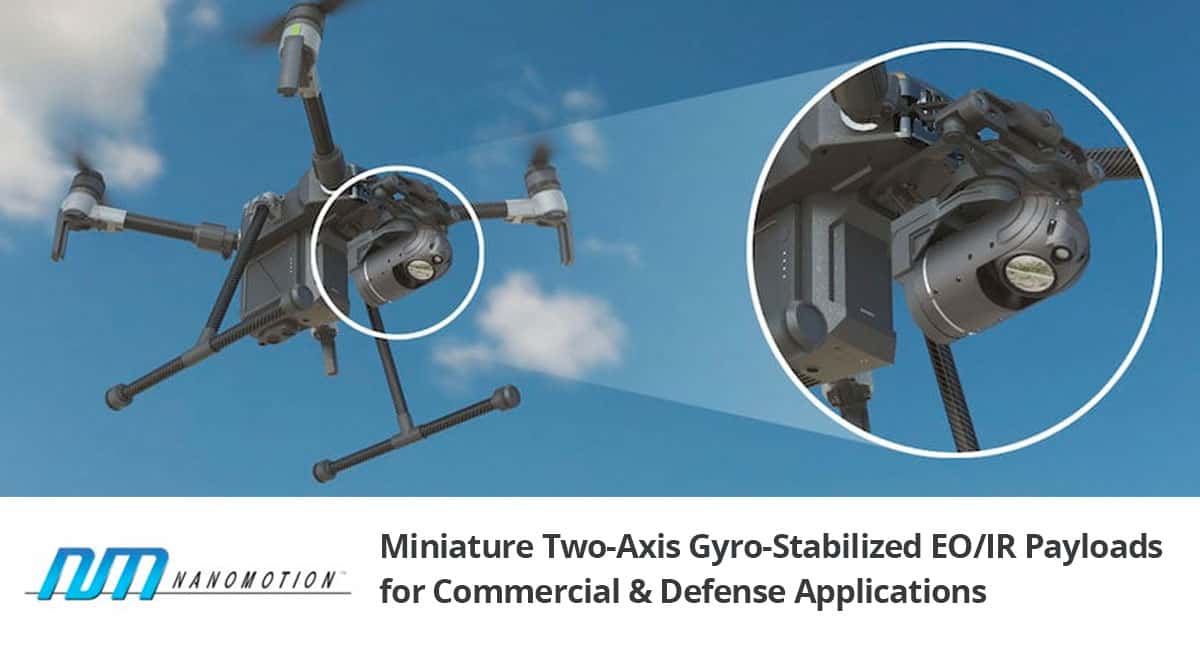
Inertial Measurement Units (IMUs)
Now, let’s shift gears and talk about Inertial Measurement Units (IMUs), which are becoming increasingly popular in the drone industry due to their advanced capabilities and compact sizes.
- How IMUs Work: IMUs combine multiple sensors, typically accelerometers, and gyroscopes, within a single unit. This allows them to not only measure orientation but also acceleration and motion dynamics simultaneously. This dual data collection offers a fuller picture of the drone’s movement.
- Key Components:
- Accelerometers: These measure linear acceleration, which is essential in detecting changes in speed or direction.
- Gyroscopes: These measure angular velocity, helping maintain orientation.
- Advantages of IMUs:
- High Sensitivity: IMUs are more responsive to rapid changes, making them particularly advantageous in fast-paced or turbulent flying conditions.
- Compact Design: Their smaller size and weight make them more suited for lightweight drones, which is a huge selling point for enthusiasts and professionals alike.
- Integrated Systems: IMUs can seamlessly connect with other drone technologies, like GPS, to achieve enhanced navigational capabilities.
- Applications of IMUs:
- IMUs are widely used in consumer drones, racing drones, and commercial applications, especially where precise flight control is essential—for instance, in aerial photography or surveying.
I’ve had my share of experience flying drones equipped with IMUs, and I can personally attest to the incredible difference it makes. I remember one particularly windy day when I needed to capture some footage of a sporting event. The drone’s IMU kept it steady and level, allowing me to get crisp shots without the usual jitter that comes with wind interference.
- Considerations for Using IMUs:
- Calibration Frequency: While IMUs generally need less frequent recalibration than mechanical gyros, users should still be aware of the importance of keeping their sensors calibrated for optimal performance.
- Signal Interference: IMUs may sometimes experience minor disruptions due to environmental factors, such as temperature changes or magnetic fields, which can affect calibration.
In summary, both mechanical gyros and Inertial Measurement Units have unique roles in drone stabilization. Choosing the right one depends significantly on your intended use. If you fly in harsh conditions where durability is paramount, mechanical gyros might be the best fit. On the other hand, if you need precision in fast-paced environments, look no further than drones utilizing IMUs. As technologies continue to evolve, hybrids and variations are entering the market, merging features from both systems. Staying informed about the latest developments will help you choose the ideal stabilization technology to enhance your flying adventures. Ultimately, understanding the distinctions between mechanical gyros and IMUs lays the foundation for optimizing your drone’s performance. So, as you venture further into the world of drone flying, you’ll know exactly what you need to achieve that perfect balance in the skies! 🚀

Choosing the Right Drone for Stabilization
Now that you’ve grasped the types of gyro stabilization systems and their importance in drone technology, it’s time to explore how to choose the right drone that meets your stabilization needs. Whether you’re a seasoned pilot or just starting, the right drone can enhance your flying experience and improve the quality of your aerial footage. So, let’s break this down into manageable parts.
Factors to Consider
When choosing a drone, there’s more to think about than just price or design. Here are the key factors you should consider to ensure you select a drone that suits your stabilization requirements effectively:
- Purpose of Use:
- Are you planning to use your drone for photography, racing, agricultural monitoring, or something else? Your intended purpose will shape your choice. For instance, if you are into aerial photography, you’ll want a drone with excellent stabilization features.
- Type of Stabilization System:
- As discussed, drones use either mechanical gyros or IMUs for stabilization. If you’re flying in a highly dynamic environment, focus more on drones with IMUs, as they are typically more sensitive and responsive.
- Camera Quality:
- If your main goal is capturing stunning aerial photographs or videos, the drone’s camera will play a vital role. Look for drones that offer high-resolution cameras and the ability to mount gimbals for added stability.
- Flight Time:
- The duration for which your drone can stay in the air will impact your shooting opportunities. Generally, higher-quality drones with advanced stabilization systems tend to have longer flight times.
- Weight and Size:
- Lighter drones are often easier to control, particularly in windy conditions. However, you need to balance weight with stability—sometimes heavier drones provide better stabilization.
- User Experience Level:
- Beginners might want to look for drones with automated stabilization features that allow for easier handling, while more experienced pilots can opt for models that offer manual controls for more challenging maneuvers.
- Budget:
- Quality comes at a price. Establish your budget ahead of time, and remember that investing in a reliable, well-stabilized drone now can pay off in terms of better performance and longevity.
- Brand and Reviews:
- Research reputable brands and read user reviews to gauge the real-world performance of the drone. Feedback from fellow users can provide valuable insights into strengths and weaknesses.
I recall when I first set out to buy my drone—I got overwhelmed with all the choices! Ultimately, I focused on what I needed: a good camera for landscape photography and a robust stabilization system that could handle windy conditions. With that clarity, my decision became much simpler.
Top Drone Models with Advanced Stabilization Features
With so many options available, here’s a curated list of top drone models renowned for their advanced stabilization features. Each of these drones caters to different needs but offers exceptional stabilization capabilities.
- DJI Mavic Air 2:
- Stabilization System: Advanced IMU and DJI’s 3-axis gimbal.
- Camera: 48 MP camera capable of shooting 4K video.
- Flight Time: Approximately 34 minutes.
- Why It’s Great: Compact and portable, the Mavic Air 2 balances performance with user-friendliness, making it ideal for both beginners and experienced pilots.
- Autel Robotics EVO Lite+:
- Stabilization System: 3-axis gimbal and advanced IMU.
- Camera: 50 MP camera with 6K video capability.
- Flight Time: Up to 40 minutes.
- Why It’s Great: Known for its excellent image quality and long battery life, this drone is perfect for professional photographers seeking aerial shots.
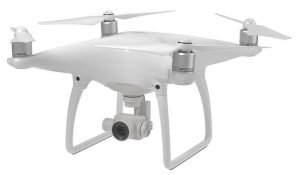
- DJI Phantom 4 Pro V2.0:
- Stabilization System: 3-axis mechanical gimbal and advanced dual IMU.
- Camera: 20 MP camera with 4K video at 60 fps.
- Flight Time: About 30 minutes.
- Why It’s Great: With superb stabilization and high-quality imaging, the Phantom 4 Pro V2.0 is a favorite among serious aerial photographers and commercial drone operators.
- Skydio 2:
- Stabilization System: Proprietary AI-driven stabilization.
- Camera: 12 MP camera with 4K video capability.
- Flight Time: Approximately 23 minutes.
- Why It’s Great: Unmatched obstacle avoidance and autonomous flying features have made Skydio 2 a popular choice for action sports and adventurous filming.
- Parrot Anafi USA:
- Stabilization System: 3-axis gimbal.
- Camera: 32 MP camera with 4K HDR video.
- Flight Time: Up to 32 minutes.
- Why It’s Great: Designed for professional user applications, it boasts thermal imaging capabilities along with excellent stabilization.
- DJI Mini 2:
- Stabilization System: 3-axis gimbal.
- Camera: 12 MP camera with 4K video.
- Flight Time: Up to 31 minutes.
- Why It’s Great: Extremely lightweight and portable, the Mini 2 is a great option for those looking to capture stunning aerial shots without the hassle of heavier gear.
Each of these models presents unique advantages tailored to various uses. Essentially, the best drone for stabilization is the one that aligns with your individual requirements. Think about what type of flying you envisage, and don’t shy away from trying out different models if you can! In conclusion, selecting the right drone involves careful consideration of factors including purpose, camera quality, and type of stabilization system. Armed with this knowledge, you can make an informed choice that enhances your flying experience and ensures you capture breathtaking footage. Happy flying! 🛩️
Tips for Optimizing Gyro Stabilization Performance
After diving deep into the fundamentals of gyro stabilization systems and how to choose the right drone, let’s focus on how to get the most out of those systems. The performance of gyro stabilization can make or break your flying experience. To help you achieve smooth, stable flights and high-quality footage, I’ve compiled a collection of essential tips and techniques. Let’s get started!
Calibration Techniques
Calibration is key when it comes to optimizing your drone’s gyro stabilization performance. It ensures that the sensors are aligned properly, which is crucial for accuracy and responsiveness. Here are some effective calibration techniques to sharpen your drone’s capabilities:
- Pre-Flight Calibration:
- Follow the Manufacturer’s Instructions: Each drone model has specific calibration steps, and it’s essential to follow these detailed instructions. You can often find these in the drone’s manual or on the manufacturer’s website.
- Clear Environment: Perform calibrations in an open area free from magnetic interference, which can distort sensor readings. Standing near large metal structures (like buildings or vehicles) may affect performance.
- Gyroscope Calibration:
- Level Surface: Always start with your drone on a flat, stable surface, ensuring that it’s perfectly level. This helps the gyro know its reference point.
- Initiate Calibration in the App: Many drones allow you to calibrate the gyroscope through their accompanying mobile app. Make sure to follow through the steps as prompted in the interface.
- Accelerometer Calibration:
- Position Calibration: Similar to gyroscope calibration, place your drone in various orientations—on its back, side, and nose down—to ensure the accelerometer is accurate in recognizing its position.
- Repeated Checks: Occasionally re-calibrate the accelerometer, especially after heavy use or if you notice any drift or instability during flight.
- Perform a Compass Calibration:
- Compass Dance: This involves rotating your drone in specific patterns, as recommended by the manufacturer. It’s crucial, especially when changing locations, as the Earth’s magnetic field can affect your drone’s navigation system.
- Check GPS Availability: Make sure your drone is getting an adequate GPS signal before performing compass calibration to avoid interference.
I still remember my first time calibrating a drone. I was so eager to fly it that I skipped the calibration process. The drone ended up drifting uncontrollably during its first few flights! Once I learned the importance of calibration, those challenges were a thing of the past.
Flight Mode Adjustments
After proper calibration, it’s time to take a closer look at your drone’s flight modes, as they can significantly impact gyro stabilization performance. Adjusting these modes according to your flying style and conditions can lead to vastly improved stability. Here’s a guide to help you tweak your flight settings:
- Selecting the Correct Flight Mode:
- Beginner Mode: If you’re a newcomer, start with modes designed to be more forgiving. These often limit speed and agility, providing a safety net as you learn to fly without losing control.
- Standard or Sport Mode: Once you’re more familiar with flying, consider switching to standard or sport mode. These modes offer improved responsiveness, but also require better skills to maintain stability.
- Use of ATTI Mode (Attitude Mode):
- What It Is: In this mode, the drone relies on gyros for stabilization and does not use GPS for hovering. While this might sound daunting, it offers fantastic control in environments where GPS signals may be weak or unreliable.
- Practice: Spend time practicing in ATTI mode to better understand how your drone responds to manual inputs. This experience can be invaluable, helping you refine your skills.
- Adjusting PID Settings:
- What Are PID Settings?: Proportional, Integral, and Derivative (PID) settings govern how your drone reacts to changes in orientation. Perfectly tuned PID settings can significantly improve stability and responsiveness.
- Experimentation: Each drone may require different PID adjustments based on weight, camera attachments, or flying style. Experiment with slight modifications and test your drone’s performance.
- Utilizing Intelligent Flight Modes:
- Follow Me, Waypoints, and Orbit Modes: If your drone features intelligent flight modes, use them! These settings automate certain flight functions, allowing the gyro stabilization system to work more efficiently.
- Pre-Flight Setup: Before initiating any intelligent flight mode, ensure your drone is calibrated and ready. This helps in making the most out of the automated features.
- Environmental Awareness:
- Choose Your Flight Area Wisely: Wind can significantly impact stabilization. When flying in high winds, consider adjusting your settings for better performance and safety.
- Practice in Different Conditions: Fly in various environments and observe how your drone responds. This will help you adapt your flight modes based on real-time conditions.
Once I got comfortable with the various flight modes, I started experimenting with ATTI mode on breezy days. It was challenging but rewarding, as it allowed me to gain deeper control over my flying. The experience ultimately improved my skills and confidence as a pilot. In summary, optimizing gyro stabilization performance involves a combination of proper calibration techniques and thoughtful adjustments to your flight modes. Calibration ensures that your drone’s sensors are functioning accurately, while the right flight modes can make your experience enjoyable and manageable. As you get familiar with these tips, you’ll be well on your way to smoother and more stable flights. Embrace the journey of learning, and enjoy every minute spent in the skies! 🌤️✈️
Advanced Techniques for Mastering Drone Gyro Stabilization
Having honed in on ways to optimize gyro stabilization, let’s take your flying skills to the next level with some advanced techniques. Mastering these methods will not only enhance your control but will also elevate your aerial footage to professional standards. Let’s explore precision flying methods and the fascinating realm of dual IMU systems.
Precision Flying Methods
When it comes to capturing breathtaking aerial shots or executing complex maneuvers, precision flying is an invaluable skill. Here are some techniques and tips to ensure your flights are sharp, controlled, and impressive:
- Practice Smooth Movements:
- Smooth, gradual inputs on your controls lead to better stabilization. Abrupt movements can lead to jerky flights and unappealing footage.
- Think of your drone as an extension of your body; practice gentle “S” curves and smooth arcs in your flight path.
- Use Gimbals for Camera Stability:
- If your drone allows for it, invest in a quality gimbal. A gimbal compensates for any sudden movements, maintaining camera stability even when the drone experiences minor turbulence.
- Key benefits include reduced shake and improved film quality—a must for any serious drone photographer!
- Practice Flying with Reference Points:
- Use visible landmarks or features in your environment as flight paths. Flying around these points can help you maintain control and ensure precision in your movements.
- For example, when navigating around trees or buildings, keep your focus on the object ahead to assist with smooth navigation.
- Incorporate Manual Modes:
- While automatic settings are great, switching to manual mode can help you learn how your drone reacts without electronic aids. This understanding is crucial for improving your flying skills.
- I remember challenging myself by flying in manual mode during a calm morning. I gained significant control over my drone’s movements and better understood how gyros react to my inputs.
- Flight Simulation Training:
- Consider using flight simulator software or apps designed specifically for drone piloting. These simulators offer realistic environments and help you practice precision flying without risking your actual drone.
- Many simulators even allow you to test various scenarios, including wind resistance and interference, preparing you for real-world challenges.
- Plan Your Flight Paths:
- Before flying, have a clear plan in mind. Determine the trajectory you want to take and the shots you want to capture. This foresight minimizes erratic movements during flight.
- Use flight planning apps that provide a visual representation of your planned route. Knowing the area before you take off can enhance your accuracy and efficiency.
Using Dual IMU Systems for Enhanced Stability
As technology evolves, dual IMU systems are emerging as a game-changer in the world of drone stabilization. By utilizing two independent Inertial Measurement Units, these systems provide enhanced accuracy and responsiveness. Here’s what you need to know about this cutting-edge technology:
- Understanding Dual IMU Systems:
- A dual IMU setup includes two separate calibration and measurement units, which allows the drone to cross-verify its data. If one unit encounters issues, the other can compensate, maintaining stability.
- This redundancy ensures that even if one IMU is affected by external factors—like vibrations or magnetic interference—the drone still functions smoothly.
- Benefits of Dual IMU Systems:
- Increased Accuracy:
- Drones equipped with dual IMUs tend to have improved data accuracy as both units provide continuous feedback. This leads to precise adjustments in real-time, particularly under dynamic conditions.
- Enhanced Reliability:
- The backup provided by dual systems results in fewer pilot errors and greater system tolerance. You’ll experience fewer abrupt reactions, leading to more controlled flights, which is great for complex maneuvers or photography.
- Increased Accuracy:
- Applications of Dual IMU Systems:
- Dual IMU systems are particularly beneficial for specialized applications like industrial inspections, surveying, and emergency services. The increased stability allows for better data collection in challenging environments.
- For example, I once assisted with a project using a drone equipped with dual IMUs while conducting a site assessment of a potentially hazardous area. Despite turbulence and varying winds, the drone’s stability allowed for clear imaging and accurate mapping.
- Choosing Drones with Advanced IMU Technologies:
- When selecting a drone, pay attention to specifications that mention dual IMU systems or advanced stabilization technology. Research models that have proven user feedback regarding their stabilization capabilities.
- Some top-tier drones equipped with dual IMU systems include:
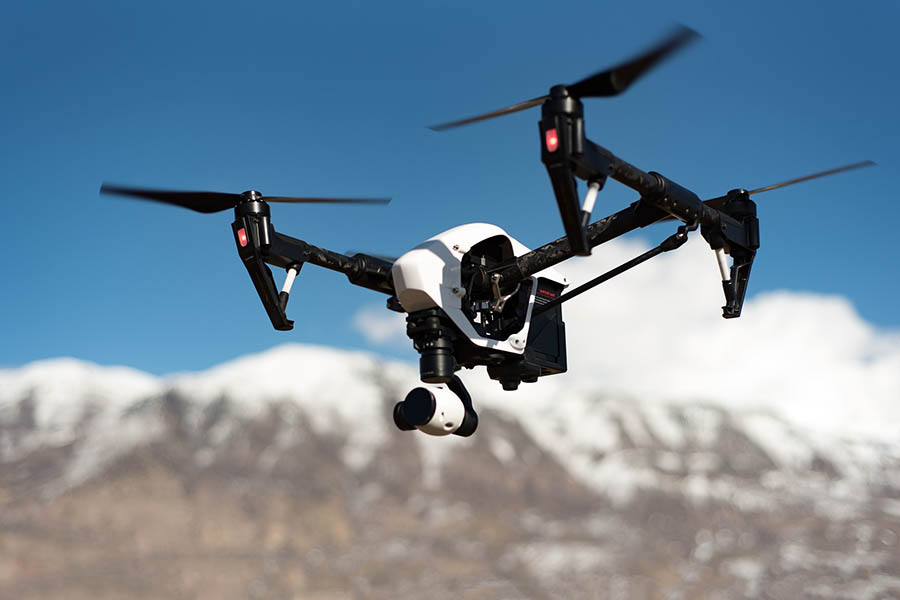
- DJI Inspire Series
- Autel Robotics EVO Series
- SenseFly eBee X (specifically for surveying tasks)
- System Maintenance:
- Regular maintenance is crucial for ensuring your dual IMU system remains effective. Keep firmware up to date, perform routine checks, and always calibrate before flights to keep your sensors in optimal condition.
In conclusion, mastering drone gyro stabilization involves a combination of precision flying methods and a keen understanding of advanced stabilization technologies like the dual IMU systems. By honing these skills, you can enhance your aerial footage, refine your piloting techniques, and ensure your drone remains stable and responsive in any flying condition. As you delve into precision flying and embrace the advancements in technology, you’ll not only enjoy flying but also discover endless possibilities in capturing stunning visuals from the skies. What’s next on your flying journey? 🚀🛩️