
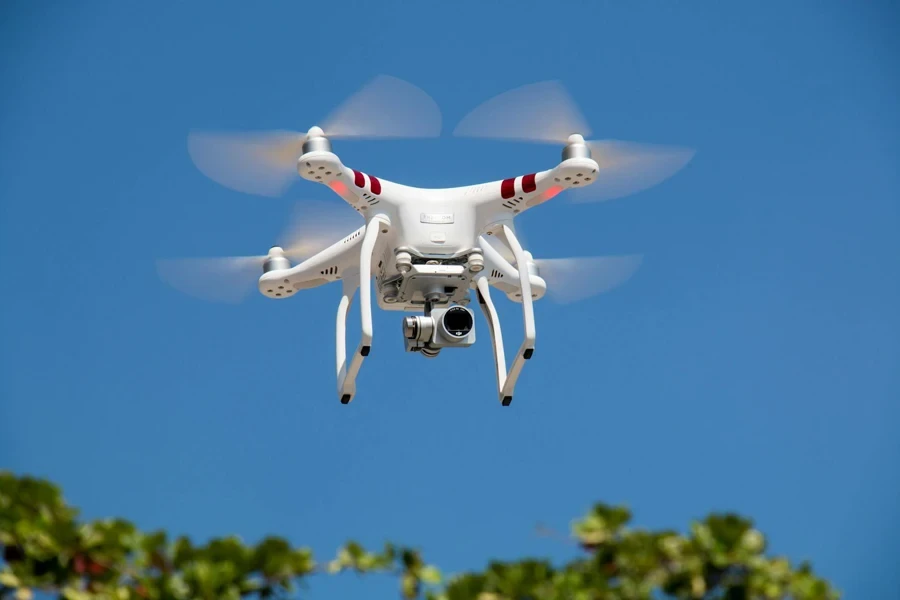
The World of Transmitters
Diving into the world of drones, one of the most fascinating components is the transmitter, which acts as your communication link with your flying machine. Just like a conductor orchestrating an orchestra, your transmitter harmonizes the signals that control your drone’s every move. It’s the device that transforms your inputs into actions, allowing you to navigate the skies with ease and precision.
Importance of Choosing the Right Transmitter
When you’re out there in the open sky, having the right transmitter can significantly enhance your flying experience. The wrong choice might lead to frustration or, even worse, may compromise your drone’s functionality. Here’s why it’s crucial to pick the right equipment:
- Control Precision: A reliable transmitter provides you with superior control, allowing for smooth and accurate flight maneuvers.
- Signal Strength: If you’re flying in wide-open spaces or even in complex terrains, the quality of your transmitter will affect the signal range and strength.
- Customization: Different transmitters offer varying levels of customization, enabling you to tailor the controls to suit your flying style.
Reflecting on my own experience, when I first started flying drones, I went for a budget-friendly option. While it did get me in the air, the lack of control during windy conditions made for a rather unpleasant experience. It was a hard lesson learned, but it taught me the importance of investing in a quality transmitter.
Features to Look for in a Transmitter
As you explore the vast selection of transmitters available, keep these essential features in mind:
- Channels: The number of channels dictates how many controls you can operate simultaneously. For most drones, a 4-channel transmitter is adequate, but more advanced setups may require 6 or even 8 channels.
- Frequency Band: Check if the transmitter operates on 2.4 GHz or 5.8 GHz. Generally, 2.4 GHz offers better range but might face interference in crowded areas.
- Ergonomics: You want a comfortable grip for long flying sessions. Look for a transmitter that feels good in your hands.
- Programmability: Future-proof your investment by choosing a transmitter with programmable features to accommodate upgrades in your drone technology.
The Learning Curve Ahead
As excited as you may be to get started, remember that there’s a learning curve involved. Don’t get discouraged if it takes a little time to master your new transmitter. Join local flying clubs or watch tutorials online to accelerate your journey. Building that confidence early on will make you a proficient pilot in no time! In summary, understanding your transmitter’s role and key features will significantly enhance your flying experience. It’s not just about getting airborne; it’s about enjoying the journey and commanding every aspect of your flight. Let’s dive deeper now into what transmitters are, starting with the various types available!

Understanding Transmitters
Now that you’re familiar with the significance of choosing a quality transmitter, let’s delve into the different types of transmitters available and the essential features you should consider. This knowledge will empower you to make an informed decision that could greatly enhance your flying experience.
Types of Transmitters
Transmitters come in a variety of styles, each suited for specific flying needs and preferences. Here are the most common types:
- Basic Transmitters:
- These are beginner-friendly options, often sold with ready-to-fly (RTF) drones.
- They usually have a limited number of channels (typically 4) and a simpler interface.
- Great for novices learning the ropes but might feel restrictive as your skills grow.
- Mid-Range Transmitters:
- Perfect for hobbyists looking to step up their game, these transmitters often feature 6 to 8 channels.
- They allow more control options and some programmable settings, giving you room to grow without breaking the bank.
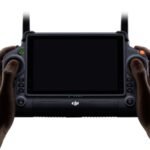
- Advanced Transmitters:
- Designed for serious enthusiasts and professionals, these transmitters can come with 10 channels or more.
- They offer extensive customization, telemetry data, and advanced features such as dual antennas for improved signal quality.
- A personal favorite of mine is the Futaba 14SG; it combines functionality with user-friendly programming, making it a joy to operate.
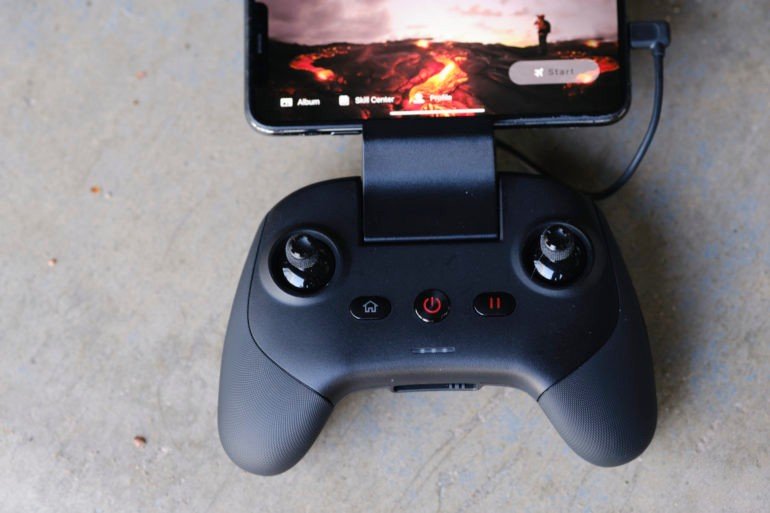
- Smartphone-Based Controllers:
- Increasingly popular due to their portability, these controllers connect via Bluetooth and use your smartphone’s screen for controls.
- While convenient, they may not provide the same tactile feedback as traditional transmitters, which some flyers prefer.
Key Features to Consider
As you explore your options, keep the following key features in mind. These can dramatically influence your flying experience:
- Channels: More channels mean greater control—giving you the flexibility to manage flight modes, camera gimbal, and additional accessories. Think of your flying style and how many different functions you might want to control simultaneously.
- Range: The effective range of a transmitter is critical, especially if you plan to fly at a distance. Aim for transmitters with at least a mile of range to ensure a robust connection.
- Ergonomics: Comfort during prolonged flights is essential. Look for transmitters with adjustable control sticks, comfortable grips, and well-placed switches to minimize strain.
- Battery Life: Long flight sessions need reliable battery life. Make sure to check reviews or specifications for an idea of operation time. Some advanced transmitters come with rechargeable batteries, which are not only economical but also environmentally friendly.
- Programmability: The ability to customize settings according to your needs can make a huge difference, particularly as your piloting skills expand. Features like mixing modes or customized switches can elevate your drone experience.
Wrapping Up on Understanding Transmitters
Understanding the various types of transmitters and their key features sets a solid foundation for your drone journey. By selecting the right one based on your needs and preferences, you’ll be well on your way to becoming a skilled pilot who enjoys every moment in the skies! Next, we’ll explore how to set up your transmitter for seamless communication with your drone, which is crucial for successful flying.

Setting Up Your Transmitter
With a solid understanding of the types of transmitters and their key features, it’s time to dive into the essential steps for setting up your transmitter. This process will ensure smooth pairing with your drone and proper calibration of controls, laying the groundwork for seamless flights.
Pairing with Your Drone
First things first—let’s talk about pairing your transmitter with your drone. This initial connection is crucial, as it establishes the communication line that will allow you to control your drone effectively. Here’s a straightforward guide to get you started:
- Read the Manuals: Before anything else, consult the manuals of both your transmitter and drone. They are treasure troves of information specific to the models you’re using.
- Power On: Start by turning on your transmitter, then power up your drone. This sequence ensures the transmitter is ready to connect.
- Enter Binding Mode:
- Many drones require you to enter a binding mode, which can usually be done by pressing a button or flipping a switch on the drone.
- Follow the instructions in your drone’s manual to activate this mode, as it allows the transmitter to recognize and connect to your drone.
- Bind the Devices:
- On your transmitter, there should be an option to bind or link. Engage this setting, and the transmitter will search for your drone.
- Once the connection is established, you may hear a beep or see an LED indicator confirming the successful pairing.
- Test the Connection: Finally, conduct a brief test by moving the controls to ensure the drone responds as expected. If all goes smoothly, congratulations—you’re officially paired up! 🎉
Calibrating Controls
Once you’ve paired your transmitter, the next step is calibration. Think of it as tuning an instrument; when done correctly, it ensures your drone performs to the best of its ability. Here’s how to go about calibrating controls:
- Enter Calibration Mode: Look for the option in your transmitter to enter a calibration mode. This setting varies by model, so check the manual for specific instructions.
- Follow On-Screen Prompts: Many modern transmitters come with on-screen guides. Follow these prompts to adjust the stick movements and ensure they align with your intended actions.
- Check Throttle and Aileron Movements:
- Verify that the throttle (up/down) and aileron (left/right) stick movements are registering accurately.
- With your throttle at the lowest setting, gently push it up to see if the drone responds appropriately. Repeat this for other controls.
- Adjust the Center Points: Sometimes, you may need to adjust the endpoints and center points of your controls. This is crucial for ensuring that your drone responds well to all commands.
- Save Your Settings: After calibration, make sure to save all your settings. Double-check the manual to find the way to confirm the settings, or else you might lose them.
Final Thoughts on Setup
Getting your transmitter paired and calibrated takes some patience, but trust me, it’s worth the effort! With your controls set and your drone ready to take to the skies, you’re one step closer to enjoying a thrilling flying experience. Up next, we’ll explore advanced control techniques to help you master those stick movements and take full advantage of different flight modes!
Advanced Control Techniques
Now that your transmitter is set up and calibrated, it’s time to take your skills to the next level! Mastering advanced control techniques will not only improve your piloting abilities but also enhance your overall flying experience. Let’s dive into the art of stick movements and explore the various flight modes that can elevate your drone adventures.
Mastering Stick Movements
Mastering stick movements is akin to learning the nuances of playing a musical instrument. Each movement can produce a variety of outcomes based on precision and timing. Here are some techniques to refine your control over the sticks:
- Smooth Inputs:
- Start with gentle movements. Quick, jerky motions can lead to unexpected behaviors from your drone.
- Think of the sticks as sliders—slowly push them to control the altitude and direction rather than jamming them abruptly.
- Practice Hovering:
- Before executing complex maneuvers, practice hovering in a stable position. This builds your muscle memory and helps with coordination.
- Try keeping your drone steady in a fixed point. You can do this indoors or in a controlled outdoor environment, which is particularly helpful when facing wind.
- Learn the Joystick Motions:
- Each stick input translates to a particular movement of your drone. For instance, moving the right stick right will cause the drone to roll to the right.
- Start by explaining specific movements:
- Throttle Up/Down: Controls altitude.
- Pitch Forward/Backward: Moves the drone forward or backward.
- Yaw Left/Right: Rotates the drone sideward.
- Combine Movements:
- Advanced flying often requires coordinating multiple stick movements at once. For instance, to perform a banked turn, you’ll need to pull the throttle while yawing and moving the stick in the desired direction.
- Practice these combinations slowly to build confidence, then gradually increase your speed as you become comfortable.
Exploring Flight Modes
Most modern drones come equipped with various flight modes designed to cater to all skill levels. Understanding these modes can dramatically improve how you execute maneuvers in the air:
- Beginner Mode:
- This setting is perfect for new pilots. It limits speed and range, making it easier to control the drone.
- If you find yourself nearing obstacles, it will automatically step in to prevent collisions.
- Altitude Hold Mode:
- This mode allows the drone to maintain a steady altitude without needing to constantly manage the throttle.
- It’s useful for capturing steady shots and navigating while ensuring stability.
- Acro Mode:
- Once you’re feeling more confident in your skills, switch to acrobatic mode. This setting gives you full control, allowing for flips, rolls, and other advanced maneuvers.
- Keep in mind that this mode removes stabilizing features, which can make flying more challenging.
- GPS Mode:
- Utilizing GPS technology, it helps keep your drone stable and hover in place even when winds are present.
- This mode is beneficial for long aerial photography sessions where stability is key.
Wrapping Up Advanced Techniques
By mastering stick movements and understanding flight modes, you’re well on your way to becoming a proficient drone pilot. These techniques will empower you to maneuver gracefully and take full advantage of your drone’s capabilities. Next, we’ll discuss troubleshooting and maintenance tips to keep your equipment in top shape, ensuring amazing flight experiences for years to come!
Troubleshooting and Maintenance
Your journey as a drone pilot will undoubtedly present a few challenges along the way. Some of these might stem from technical issues that can be resolved with a bit of troubleshooting, while others may relate to proper maintenance practices to keep your drone in peak condition. Let’s explore common troubleshooting issues and solutions, as well as tips for extending your battery life, ensuring you can enjoy many successful flights ahead.
Common Issues and Solutions
No matter how experienced you are, encountering issues is part of the journey. Here are some common problems you might face and solutions to address them:
- Drone Won’t Connect to Transmitter:
- Solution: Ensure that both the drone and transmitter are powered on. If they still won’t link, check your manual for the correct binding procedure. A good practice is to reset the transmitter and go through the binding process again.
- Drifting During Flight:
- Solution: If your drone drifts to one side while hovering, you may need to calibrate the compass and gyroscope. Consult your manual to find the calibration procedure, as this resets the drone’s references, allowing it to stabilize more accurately.
- Low Battery Warning:
- Solution: Reduce flight time by monitoring your battery status closely. Invest in additional batteries, and consider using a voltage alarm that alerts you when battery levels drop too low.
- Poor Video Feed:
- Solution: If you’re experiencing a grainy or pixelated video feed, check your antenna connections. Sometimes, simply adjusting the angle of the antennas can significantly improve your signal quality.
- Propellers Not Spinning:
- Solution: Inspect the propellers for damage and ensure they are installed correctly. If they appear damaged, replace them to avoid issues during flight.
Extending Battery Life
Speaking of battery-related issues, maintaining your battery’s health is critical for prolonging flight times and minimizing replacements. Here are some practical tips to help you get the most out of your drone’s battery:
- Avoid Over-Discharge:
- Never let your battery drop below its recommended voltage. Most manufacturers advise landing when your battery reaches around 20% to 30% of its capacity.
- Slow Recharge Times:
- Allow batteries to charge at a lower rate whenever possible. While it might be tempting to use high-speed chargers, a slower charge can extend the lifespan of your battery. Aim for a 1C charge rate unless specified otherwise.
- Storage Considerations:
- Store your batteries at a partial charge (about 40% to 60% capacity). Keeping them fully charged or completely discharged for long periods can reduce their lifespan.
- Temperature Management:
- Batteries have an optimal operating temperature. Try to keep them away from extreme heat or cold, as both can negatively impact performance. For cold-weather flying, warm up the batteries in a jacket or thermal bag before use.
- Regular Maintenance Checks:
- Just like your car requires regular checks, so do drone batteries. Look for signs of wear or swelling, which can indicate battery failure.
Promoting Longevity and Performance
By troubleshooting common issues and adopting good battery maintenance practices, you’ll significantly improve your flying experience. Regular checks and mindful management will help you enjoy longer flights and less downtime. In the next section, we’ll discuss enhancing range and signal, ensuring that you can explore even further on your adventures!

Enhancing Range and Signal
As a drone enthusiast, one of the thrilling aspects of flying is the ability to explore vast areas from a bird’s-eye view. However, the limitations of range and signal strength can sometimes put a damper on your adventures. Fortunately, there are several techniques you can employ to enhance your drone’s range and signal, allowing you to push the boundaries of your flying experiences. Let’s explore some effective strategies to achieve this.
Upgrading Your Antennas
One of the simplest yet most effective ways to improve signal strength is by upgrading your antennas. Stock antennas can often limit your drone’s capabilities. Here’s how you can optimize this:
- Directional Antennas: Instead of using standard omnidirectional antennas, consider switching to directional ones. These are designed to send signals in a specific direction, providing a stronger connection when aimed towards your drone.
- FPV Antennas: If you’re into First-Person View (FPV) flying, investing in higher-quality antennas can improve your video feed quality dramatically. Look at options labeled as “higher gain” antennas for improved distance.
- Polarization Matters: Make sure your antennas are well-aligned in terms of polarization. If both your drone and transmitter antennas are vertically oriented, signals will travel much more efficiently compared to mismatched orientations.
As a personal tip, when I upgraded to a cloverleaf antenna for my FPV setup, I noticed a substantial improvement in both range and clarity of my video feed—definitely a game-changer! 🌟
Optimizing Flight Conditions
Choosing the right flying conditions can have a surprising effect on range and signal:
- Avoiding Obstacles: Always fly in open areas without buildings, trees, or other structures obstructing the line of sight. Any interference can weaken your signal and result in erratic control.
- Fly High: If safe and permissible, gaining a bit of altitude can help minimize obstacles between your transmitter and drone, thus enhancing your signal range.
- Weather Check: Monitor the weather conditions, especially wind and humidity. Flying on clear, calm days generally yields better results than gusty days when signals can easily be disrupted.
Firmware Updates and Settings
Keeping your drone and transmitter firmware up to date is often overlooked, but it can significantly enhance performance:
- Update Regularly: Manufacturers frequently release firmware updates that improve signal processing and overall flight performance. Check your manufacturer’s website or app regularly for updates.
- Adjust Transmitter Settings: Some transmitters allow you to tweak settings that can enhance range. For example, increasing the transmission power, if supported, can effectively boost your range.
Battery Power Management
Adequate battery power is essential for maintaining signal strength:
- Fresh Batteries: Always ensure your transmitter and drone batteries are fully charged before flying. A weak battery can lead to poor signal transmission and reduced range.
- Battery Quality: Invest in quality batteries that can handle demanding situations, especially if you’re increasing your signal strength or range.
Final Considerations
By upgrading antennas, optimizing flight conditions, keeping firmware current, and managing battery power, you can significantly enhance your drone’s range and signal strength. Having experienced both improved control and breathtaking views by utilizing these techniques, I can assure you that exploring those further horizons is well worth the effort. Next, we’ll delve into essential safety tips and regulations to ensure that your flying adventures are not only exhilarating but also responsible!

Safety Tips and Regulations
As exhilarating as it is to soar through the skies with your drone, prioritizing safety and adhering to regulations is essential for both your well-being and the broader community. Whether you’re a seasoned pilot or just beginning your aerial adventures, understanding and following safety guidelines is key to fostering a responsible flying culture. Let’s dive into some vital safety tips and the regulations you should keep in mind.
Pre-Flight Safety Checklist
Before even launching your drone, a thorough pre-flight safety checklist can help prevent accidents and ensure a successful flight:
- Inspect Your Equipment: Always check the drone’s battery life, propellers, and general condition before flying. A personal mantra I have is: “If something feels off, don’t take off.” Minor issues can lead to major problems mid-flight.
- Clear Flight Area: Ensure your launch area is free of obstacles and people. Flying in crowded spaces not only increases the risk of accidents but also can lead to regulatory violations.
- Check the Weather: Windy or stormy conditions can significantly impact your drone’s stability. Choose calm days for your flights, and keep an eye on any weather changes that may occur during your session.
- Understand Your Drone’s Limits: Familiarize yourself with the specifications and limits of your drone. Knowing its range and operational altitude can help you stay within safe parameters.
Flying Responsibly
It’s not just about launching and capturing stunning aerial views; flying responsibly is vital for your safety and that of others:
- Maintain Visual Line of Sight: Always keep your drone in sight. It’s not only a legal requirement in many areas but also helps you respond quickly to any situations that may arise.
- Avoid No-Fly Zones: Respect no-fly zones including airports, military bases, and populated areas. Many drones come with built-in geofencing features to help prevent accidental intrusions into these areas—don’t disable them!
- Respect Privacy: Always consider the privacy of others. Avoid flying over private properties, and be mindful of capturing images or videos of people without their consent. Not only is this respectful, but it also helps you avoid legal complications.
Know the Regulations
Familiarizing yourself with local drone regulations is a must. Here are a few key points to consider:
- Register Your Drone: In many countries, drones over a certain weight must be registered with the relevant aviation authority. Make sure to check the rules in your region.
- Licensing Requirements: Depending on where you live, operating a drone for commercial purposes may require special licensing or permissions. If you plan to monetize your drone usage, consult your local regulations.
- Altitude Restrictions: Many regulations specify maximum altitude for drone flights (usually 400 feet). Adhering to these limits is crucial to avoid interference with manned aircraft.
Wrap-Up on Safety and Regulations
Incorporating these safety tips and staying updated on regulations will help ensure enjoyable flying experiences while keeping safety a priority. By approaching your drone hobby responsibly, you’ll contribute to a positive perception of drone usage within your community. And remember, the ultimate goal of flying is not just about capturing stunning visuals but also about enjoying the journey while ensuring everyone’s safety. As we wrap things up, we’ll also explore how upgrading your transmitter can further enhance your flying experience and capabilities.

Upgrading Your Transmitter
Now that you’re equipped with essential safety tips and an understanding of regulations, it’s time to focus on enhancing your flying capabilities further by upgrading your transmitter. A well-chosen transmitter can significantly improve your control, flexibility, and overall flying experience, and it’s a wise investment as you grow in your hobby. Let’s delve into the various aspects of upgrading your transmitter, including reasons to upgrade, what to look for, and the benefits that can come with a new setup.
Why Upgrade Your Transmitter?
Upgrading your transmitter might seem like an extravagant step, but it can lead to a transformative experience in how you pilot your drone. Here are some compelling reasons to consider:
- Enhanced Control: A higher-quality transmitter often provides more channels, giving you greater control over other features such as camera gimbals or additional payloads. This flexibility can open up new creative possibilities during your flights.
- Improved Range and Signal: Advanced transmitters often come with more powerful signal technology, leading to a more robust and reliable connection. This results in longer flying distances without the fear of losing control or video feed.
- Customization Options: Many mid-range and advanced transmitters allow for customizable controls and programmable switches. This personalization means you can tailor your flying experience to your specific needs and style.
- Better Feedback: A high-end transmitter often features haptic feedback and clear visual displays, allowing you to receive vital flight information at a glance, which can be crucial during more complex maneuvers.
Personal experience taught me the importance of a good transmitter when I switched from a basic model to a more advanced one. The difference in responsiveness and range was night and day—and it opened up new pathways for creativity during my aerial shoots! 🕊️
What to Look for When Upgrading
To make the most out of your upgrade, keep these features in mind:
- Channel Count: Aim for a transmitter with at least 6 to 8 channels. This leaves you room for future expansions or additional functions as you grow in your flying capabilities.
- Frequency: Look for transmitters that operate on 2.4 GHz for better performance. Some models even support multiple frequencies, offering flexibility in crowded areas.
- Ergonomics: Comfort is crucial if you’re flying for extended periods. Test the weight and grip of the transmitter before purchasing to ensure it feels right in your hands.
- Programmable Functions: Check for the availability of multiple programmable switches and knobs, allowing you to set up your transmitter for various modes and settings quickly.
Installation and Compatibility
Before upgrading, it’s essential to ensure that the new transmitter will be compatible with your drone. Many manufacturers provide compatibility lists for their products. Additionally, calibration may be necessary after installation to ensure everything is functioning correctly.
Enjoying the Benefits
Once you’ve made the switch, don’t forget to spend some time getting familiar with the new transmitter’s features. Practicing in a safe environment will help you build confidence as you learn the ins and outs of your upgraded equipment. Upgrading your transmitter represents not just a financial investment but also a commitment to improving your drone flying skills. By enhancing your control and flexibility, you’ll open up a world of creative possibilities—whether that’s capturing stunning landscapes or simply enjoying the thrill of flight. As you embark on this new part of your drone journey, remember that it’s about having fun, exploring new horizons, and enjoying the exhilarating experience that flying has to offer. Happy flying! 🛩️
Conclusion
As we wrap up this comprehensive exploration of drone flying, from understanding transmitters to safety tips and the benefits of upgrades, it’s clear that the world of drones offers boundless possibilities for enthusiasts of all skill levels. Reflecting on my personal journey, there’s something magical about controlling a drone and witnessing the breathtaking views from above. Whether capturing stunning landscapes or simply enjoying the thrill of maneuvering through the skies, the experience is unmatched.
A Recap of Key Takeaways
Let’s take a moment to revisit some of the essential points we’ve covered throughout this guide to reinforce your knowledge and prepare you for your next flight:
- Understanding Transmitters: Selecting the right transmitter is crucial for maximizing your control over your drone. From the various types available to the key features to consider, a thoughtful choice will enhance your flying experience.
- Setting Up Your Gear: Properly pairing your transmitter with your drone, along with calibrating controls, ensures smooth and responsive flights. Taking the time to set this up eliminates frustration down the line.
- Advanced Techniques: Mastering stick movements and understanding flight modes has the power to transform your flying skills. The more comfortable you become with your controls, the more creative you can be in the air.
- Troubleshooting and Maintenance: Common issues can arise during your flying sessions, so knowing how to troubleshoot problems and maintain battery health is vital. It prevents unexpected disruptions and keeps your equipment in peak condition.
- Safety and Regulations: Prioritizing safety is paramount. Respect local regulations and stay informed about the guidelines surrounding drone operation to foster a positive flying culture.
- Upgrading Your Transmitter: A timely upgrade can lead to enhanced performance and more enjoyable flights. Understanding what to look for will ensure that your investment pays off in the long run.
Embrace the Aerial Adventure
Ultimately, the journey in drone flying is not just about the destination but the experiences you gather along the way. It’s about the challenges faced, the skills developed, and the breathtaking viewpoints that only aerial perspectives can provide. I remember my first successful flight; the thrill of smoothly controlling the drone through the air while capturing sweeping shots of the coastline was an unforgettable moment. As you venture into the world of drone flying, don’t hesitate to experiment, learn, and connect with fellow enthusiasts. Engaging with communities—whether online or in person—can provide invaluable insights, support, and a deeper sense of camaraderie.
Your Next Steps
Now that you’ve armed yourself with knowledge, the skies are truly the limit. Embrace your passion for flying, continue to learn about new technologies, and remember that every flight is an opportunity to grow. So, grab your drone, connect your transmitter, and get ready to take to the skies! With all this information at your fingertips, may your future flights be filled with excitement and creativity. Happy flying! 🌤️✨