
Introduction
Overview of Mavic Pro
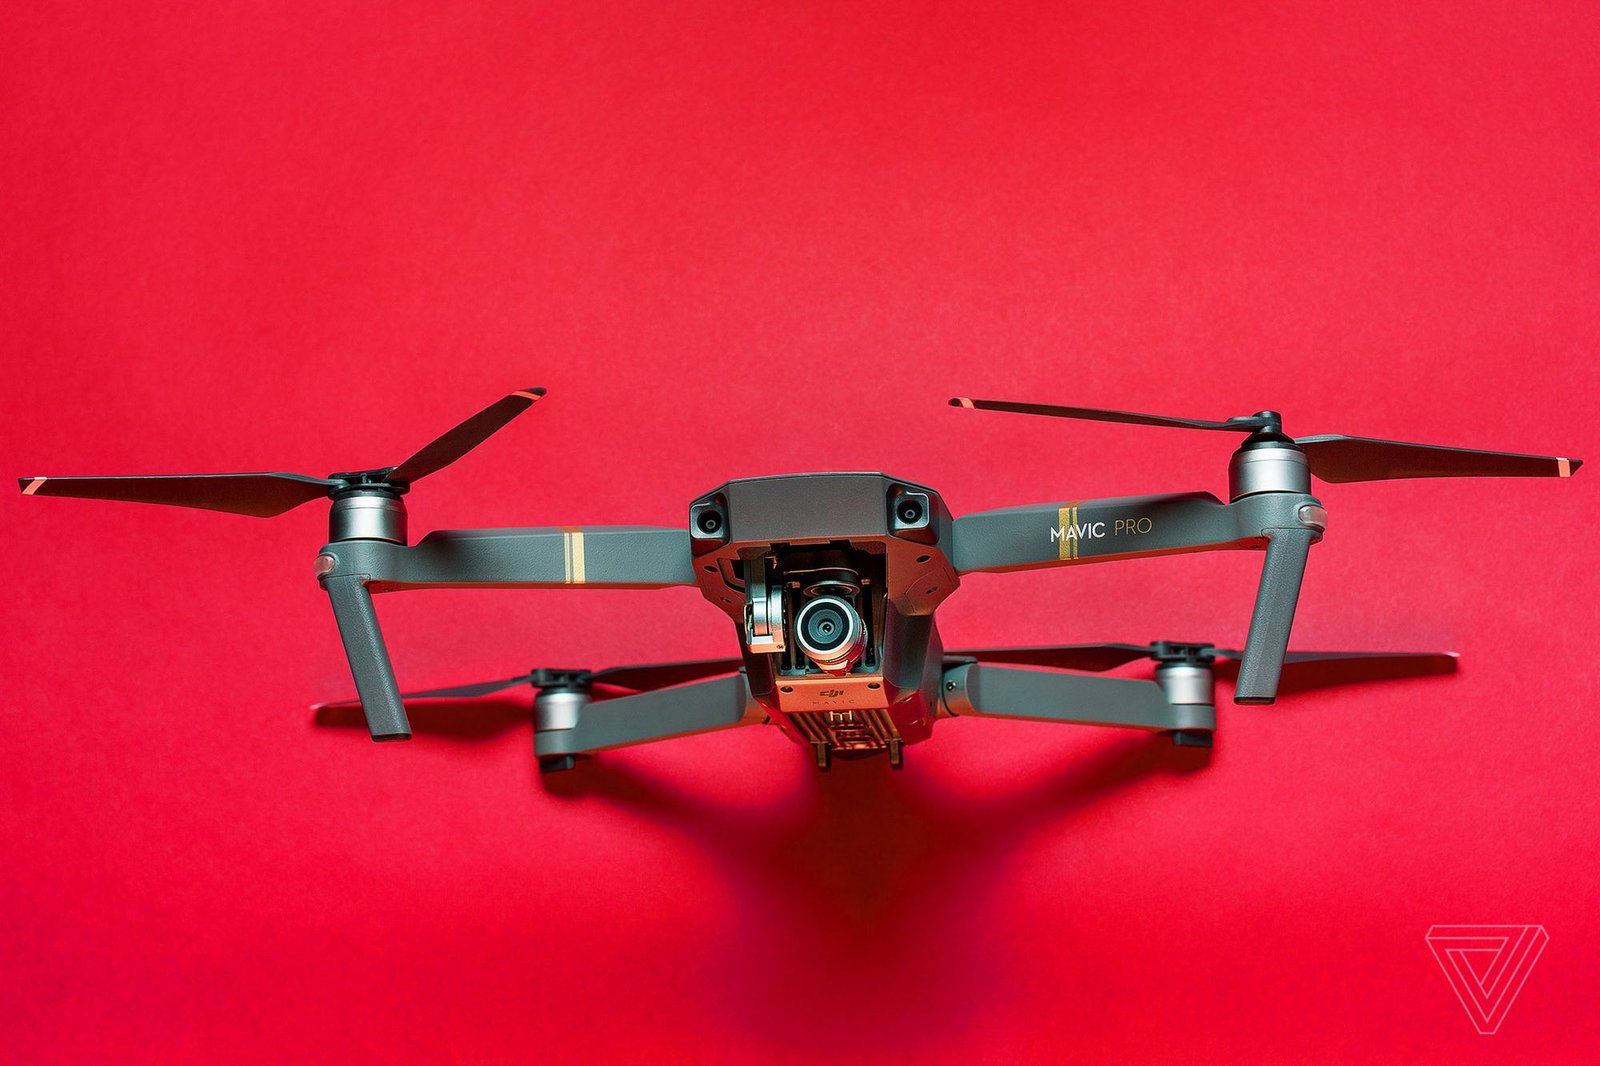
The Mavic Pro is a remarkable drone that has made quite a name for itself in the aerial photography and videography community. Its compact design allows for easy transport, while its impressive flight features make it a favorite among both amateurs and professionals. With a camera capable of shooting 4K video and stunning 12MP photos, you can essentially carry a high-end camera right in your backpack. Not to mention, the Mavic Pro boasts an impressive flight time of around 27 minutes, which is quite commendable compared to many other drones in its class. Many users appreciate its advanced autonomous flying capabilities, which include features like ActiveTrack, TapFly, and gesture control, allowing you to focus more on capturing that perfect shot rather than steering the drone. Beyond its tech-savvy features, the Mavic Pro has a user-friendly interface, making it accessible to newcomers who might be intimidated by drone technology. Overall, whether you’re interested in capturing family vacations or dreaming of launching a career in aerial photography, the Mavic Pro can be an excellent investment. However, before you make that leap and purchase the Mavic Pro, it’s crucial to consider the comprehensive costs involved.
Importance of Understanding the Real Cost
When it comes to investing in a drone like the Mavic Pro, the initial purchase price is only the tip of the iceberg. The “real cost” of owning a drone encompasses several hidden fees and ongoing expenses that can accumulate over time. Having a clear understanding of these additional costs will help you plan better and avoid unexpected financial surprises down the road. Here are some factors to consider:
- Understanding the Full Financial Commitment: Just as you wouldn’t buy a car without considering fuel, insurance, and maintenance, the same principle applies here. By breaking down the expenses, you can make an informed decision about whether the Mavic Pro aligns with your budget and needs.
- Avoiding Buyer’s Remorse: Many find themselves elated at the prospect of owning a high-tech gadget like the Mavic Pro, only to be taken aback by additional costs that they hadn’t foreseen. Understanding the real cost before purchasing helps mitigate the chances of regret.
- Planning for Accessories and Upgrades: Drones can benefit significantly from various accessories like extra batteries, carrying cases, and enhanced camera equipment. Knowing what extras you might want to buy gives you a clearer picture of the overall cost. For instance, an extra battery can cost around $89, which might seem trivial but adds up over time.
- Budgeting for Maintenance and Repairs: Drones might encounter wear and tear. Having a handle on possibly needing repairs—whether due to crashes or general upkeep—will keep your finances in check.
In essence, understanding the full-spectrum costs associated with the Mavic Pro is vital for anyone considering this investment. For example, I remember when I first purchased my Mavic Pro; I was enamored with its capabilities and couldn’t wait to take it for a spin. But after plugging in for accessories, insurance, and basic maintenance, I quickly realized that the effective “real cost” was significantly more than just the sticker price. This realization is essential not just for covering your bases financially, but also for ensuring that you are ready to embrace the full experience that comes with owning a drone. The joy of aerial photography is immense, but it’s even better when you are informed and prepared for what lies ahead. In the sections that follow, I’ll dive deeper into specific costs associated with the Mavic Pro including the initial investment, maintenance, hidden fees, and comparison with other models. This will give a crystal clear view of what carrying this powerful piece of technology involves. Not only will you walk away with a better understanding of the Mavic Pro itself, but you’ll also gain insights into how to navigate the world of drones more effectively. Stay tuned as we uncover all aspects associated with the Mavic Pro so you can fly confidently, knowing you’re well-prepared for both the joyous and financial responsibilities that come with drone ownership! 🌟

Initial Investment of Mavic Pro
Purchase Price
Let’s take a closer look at the initial investment required to own the Mavic Pro, starting with the purchase price. Currently, the Mavic Pro retails for approximately $999, depending on promotions or package deals. While this price tag may initially seem steep, it’s essential to remember the advanced technology and features packed into this compact drone. Many first-time drone buyers often cite this purchase price as a significant factor in their decision-making process. I remember when I decided to buy my Mavic Pro; the moment I placed that order, a mix of excitement and anxiety washed over me. Would it be worth every penny? Here are a few important considerations regarding the purchase price:
- Sales Tax and Shipping: Don’t forget to account for sales tax, which varies by state. These charges can add an additional 6-10% to the final cost. If you choose to buy it online, factor in shipping costs that may apply.
- Warranty Options: Consider investing in extended warranty options. While the Mavic Pro comes with a standard warranty, accidents happen. An extended warranty can provide peace of mind, typically costing anywhere from $100 to $200.
- Retailer Variations: Prices may vary from retailers, especially during holiday sales or promotional events. Keep an eye out for bundle offers, as they often include useful accessories at a discount that can make your purchase more palatable.
While the upfront investment is substantial, many users find the value it brings in terms of creativity and entertainment far exceeds the initial financial commitment.
Additional Accessories Cost
Now that you’ve covered the subscription price, let’s delve into the additional accessories you might want or need. Buying the Mavic Pro is just the beginning; accessories can significantly enhance your flying experience and address potential challenges. Here’s a breakdown of common accessories and their estimated costs:
- Extra Batteries ($89 each): One of the wisest investments you can make is purchasing extra batteries. Each battery gives you an additional 27 minutes of flying time, so if you’re planning an extensive shoot, having more than one battery is invaluable.
- Carrying Case or Backpack ($50 – $150): Protecting your drone during transport is essential. A sturdy carrying case or backpack secures your drone and offers compartments for your accessories to keep everything organized.
- ND Filters ($40 – $100): If you plan on shooting high-quality videos, consider getting neutral density (ND) filters. They help manage exposure in bright sunlight, allowing for smoother, more professional-looking footage.
- Propeller Guards ($20): These simple devices can save your propellers (and your drone itself) during mishaps. They help prevent damage during beginner flights or crowded areas, adding a layer of insurance for around $20.
- Landing Gear Extensions ($20): These can provide extra clearance for your drone when landing, which can be especially useful on uneven surfaces.
In total, by the time you’ve added a couple of batteries, a carrying case, and maybe even some filters, you could be looking at an extra $300 to $500—or more—added onto the initial purchase price. It’s critical to consider these additional costs as part of your overall financial commitment to owning a Mavic Pro. A practical tip from my experience: Always prioritize what you genuinely need vs. what seems attractive. For example, when I started flying, I was tempted to buy every accessory on the market. However, I quickly realized that focusing on essentials first—like extra batteries and a solid case—greatly improved my flying experience without breaking the bank. In summary, the initial investment for a Mavic Pro can swiftly add up when you include the purchase price and accessory costs. Understanding these components helps you establish a realistic budget, allowing you to fully embrace the joy of flying without any financial blindsides. As we continue to dive deeper into the ongoing expenses and maintenance costs associated with the Mavic Pro in the following sections, it’s vital to keep in mind that this drone is an investment—one that, when taken care of, will provide endless enjoyment and creativity. 🌈
/cdn.vox-cdn.com/uploads/chorus_asset/file/13064841/akrales_161026_1250_0252.0.0.1478270169.jpg)
Maintenance Cost of Mavic Pro
Regular Maintenance Expenses
Now that you’ve considered the initial investment with the Mavic Pro, it’s time to focus on maintenance costs. Just like any other high-tech gadget, the Mavic Pro requires regular maintenance to keep it performing at its best. While it doesn’t demand a significant commitment in terms of time or money, knowing what to expect can save you from potential pitfalls down the line. One area often overlooked is basic maintenance. To keep your drone in top shape, it’s essential to invest a little effort in regular upkeep. Here’s a breakdown of common maintenance tasks and their associated costs:
- Battery Care: Proper battery maintenance is crucial. You should avoid fully depleting them before a charge and make sure you store them at a 40-60% charge level when not in use. This simple practice can extend battery life significantly. Each battery costs about $89, so treating them right can save you from repeated replacements.
- Firmware Updates: Keeping the drone’s firmware up-to-date is essential for optimal performance. Luckily, this is often free of charge and can be done via the DJI GO 4 app. Regularly checking for updates will ensure that you’re utilizing every new feature and improvement the manufacturer provides.
- Cleaning: Regular cleaning of your drone, especially the camera lens and sensors, is vital. A simple cleaning kit, which may cost around $15-30, can help keep your drone dirt-free, ensuring top-notch performance and image quality.
- Propeller Checks: Given how much wear and tear they endure, checking your propellers for signs of damage should be part of your routine. Propellers cost about $10-15 each, and replacing them when necessary can prevent more severe damage to your drone.
- Software Tools: Consider investing in applications that assist with flight planning and battery management. While many are free, some premium apps may charge around $20, depending on their features.
By getting into a regular maintenance routine, you can keep your Mavic Pro flying efficiently. It not only saves you money in the long run but also ensures that you’ll be capturing those stunning aerial shots hassle-free.
Repair and Replacement Costs
Despite your best maintenance efforts, accidents can happen, especially if you’re a beginner or trying to capture that perfect shot. This is where repair and replacement costs come into play. Understanding possible damage types and their associated costs is an essential aspect of being a responsible drone owner. Here are some common repair issues and potential costs:
- Propeller Damage: Crashes or hard landings can lead to damaged propellers, which typically cost $10-15 each. Always carry extras if you’re planning an extensive flying session.
- Gimbal Repairs: The gimbal is one of the most critical components for capturing stable and high-quality footage. If it malfunctions, repairs can cost between $100 and $200, depending on the issue.
- Camera Replacement: Accidental impacts can also damage the camera, which typically costs around $300 to $600 for a replacement. However, some parts may be covered under warranty, making it crucial to read the fine print when signing up.
- Motor Issues: If the motors start producing unusual sounds or behave erratically, a repair may be required. This can set you back about $30-50 per motor to replace, and you might need to engage a professional technician, depending on your comfort level with repairs.
- Controller Repairs: If your remote control faces issues, repairs can range from $50 to $150, depending on what needs fixing.
To help manage these potential costs, you may want to consider getting insurance for your drone. Insurance costs typically range from $10 to $30 monthly, depending on the coverage. Trust me; when something goes wrong and it costs you hundreds of dollars to repair or replace components, having insurance suddenly feels like the smartest decision you could’ve made. Speaking from experience, I’ve faced my share of mishaps—like misjudging my landing approach and damaging a propeller. Thankfully, I learned to stock up on spare parts, which saved time and minimized disruptions in flight plans. Maintaining your Mavic Pro is an ongoing commitment, but it’s an investment that pays off by keeping your drone operational and your shoots hassle-free. Remember, the more carefully you maintain and protect your drone, the less you’ll spend on repair and replacement costs in the long run. As we move forward, we’ll explore hidden fees and charges associated with owning a Mavic Pro, which can often surprise many first-time drone owners. By being prepared and informed, you can enjoy the thrills of flight without unnecessary financial worries! 🌤️

Hidden Fees and Charges
Subscription Fees
As we’ve unpacked the notable maintenance costs of owning a Mavic Pro, it’s crucial to shed light on another area that many prospective drone owners tend to overlook: hidden fees and charges. These often include subscription fees for software and services that can significantly impact your budget. In today’s world, where flight planning and aerial footage management almost always involve technology, knowing what services you might be inclined to subscribe to can lead to a more pleasant experience. Here are some common subscription services you might find beneficial—and their associated costs:
- DJI Care Refresh: This is a service that provides coverage for accidental damage. Depending on your model, the subscription fee typically ranges from $99 to $199 per year. For that price, you may get up to two exchanges for damaged drones; this can be a lifesaver if you accidentally crash during a thrilling flight.
- DJI Cloud Services: While not mandatory, subscribing to cloud services for storage of your flying footage can be very helpful. These costs vary widely, generally from $9.99 to $29.99 a month based on storage capacity and additional features like sharing capabilities.
- Flight Planning Apps: Many apps designed to enhance your flight experience often come at a subscription cost. For instance, a popular flight planning app might charge around $10 monthly for premium features such as real-time airspace maps and weather updates. Having access to this kind of information can noticeably improve your flying experience and safety.
- Editing Software: If you plan on creating high-quality videos from your aerial footage, software like Adobe Premiere Pro and Final Cut Pro can also incur monthly fees of about $20 to $50. While these tools can enhance the quality of your content, budget accordingly because it adds to the overall expenses.
These subscription services may not be essential, but many avid drone users find them exceedingly valuable. I remember being skeptical about subscribing to a cloud storage service initially. However, after losing a few precious shots due to inadequate local storage, I realized that those extra few dollars were well worth the peace of mind and convenience.
Insurance Costs
Next up on the list of hidden charges is insurance. While not technically a “hidden fee,” many new drone owners don’t think about the need for insurance until it’s too late. Insuring your Mavic Pro is an extra layer of protection, especially considering the investment you’ve made in both the drone and its accompanying gear. Here are some key considerations regarding insurance costs:
- General Liability Insurance: Many drone operators opt for general liability insurance, costing between $500 and $1,500 annually, depending on coverage limits. This insurance can protect you against claims in case of property damage or physical injury caused by your drone while in operation. It’s particularly recommended if you plan to use your drone commercially.
- Hull Insurance: This covers physical damages to your drone, ranging from $300 to $1,000 annually based on the model and plan. This can be a safety net, especially when flying in challenging environments or while testing new maneuvers.
- Accidental Damage Coverage: Some policies provide coverage for accidental crashes or losses, which might cost around $150 to $300 annually. This is worth considering for nervous flyers or those still perfecting their skills.
While insurance may seem like an added cost, especially for recreational users, it can save you considerable money and pain down the road. I once had a close call when I lost control of my drone and it landed in a tree. Thankfully, I had hull insurance, which covered the recovery operation. Without it, I would have been facing a significant repair bill. Consider your flying style and environment when assessing whether to invest in insurance. If you fly in busy areas or plan on commercial use, you might find that insurance costs pale in comparison to potential financial liabilities you might face. In conclusion, the Mavic Pro brings incredible opportunities for creativity and exploration, but you must be aware of hidden fees and charges that accompany its ownership. Subscription services can enhance your experience greatly, while insurance provides peace of mind. Being informed about these potential costs helps you balance your budget more effectively, ensuring there are no unpleasant surprises as you navigate the world of drones. Next up, we’ll dive into upgrading and enhancement expenses, shedding light on how to elevate your Mavic Pro without breaking the bank. 🚀

Upgrading and Enhancement Expenses
Software Updates
Now that we’ve navigated through the hidden fees and charges associated with owning the Mavic Pro, it’s time to explore another aspect of drone ownership: upgrading and enhancement expenses. This area encompasses both software updates and hardware upgrades, crucial elements to ensure your drone remains top-notch without requiring a brand-new model. Starting with software updates, it’s important to keep your Mavic Pro’s firmware and apps up-to-date. DJI frequently releases updates that improve functionality, enhance performance, and add fascinating new features. The best part? Most software updates from DJI are free, which is a delightful perk in the world of tech! Here are some key points regarding software updates:
- Performance Improvements: Regularly installing updates helps enhance performance. You might notice better battery efficiency, smoother flight controls, or even improved obstacle detection.
- New Features: Often, DJI rolls out exciting new modes or tools through updates. For instance, they might introduce a new shooting mode that transforms your creative options. Keeping your drone updated means you’ll continually receive new capabilities as they’re released.
- Bug Fixes: Like any electronic device, glitches may occur. Update patches often fix existing bugs, meaning a smoother flight experience. An embarrassing error I faced involved not updating my firmware before a big shoot; my drone went haywire mid-flight! Lesson learned—now I check for updates before every adventure.
To successfully manage software updates, set aside a specific time every month to check for updates in the DJI GO 4 app. This proactive approach ensures you never miss out on enhancements, keeping your flying experience fresh and exciting.
Hardware Upgrades
While software updates keep your Mavic Pro running smoothly, hardware upgrades can take your flying experience to an entirely new level. Investing in quality hardware can enhance image quality, extend battery life, and improve maneuverability. Here are some useful hardware enhancements to consider:
- Camera Filters: Upgrading your visual storytelling toolkit with ND (neutral density) filters and polarizers can help enhance photo and video quality. These filters can run anywhere from $30 to $150, depending on the brand and quality. I remember the first time I put a polarizer on my camera; the difference was astonishing—colors popped like never before, and glare was eliminated.
- Battery Upgrades: As previously mentioned, extra batteries are critical for longer flight times. However, you can also consider high-capacity battery options, which could cost around $150. These batteries give you even more flight time, allowing you to capture extended footage without interruptions.
- Propellers: Special performance propellers, which are often quieter and offer better efficiency, are available at about $20-30 per set. These can help translate your flying skills into smoother aerial shots and longer flight times, reducing motor strain.
- GPS Tracking Devices: Adding a GPS tracker to your drone can help recover it in case of a flyaway scenario. These trackers can cost between $30 and $100 and provide peace of mind when flying in challenging environments.
- Carrying Cases: While technically an accessory, investing in a rugged carrying case is worthwhile for protecting your drone and its components. A high-quality case can cost from $50 to $150, but it ensures your drone’s safety during travel, especially for those adventurous trips I love to take.
Setting a budget for potential upgrades is essential, so prioritize based on your needs and what you find most beneficial. Every pilot’s needs differ based on their flying style and purpose—whether that’s casual photography, commercial work, or competitive drone racing. From personal experience, it can be tempting to go on a shopping spree the moment you own a drone. I fell into this trap, thinking I needed every gadget available. But after a few flights, I learned that strategic upgrades—especially in filters and batteries—made a more immediate impact on my quality of flight and outputs. In essence, upgrading your Mavic Pro through software updates and hardware enhancements not only helps maximize its potential but also enriches your overall flying experience. As you explore these options, consider what will yield the most significant returns in terms of creativity and convenience. As we move forward to conclude our comprehensive exploration of costs associated with owning a Mavic Pro, let’s reflect on the various aspects we’ve covered. From initial expenses and maintenance to hidden fees and upgrades, understanding these costs will ultimately lead to a more informed and enjoyable drone ownership experience. Get ready for some insightful final thoughts! ✨

Comparison with Other Drone Models
Cost Analysis with Mavic Air
Now that we’ve explored the expenses associated with the Mavic Pro, it’s time to see how it stacks up against other popular drone models. The Mavic Air is a strong contender in the sub-drone category and offers some impressive features for a lower price point. A cost analysis between the Mavic Pro and Mavic Air reveals some intriguing insights that can help in your decision-making process. Mavic Air Overview:
- Purchase Price: You can typically find the Mavic Air for around $799, making it a bit more affordable than the Mavic Pro. However, always consider rebates or seasonal sales, as prices can fluctuate.
- Camera Specs: The Mavic Air shoots 4K video at 30fps and offers a 12MP camera, which is slightly less powerful than the Mavic Pro’s offerings. While you’re still getting excellent image quality, you won’t have the same level of control or the professional feel that the Pro brings.
- Flight Time: The Mavic Air boasts around 21 minutes of flight time, which is commendable but falls short of the Mavic Pro’s 27 minutes. If long flights are crucial for your capture sessions, that’s a vital consideration.
So, what does all this translate to in terms of value? While the Mavic Air is priced lower than the Mavic Pro, it really shines in portability due to its smaller and lighter frame. If you’re into hiking and capturing shots from far-off trails, Mavic Air might just be your best friend. However, when weighing this against the Mavic Pro’s extra features—which include a superior camera and better flight statistics—many would argue that the additional investment in the Pro is worthwhile. Personal Experience: There was a time when I debated between the Mavic Air and Mavic Pro. I loved that the Air was lighter, making it easier for my treks. However, after chatting with a seasoned photographer, I realized that the Pro offered the professional touch I needed for quality work. Ultimately, my choice was based not only on performance but also on how often I’d be utilizing those pro features.
Value Comparison with Phantom Series
Next on the list is a comparison between the Mavic Pro and the Phantom Series, particularly the Phantom 4 Pro. This model represents a different set of features and, correspondingly, a different price range that creates unique pros and cons for potential buyers. Phantom 4 Pro Overview:
- Purchase Price: The Phantom 4 Pro generally retails for around $1,499. That’s a sizeable jump compared to the Mavic Pro’s initial price, making it crucial to weigh the added benefits.
- Camera Quality: What sets the Phantom 4 Pro apart is its incredible camera system. With a 1-inch 20MP sensor capable of capturing 4K video at 60fps, it’s a favorite among professional videographers. If high-quality footage is your game, this might be the drone for you.
- Flight Time: The Phantom 4 Pro has an impressive flight time of about 30 minutes, similar to the Mavic Pro. However, the Phantom’s size and aesthetics make it less portable; it’s not something you’d easily toss in your backpack.
When comparing value, the Phantom Series tends to shine in terms of camera capabilities and flight stability, thanks to its larger frame. If you’re focusing primarily on high-end cinematography, the investment may be justified for you. Personal Insight: I once joined a workshop where several friends flew their Phantom drones. While the image quality was certainly mesmerizing, I found carrying around a bulky Phantom cumbersome compared to my Mavic Pro. This balance between mobility and quality is essential to consider before making a decision. Ultimately, the choice between the Mavic Pro, Mavic Air, and the Phantom Series boils down to your individual needs and goals as a drone pilot. Your budget and how you plan on utilizing the drone should guide your decision-making process as you weigh the cost against the features that are most important to you. To sum it all up, each model has its strengths and weaknesses, and understanding the costs involved can empower you to make a more informed choice in the vast world of drones. Regardless of your choice, investing time into understanding these comparisons can lead you to a fantastic flying experience that meets your needs. As we wrap up our discussion on the Mavic Pro and comparisons with other models, the insights shared will prove invaluable as you continue your drone journey. Happy flying! 🌤️