Introduction
Overview of the DJI Mini 3 Pro Controller
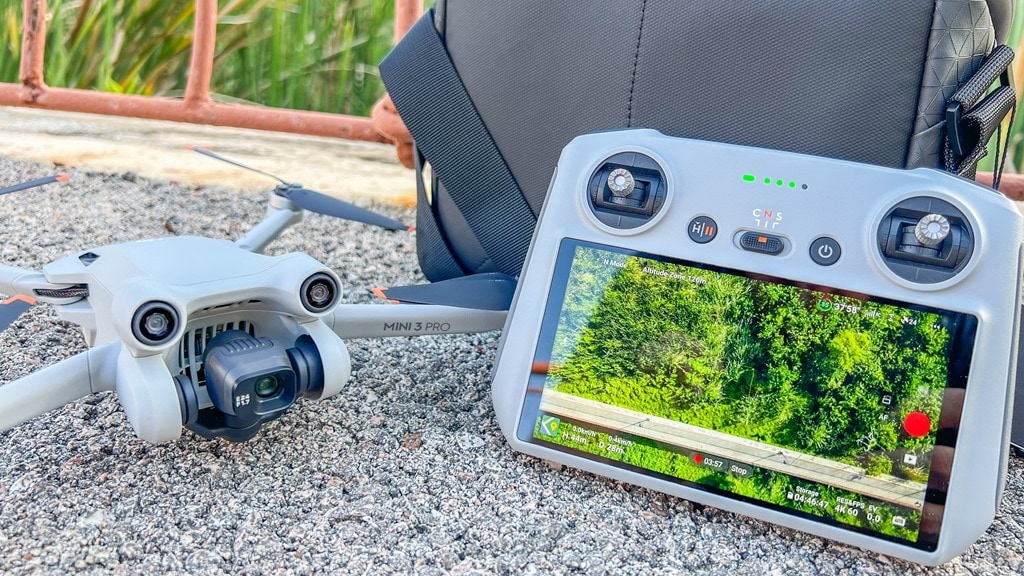
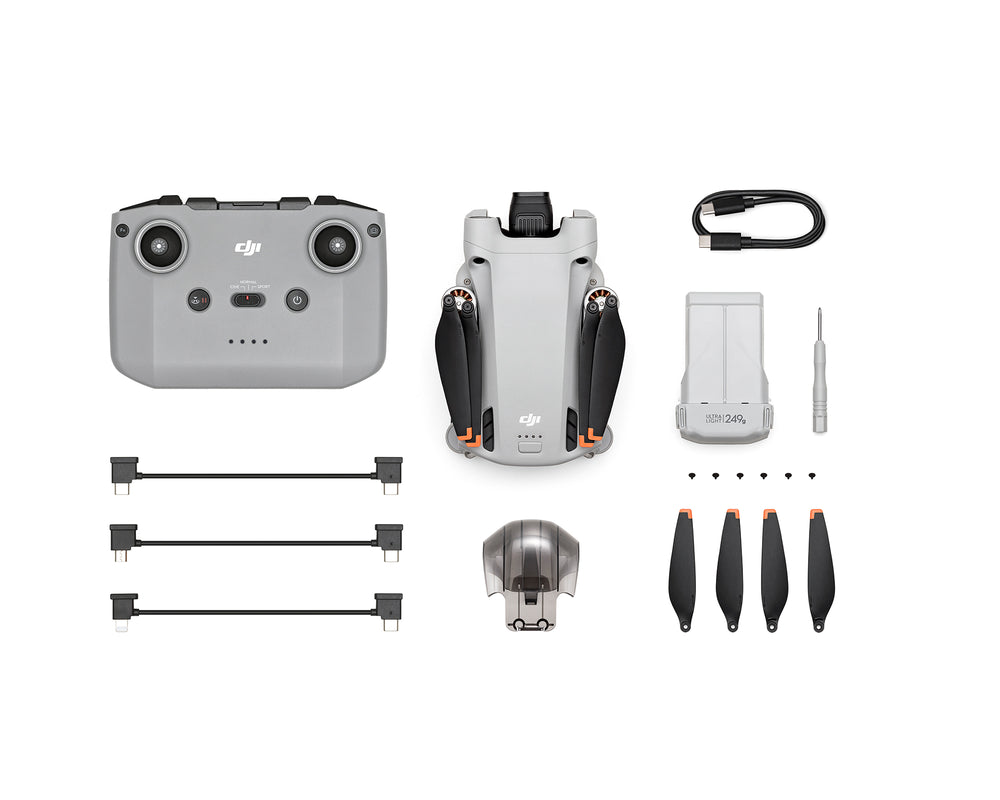
The DJI Mini 3 Pro Controller represents a significant leap forward in drone operation, offering enthusiasts a refined experience that merges enhanced technology with user-friendliness. This controller is thoughtfully designed to complement the DJI Mini 3 Pro drone, providing you with a seamless connection while maximizing your aerial photography and videography potential. With its sleek design and intuitive layout, the controller is not just comfortable; it opens up a world of possibilities:
- Longer Transmission Range: With O3 transmission technology, you can explore further than ever before.
- Enhanced Battery Life: The controller features an advanced battery management system, ensuring long flight sessions without interruptions.
- Ergonomics: Its lightweight materials and user-friendly design make it easy to hold for extended periods, reducing fatigue.
When you first pick up the DJI Mini 3 Pro Controller, it feels like you’re holding a device that’s ready to unleash your creativity in the skies. I still remember the first time using it. As I adjusted my grip and felt the responsive buttons, I knew that my aerial adventures were about to get a serious upgrade!
Evolution of DJI Mini Series
The DJI Mini Series has seen impressive growth since its inception, evolving from a compact entry-level drone into a powerful and sophisticated tool for both hobbyists and professionals. Let’s take a quick journey through its transformation:
- DJI Mini 1: Launched as a lightweight option, it was perfect for casual flyers. Although it lacked advanced features, its affordability caught the attention of many.
- DJI Mini 2: This upgrade introduced 4K video capabilities, drastically improving image quality. Its remarkable ease of use made it a favorite among newcomers.
- DJI Mini SE: While sharing features of its predecessors, the SE focused on introducing budget-friendly options for those seeking an introductory model without losing quite a bit in quality.
- DJI Mini 3 Pro: The latest in the series, this model brings in improved camera specs, obstacle avoidance systems, and the new Pro Controller that unlocks sophisticated features, enhancing your flying experience.
The evolution of the DJI Mini Series showcases how DJI expands upon each iteration, integrating feedback and technological advancements to produce drones that cater to evolving user demands. Reflecting on my own journey, I can confidently say that each model has brought something unique to the table. The transition from the original Mini to the Mini 3 Pro was not just an upgrade in features but a broader vision for drone technology that seeks to empower every user. As you delve into the features of the DJI Mini 3 Pro Controller, you’ll see how it complements this evolution, making your flights more sophisticated and enjoyable. Ready to dive deeper? Let’s explore the key features next!
Key Features of DJI Mini 3 Pro Controller
Improved Flight Performance
One of the standout features of the DJI Mini 3 Pro Controller is its unparalleled flight performance, which sets it apart from previous models. With advancements in both hardware and software, you can expect elevated functionality that truly enhances your flying experience.
- Extended Flight Range: With O3 transmission technology, the Mini 3 Pro can cover a remarkable distance, ensuring stable and clear video feed from up to 12 km away. Imagine soaring high above breathtaking landscapes without the worry of losing connection.
- Stability in Windy Conditions: The controller has been optimized to maintain control and stability in challenging weather. Whether you’re flying on a breezy day or capturing action shots near the coast, you’ll feel confident in the drone’s ability to hold its course.
- Smart Return to Home: The Mini 3 Pro can intelligently navigate back to its takeoff point when the battery runs low or if it loses signal, adding an extra layer of security. I remember once flying my drone at a magnificent beach and feeling relieved knowing it would safely return as the sun began to set.
These performance enhancements allow you to explore more adventurous locations and push the boundaries of your aerial photography.
Upgraded Control Options
Another significant advancement of the DJI Mini 3 Pro Controller lies in its upgraded control options. The intuitive design and technology packed into this controller give you unprecedented command over your drone:
- Customizable Buttons: With the ability to assign specific functions to buttons, you can tailor your flying experience to suit your needs. Whether it’s adjusting camera settings on the fly or switching modes quickly, you have customization at your fingertips.
- Enhanced Touchscreen Interface: The built-in touchscreen offers a user-friendly experience, allowing you to easily access settings and features with just a swipe. I’ve found that being able to adjust my camera while keeping an eye on the drone’s surroundings makes for much smoother shooting sequences.
- Dual Control Modes: The Mini 3 Pro Controller allows you to switch between novice and expert flight modes. This versatility means you can start out with easier controls as a beginner and progressively explore advanced features as your skills improve.
- Gesture and Voice Control: An exciting addition is the gesture control and voice command feature, which enables you to take photos or record videos just by raising your hand or giving verbal commands. It’s perfect for self-portraits or capturing spontaneous moments without fumbling with the controller.
With these upgraded control options, you’re not just piloting a drone; you’re actively engaging with it, making every flight a personalized adventure. As you prepare to set out for that next aerial journey, the DJI Mini 3 Pro Controller has packed in features that fuel your creativity and unlock new stories waiting to be told! Ready to dive into the setup process? Let’s get you flying!

Setting Up Your DJI Mini 3 Pro Controller
Charging and Battery Management
Before you take to the skies with your DJI Mini 3 Pro Controller, it’s crucial to set up and manage your battery effectively. A well-prepared controller means fewer interruptions during your flights!
- Initial Charging: When you first unbox your controller, make sure to fully charge it using the provided USB-C cable. This ensures that you get the most out of your flight time. I remember being so eager to fly my new drone that I overlooked this step, and it resulted in a bit of a waiting game before my first takeoff!
- Battery Indicator: The controller comes equipped with a battery indicator LED, which allows you to easily assess the charge level. Consider this; if you’re planning an extensive flight session, it’s wise to keep an eye on this indicator to avoid any surprises mid-flight.
- Smart Battery Management: The DJI Mini 3 Pro Controller features an intelligent battery management system that optimizes charging and discharging cycles. One handy tip is to avoid letting the battery drop below 20% regularly—it can help extend its lifespan!
- Follow Best Practices: Always store your battery in a cool, dry place. Avoid leaving it in hot conditions, as excess heat can damage the battery cells. You want to be ready for that next adventure, right?
Managing the battery efficiently is key to ensuring that you’re always powered up and ready to capture stunning views!
Connecting to Your Drone
Once your controller is fully charged, it’s time to connect it to your DJI Mini 3 Pro drone. This is a straightforward process designed to get you flying quickly.
- Power On: Start by turning on both the controller and the drone. Hold the power button for a couple of seconds until you see the lights illuminate. That feeling of anticipation is always a rush for me!
- Pairing Process:The first time you connect, follow these simple steps:
- On the controller, navigate to the menu and select ‘Connect to Drone.’
- On your drone, locate the small pairing button, usually positioned near the battery compartment. Press it.
- Press the button on the controller when prompted, and voilà! Your devices are paired!
- Check Connectivity: Once connected, it’s wise to check the status on both screens to confirm a strong signal. You’ll know it’s successful when you see a solid connection icon.
- Calibration: Before your first flight, take a moment to calibrate the controller. This step ensures that your drone responds accurately to your commands, making your experience more intuitive.
- Update Firmware: Don’t forget to check for any firmware updates for both the controller and drone. Keeping your devices updated means accessing the latest features and improvements!
Connecting your DJI Mini 3 Pro Controller to your drone sets the stage for countless memorable adventures. With your battery managed and your drone ready to fly, you’re well on your way to capturing breathtaking views from above. Let’s unfurl those wings and take to the skies!
Understanding the Controls
Buttons and Functions
Once you’re all set up with your DJI Mini 3 Pro Controller, it’s time to dive into understanding its controls. Familiarizing yourself with the buttons and functions will make your flying experience much smoother and more enjoyable!
- Left and Right Sticks: The dual analog sticks provide precise control over your drone’s movements. Push forward to ascend, pull back to descend, and move left or right to navigate horizontally. It took me some practice to get the hang of this—making those delicate maneuvers during my first few flights felt like trying to parallel park a car!
- Camera Controls:
- Shutter Button: Located at your fingertips, it allows you to take photos or start video recording with a quick press.
- Record Button: Separate from the shutter, this button lets you control video recording specifically, so you don’t accidentally stop recording while capturing stills.
- Gimbal Control Wheel: This dial adjusts the tilt of your camera, enabling you to shoot breathtaking angles while the drone is in motion.
- Function Buttons:
- Return to Home (RTH): Pressing this button will automatically guide your drone back to its launch point, making it essential for those first-time flyers (or even seasoned ones) who might lose sight of their drone.
- Mode Switch: This switch allows you to toggle between different flying modes, whether you want to fly easily without much hassle or dive into more advanced features.
Getting comfortable with these buttons is key to handling your drone like a pro!
Modes and Settings
Once you’ve got a grip on the controls, the next step is understanding the available flight modes and settings. Each mode unlocks different capabilities that cater to varying skill levels, ensuring everyone can find their groove.
- Beginner Mode: This setting limits altitude and distance, which is great for easing new pilots into the air. The first time I flew in beginner mode, I felt a mix of excitement and nerves. Knowing I couldn’t stray too far helped me relax and enjoy the ride!
- Normal Mode: Ideal for most scenarios, normal mode offers a good balance of control and freedom. You’ll be able to fly farther and higher, perfect for capturing larger landscapes.
- Sport Mode: This mode allows for faster speeds and more agile maneuvers, satisfying those adrenaline junkies among us! I vividly recall my first time engaging sport mode—my heart raced as I zipped through trees, capturing the thrill of speed.
- Cinematic Mode: Ideal for filmmakers, cinematic mode softens the controller’s response to provide smoother footage. Perfect for those swooping camera shots where you want to create stunning cinematic effects without sudden jerks.
- Settings Menu: Dive into the settings menu for customizable controls—this is where you can adjust parameters like video resolution, photo quality, and more to match your creative vision.
Understanding these modes and settings allows you to tailor your flying experience to your preferences, whether you’re cruising for fun or capturing the perfect shot for your next project. You’re well on your way to navigating the skies like a pro, so let’s get ready to explore some advanced techniques next!
Mastering Advanced Flight Techniques
Waypoint Navigation
With a solid understanding of the controls and settings of your DJI Mini 3 Pro, you’re ready to elevate your drone piloting skills by mastering advanced flight techniques. One of the most exciting features to explore is waypoint navigation, which allows you to plan a route for your drone to follow autonomously.
- Setting Waypoints: This feature enables you to define specific geographic points in the app that the drone will fly to. You can create a complete aerial path by simply tapping these points on a map. I vividly recall using this feature during a scenic hike; I mapped out a series of breathtaking cliffside shots, and the drone executed the flight perfectly while I could focus on enjoying the view.
- Using the Flight Plan: Once your waypoints are set, the drone will navigate and capture images or videos at each point based on your preferences. This is incredibly useful for landscape photography where timing and angles need to be carefully controlled.
- Adjustable Parameters: You can customize altitude, speed, and camera angle for each waypoint to achieve your desired shot. The flexibility of this feature is a game-changer—especially when you want to create a stunning time-lapse video or capture a sunset from different angles.
Overall, mastering waypoint navigation not only expands your storytelling possibilities but also enhances your flying experience by taking some of the guesswork out of capturing stunning shots.
ActiveTrack and Follow Modes
Another incredible feature of the DJI Mini 3 Pro is its ActiveTrack and follow modes, which are perfect for capturing dynamic subjects, from people to moving vehicles. This functionality adds a whole new layer to your aerial photography or videography.
- Understanding ActiveTrack: ActiveTrack allows the drone to recognize and follow a specific subject automatically. For example, I once tested this feature while biking through a picturesque park. I activated ActiveTrack, and the drone effortlessly followed me along the trail, ensuring I was perfectly framed in every shot!
- Follow Modes:There are different variations:
- Trace Mode: The drone follows behind or in front of your subject at a defined distance, which is fantastic for capturing action-packed sports footage.
- Profile Mode: Here, the drone positions itself to the side of the subject, creating a dramatic profile shot as they move.
- Spotlight Mode: This mode keeps the camera focused on a subject while the drone flies freely around it, making it great for dynamic videos where you want to showcase the surroundings.
- Customization Options: With ActiveTrack, you can adjust the speed, distance, and framing options for your shots. This empowers you to add a personal touch to your creative projects; just think about the stunning perspectives you can achieve!
Mastering ActiveTrack and follow modes allows you to capture creative and dynamic footage without needing another person to operate the camera. You become the director, able to focus on your shoot with confidence, knowing the technology has your back. As you explore these advanced techniques, your storytelling will significantly evolve, opening up endless possibilities for capturing incredible visuals. Next, let’s look at how to enhance your photography and videography with optimal settings!

Enhancing Your Photography and Videography
Camera Settings and Modes
Now that you’ve mastered advanced flight techniques with your DJI Mini 3 Pro, it’s time to shift your focus to enhancing your photography and videography skills. Great drone footage hinges on understanding your camera settings and modes.
- Resolution and Frame Rate: Start by selecting the appropriate resolution and frame rate for your needs. For instance, if you want crisp visuals, opt for 4K resolution. I’ve learned that shooting at 30 frames per second (fps) gives beautiful, smooth video, but if you’re planning a slow-motion effect, crank it up to 60 fps for mesmerizing playback.
- Shooting Modes:
- Single Photo: Perfect for capturing a single moment in time. Use this for landscape shots when you want the best quality.
- Burst Mode: Take a series of photos in rapid succession. It’s superb for fast-moving subjects like birds or athletes.
- AEB (Auto Exposure Bracketing): Create stunning HDR images by taking multiple shots at different exposures. Trust me, the results are often breathtaking!
- Camera Adjustments:Delve into exposure settings:
- ISO: A lower ISO (100-400) is great for bright conditions, while a higher ISO (800+) is useful for low-light scenarios, though it may introduce some noise.
- Shutter Speed: Aim for a shutter speed of at least double your frame rate to avoid motion blur; for instance, if you’re shooting at 30 fps, set your shutter speed to 1/60th of a second.
Getting familiar with these camera settings allows you to adapt quickly to different shooting environments, ultimately enhancing the quality of your captures!
Tips for Capturing Stunning Shots
Once your camera settings are dialed in, it’s time to think about how to frame your shots effectively. Here are some tips I’ve gathered through my own experiences:
- Plan Your Composition: Before taking off, think about your shot composition. Applying the rule of thirds can transform your visuals—imagine dividing the frame into a three-by-three grid and placing your subject along those lines for a more balanced image.
- Utilize Natural Light: Early mornings and late afternoons provide the best soft lighting for stunning photographs. I still recall one sunset flight where the golden hour painted the landscape, creating magical shots that I treasure.
- Vary Your Angles: Don’t be afraid to experiment with different angles. Low shots can add drama, while higher viewpoints can give a stunning overview of landscapes. I often switch between different heights during a single flight, capturing unique perspectives I didn’t anticipate.
- Frame the Subject with Surroundings: Use elements of the landscape to frame your subject, drawing viewers’ attention and adding depth to your images.
- Stability is Key: To get the best results, ensure your drone’s movements are smooth and controlled, especially when zooming in on subjects. Utilize filter options for added smoothness in your shots.
By applying these settings and tips, you’ll be well on your way to capturing breathtaking photography and videography. As you put these strategies into practice, you’ll discover your personal style and storytelling voice through your aerial imagery. Ready to explore troubleshooting and maintenance tips next? Let’s keep that drone flying smoothly!

Troubleshooting and Maintenance Tips
Common Issues and Solutions
Every drone pilot knows that sometimes, things don’t go as planned. Fortunately, the DJI Mini 3 Pro is designed with user-friendly troubleshooting in mind, allowing you to swiftly handle common issues.
- Lost Connection Issues:If your drone loses communication with the controller, check:
- Ensure your controller and drone are fully charged.
- Make sure there are no obstacles blocking the signal.
I once had my drone lose connection while flying through some trees! I quickly adjusted my position to gain a clear line of sight, and the connection was restored.
- Update Notifications: If the drone prompts you for a firmware update, it’s essential not to ignore these messages. Keeping your firmware updated can prevent glitches and improve performance. Try checking the DJI app regularly for updates—consider it your drone’s health check!
- Camera Not Responding:If the camera isn’t functioning as expected:
- Ensure the lens is clean and free from obstructions.
- Restart both the drone and the controller, as simply refreshing the connection can often solve the problem.
- Wobbly Footage: This can happen due to gusty winds or incorrect gimbal settings. In windy conditions, try to shoot in Cinematic mode for smoother footage and don’t hesitate to adjust the gimbal settings in the app to enhance stabilization.
Identifying and resolving these common issues quickly will give you more confidence during your flights and lessen those anxious moments!
Care and Maintenance Guidelines
Maintaining your DJI Mini 3 Pro not only prolongs its life but also ensures that you capture the best footage possible. Here are some essential care and maintenance guidelines I’ve picked up over time:
- Regular Cleaning: After each flight, take a moment to clean the drone and controller. Use a microfiber cloth to wipe down the body and lenses. I often carry a small brush to easily clear out dust from the propellers and sensors, which can be vital for optimal performance.
- Propeller Inspection: Before every flight, inspect your propellers for any signs of damage or wear. Cracks or chips can lead to performance issues—removing damaged propellers is a quick and straightforward task, and I’ve had to replace mine more than once after a close encounter with some branches!
- Battery Management:
- Avoid letting the batteries drop below 20% regularly, as this can decrease their lifespan.
- Store batteries in a cool, dry place to help maintain their health.
- Periodically check for swelling or damage, as this could indicate a need for replacement.
- Software Updates: Aside from firmware, check the DJI Fly app for any new software features that could enhance your flying experience or improve performance based on user feedback.
By incorporating these care and maintenance practices into your routine, you can rest assured that your DJI Mini 3 Pro will serve you well for many exciting flights ahead. Now that you’re well-versed in troubleshooting and maintenance, let’s explore how to expand your creativity with third-party apps!
Expanding Your Creativity with Third-Party Apps
Compatible Apps for Enhanced Features
Once you’ve mastered flying your DJI Mini 3 Pro and have a solid grasp on your photography and videography, it’s time to take things up a notch with third-party apps. These applications can supercharge your creative potential, offering features that can elevate your projects to new heights.
- Litchi: This popular app provides advanced waypoint mapping features, allowing you to create comprehensive flight plans beyond what the default DJI Fly app offers. I remember using Litchi for a drone project where I had precise coordinates marked for a multi-location shoot; the app executed the plan flawlessly, saving me time and ensuring stunning footage!
- DroneLink: Another great option, DroneLink, allows for 3D mapping and intelligent control through its intuitive interface. If you’re into creating complex aerial surveys or 3D maps, this app can streamline the process.
- SkyPixel: Looking to share your work? SkyPixel offers a community platform where you can showcase your aerial photos and videos. It’s a great way to connect with other drone enthusiasts for inspiration and feedback. I uploaded some of my scenic shots to SkyPixel, and the response was overwhelming; it really motivated me to push my creative boundaries!
- AirMap: Keeping track of airspace regulations and local rules can be daunting. AirMap provides real-time data about where you can fly, ensuring you stay compliant while having fun. Getting familiar with the areas I could safely explore made all the difference in my flying experience.
Integrating any of these third-party apps into your workflow can unlock hidden potentials and help you gain a competitive edge in your drone photography and videography endeavors.
Integration with Editing Software
Once you’ve captured stunning footage with your drone, the next step is to bring that material to life through editing. Integrating your drone’s shots with professional editing software can truly enhance your final products. Here are a few popular editing tools to consider:
- Adobe Premiere Pro: A favorite among video editors, this powerful software allows for intricate editing, motion graphics, and color correction. I’ve found that its versatility lets me transform my raw drone footage into polished films, enhancing both visual appeal and storytelling.
- Final Cut Pro: If you’re a Mac user, Final Cut Pro is an excellent option for seamless editing. Its user-friendly interface makes it easy to cut and stitch together footage while providing advanced color grading tools to bring out the best in your captures.
- DaVinci Resolve: Known for its exceptional color grading capabilities, DaVinci Resolve is perfect for those who want to give their drone footage that extra visual flair. I’ve used this software to elevate the colors in my sunset shoots, adding that rich, vibrant quality that really pops.
- iMovie: For beginners or casual users, iMovie offers a great entry point into video editing. It’s simple to navigate, allowing you to quickly assemble clips and add transitions without feeling overwhelmed.
By combining your drone footage with these editing applications, you can enhance the quality of your final product, making each project as stunning as possible. As you dive into these creative avenues, remember that becoming skilled with both flying and editing takes time and practice. Embrace the learning process, and soon enough, you’ll unlock a world of creativity using your DJI Mini 3 Pro! Let’s delve into safety guidelines and best practices next to ensure your adventures remain enjoyable and responsible.

Safety Guidelines and Best Practices
FAA Regulations and Compliance
As a drone pilot, it’s essential to understand and comply with the regulations set forth by the Federal Aviation Administration (FAA) to ensure the safety of yourself, your drone, and those around you. These rules are designed not just for compliance but to promote responsible flying.
- Register Your Drone: If your drone weighs over 0.55 lbs, you must register it with the FAA. The registration process is straightforward and fast, and it provides you with an FAA registration number that needs to be visible on your drone. I remember registering mine and feeling a sense of responsibility, knowing I was adhering to the necessary regulations.
- Know the Airspace: Before flying, familiarize yourself with the types of airspace you’ll be flying in. Make sure to check for any restrictions or Temporary Flight Restrictions (TFRs) in the area. Resources like the FAA’s UAS Data Team or apps like AirMap can provide real-time airspace information.
- Altitude Limits: The FAA dictates that recreational drone pilots should not fly above 400 feet. This regulation is crucial because flying higher could interfere with manned aircraft. I’ve made it a habit to set a reminder alarm on my device, ensuring I stay within this limit while focused on capturing footage.
- Maintain Visual Line of Sight: Always keep your drone within your line of sight during flight. This is not only a regulation but also a safety measure. There have been times I’ve had to correct my drone’s path quickly, which would have been impossible if I couldn’t see it.
Understanding and adhering to FAA regulations fosters a landscape of safety and respect, making flying enjoyable and trouble-free!
Safety Tips for Responsible Flying
Once you’re equipped with the knowledge of regulations, it’s time to instill safe practices into your flying routine. Here are some safety tips to keep in mind that I’ve learned from my own flying experiences:
- Pre-Flight Checklist: Always conduct a pre-flight check. Look for any damage to your drone, ensure all systems are operational, and check battery levels. Trust me, overlooking this step can lead to unexpected surprises mid-flight!
- Be Aware of Your Surroundings: Keep an eye out for obstacles like power lines, trees, and people. I’ve had some close calls, and maintaining situational awareness is crucial for avoiding collisions.
- Weather Awareness: Check weather conditions before flying, and avoid windy or rainy days. I learned this lesson the hard way on a slightly breezy day when my drone struggled to maintain stability, leading to some nerve-wracking moments!
- Respect Others’ Privacy: While capture incredible footage is the goal, it’s important to respect the privacy of others. Avoid flying over private properties without permission and be mindful of where you point your camera.
- Stay Sober and Focused: Always fly under the influence of nothing but good vibes. Just like driving, operating a drone requires focus and clear-headedness; distractions and impairments can lead to poor decisions.
Implementing these safety tips will enhance your flying experience while keeping it enjoyable for everyone around you. Respecting the airspaces and others is not only a best practice; it ensures that drone technology can continue to thrive in harmony with our daily lives. With safety guidelines solidly in place, you’re all set to embark on your next exciting aerial adventure! Up next, let’s wrap everything up with a look at how you can unlock the full potential of your DJI Mini 3 Pro Controller and the future of drone technology.

Conclusion
Unlocking the Full Potential of DJI Mini 3 Pro Controller
Throughout this blog, we’ve explored the multifaceted features, advanced techniques, and responsibilities that come with flying your DJI Mini 3 Pro. The capability of this controller is remarkable, allowing you to seamlessly take breathtaking aerial shots and explore more creatively. To truly unlock its full potential, it’s key to:
- Master the Features: As we’ve discussed, diving deep into waypoint navigation, ActiveTrack, and the various camera settings will allow you to capture stunning imagery. In my own experience, those moments of exploration were enhanced by experimenting with these features; each flight became a new story waiting to unfold.
- Stay Updated: Always keep your firmware and apps updated. With every new software update, DJI often introduces improvements and exciting new features. I make it a regular practice to check for updates before any big filming session so I don’t miss out on the latest and greatest.
- Engage with the Community: Connect with other drone enthusiasts, share experiences, and learn from one another. Engaging with fellow pilots not only enriches your knowledge but can also spark creativity. I’ve picked up several tips from community forums that transformed my approach to drone flying.
By combining these strategies, you’ll be able to elevate your drone flying and photography to new heights—quite literally!
Future Innovations in Drone Technology
As we conclude this exploration of the DJI Mini 3 Pro Controller, it’s exciting to look ahead at the future of drone technology. The industry is progressing at breakneck speed, and upcoming innovations are likely to redefine aerial photography, videography, and beyond.
- Improved Autonomous Flying: As artificial intelligence continues to develop, future drones will likely feature even more sophisticated autonomous functions, allowing for complex maneuvers, obstacle avoidance, and enhanced tracking capabilities.
- Increased Battery Life: Innovations in battery technology could significantly extend the flight time of future drones. Imagine a drone that can capture footage for long stretches without needing a recharge. It’s a game-changer I’m eagerly anticipating!
- Enhanced Camera Capabilities: Future models may focus even more on delivering higher resolutions, improved low-light performance, and better image stabilization, which will match the demands of both casual users and professional photographers alike.
- Broader Connectivity: As 5G networks become more widespread, expect to see enhanced connectivity options for drone operation, resulting in smoother video transmission and real-time data sharing.
As drone technology evolves, staying informed about these innovations will not only keep you at the forefront of aerial creativity but can also enhance the way you tell your stories through the lens of your DJI Mini 3 Pro. In summary, your journey with the DJI Mini 3 Pro Controller is just beginning. By mastering its features and embracing the future of drone technology, you’re setting the stage for limitless possibilities in your aerial adventures. Happy flying, and may each flight be filled with creativity and inspiration! 🚀✨