
Introduction
Overview of Aerial Photography
Aerial photography is truly a captivating art form that provides unique perspectives of our world. By capturing images from above, photographers can showcase stunning landscapes, urban layouts, and intricate details that are often missed from the ground level. Imagine soaring high above your favorite city or serene natural scenery; the ability to encapsulate such beauty is what makes aerial photography both thrilling and rewarding. Many aspiring photographers start with traditional equipment but are soon drawn to the incredible potential of drones. Drones not only allow for a more creative approach to photography; they also make it easier to access remote or hard-to-reach areas. Here are a few compelling reasons why aerial photography is gaining popularity:
- Vast Perspectives: Drones can capture expansive areas, providing a breadth of view that ground photography often can’t achieve.
- Creative Angles: The ability to shoot at various altitudes and angles opens up a world of artistic possibilities.
- Low-Cost Exploration: Compared to hiring a helicopter or plane, drones are an affordable way to shoot aerial photography.
- Accessibility: Drones can go where photographers might struggle to reach, such as uneven terrains or over water.
Many photographers rave about the impact aerial shots have on storytelling. Whether it’s showcasing the vastness of a mountain range or the intricate layout of a city, aerial images add a layer of depth to visual narratives that simple ground-level photos just can’t replicate.
Introduction to DJI 3 Drone
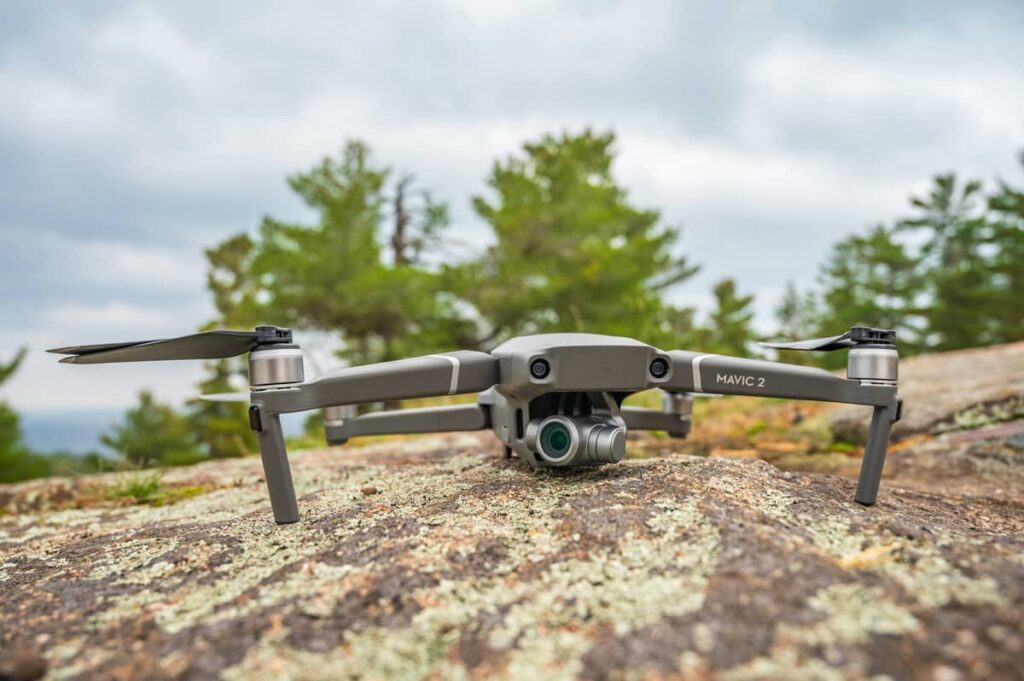
If you’re venturing into the world of aerial photography, the DJI 3 Drone is an excellent choice to kickstart your journey. This model has been lauded for its ease of use and robust capabilities, making it friendly for both beginners and seasoned drone users alike. This drone is packed with impressive features:
- High-quality camera: With a 12 MP sensor, it captures stunningly detailed imagery and 4K video footage.
- Easy-to-use interface: The intuitive controls simplify the flying experience, even if you’re new to drones.
- Range and Stability: It offers remarkable altitude and distance coverage, combined with rock-solid stability for optimum photography.
Think back to the excitement you felt as a child watching the clouds drift by or the joy of flying a kite on a sunny day. Now, imagine channeling that nostalgia into capturing breathtaking aerial views with the DJI 3. The rush of sending your drone high above, while watching live video streamed back to your personal device, is an exhilarating experience. Not only does the DJI 3 make it easy to get started; it also supports you as you grow and develop your skills. Whether you’re aiming to expand your photography portfolio, enhance your videography projects, or simply explore the skies, this drone is a remarkable tool that invites endless creativity. Equipped with the DJI 3, you’re well on your way to mastering the beautiful world of aerial photography!

Understanding DJI 3 Drone
Features and Specifications
Getting to know the DJI 3 Drone is crucial if you want to unlock its full potential for aerial photography. This drone isn’t just a flying camera; it is a sophisticated device packed with features that enhance your shooting experience. Here are some standout specifications you’ll appreciate:
- Camera Quality: It boasts a 12 MP camera that shoots stunning high-definition images and can record video in 4K at 30 frames per second. This means your shots will be crisp and vibrant.
- Flight Time: With a maximum flight time of about 23 minutes, the DJI 3 allows you to gather ample footage before needing to recharge. That’s enough time to explore the skies and capture those perfect moments.
- Range: You can fly your drone up to 5 kilometers away! This impressive range opens up a world of possibilities for capturing dramatic landscapes or unique cityscapes.
- Intelligent Flight Modes: From “Follow Me” to “Waypoints,” the DJI 3 includes various intelligent modes that make your aerial photography experience seamless and exciting.
- Gimbaled Stability: The 3-axis gimbal stabilizes your camera, ensuring that even in windy conditions, your footage remains steady and professional-looking.
When I first tested the DJI 3, I was amazed by how easy it was to operate, especially with the clear live feed that comes through your mobile device. Whether you’re a hobbyist or a serious photographer, these features make it easier to create beautiful aerial shots that can elevate your work.
Benefits of Using DJI 3 Drone
Why should you consider the DJI 3 for your aerial photography projects? Let’s talk about the benefits it brings to the table.
- User-Friendly Design: The intuitiveness of its controls allows even novices to feel like pros. Whether you’re new to drones or an experienced pilot, the DJI 3 makes it simple to get started.
- Versatile Applications: This drone isn’t limited to one type of photography. It’s suited for real estate, landscape, event coverage, and even film-making, giving you the versatility to adapt to different scenarios.
- High-Quality Results: As mentioned earlier, its camera captures vivid images and smooth videos, ensuring your final results stand out—just like the breathtaking views you capture.
- Safety Features: The DJI 3 has built-in obstacle avoidance, return-to-home functionality, and GPS positioning. These features ensure a more secure flying experience and lower the risk of accidents.
- Community and Support: With an established user base, finding resources, tutorials, and support is easy. You’re not just buying a drone; you’re joining a community that shares tips and tricks, ultimately enhancing your skills.
Investing in a DJI 3 Drone enriches your photographic toolkit, offering opportunities to explore and capture stunning aerial vistas. With its balance of advanced features and user-friendliness, it truly is a game changer in the world of aerial photography. So, prepare to unleash your creativity, and let the DJI 3 take your visual storytelling to new heights!

Getting Started with DJI 3 Drone
Unboxing and Assembly
The moment has finally arrived! After eagerly anticipating your DJI 3 Drone’s delivery, it’s time to dive into the exciting process of unboxing and assembling your new aerial companion. As you crack open the box, you’ll be greeted by a well-organized array of parts. Here’s what you can expect to find inside:
- DJI 3 Drone: The star of the show, ready to take flight.
- Remote Controller: This is your guide in the sky, essential for flying and capturing stunning images.
- Batteries: Make sure you charge these up before your first flight.
- Propellers: These little guys are crucial for lift-off, so check for any additional spare pairs.
- Charging Cable and Adapters: Keep everything powered and ready to go.
- User Manual: This might seem mundane, but trust me; it’s worth a look for tips on getting started.
Once you have everything laid out, assembling the drone is straightforward. Just follow these steps:
- Attach the Propellers: Align them with the appropriate motors and twist until you hear a click. Yes, a satisfying sound, just like when you snap on a lid!
- Insert the Battery: Slide it into place until it clicks securely. Easy peasy!
- Connect the Remote Controller: Make sure it’s paired with the drone, typically done through the DJI app you’ve downloaded on your smartphone.
After all that, take a moment to appreciate your handiwork. The DJI 3 looks sleek and ready to soar!
Basic Controls and Settings
Now that your drone is assembled, it’s time to familiarize yourself with the basic controls and settings. The best way to feel confident is to practice, but here’s a foundational guide to get you started:
- Powering On: To turn on the drone, press the power button on the battery and hold it until you see the lights activate. Do the same for the remote controller.
- Takeoff: Use the left joystick to throttle up gently. A good rule of thumb is to keep your movements smooth and gradual. Feel the drone lift smoothly off the ground!
- Direction Guidance: The right joystick controls the orientation:
- Up/Down: Ascend or descend.
- Left/Right: Rotate the drone.
- Camera Controls: Once you’re in the air, use the designated buttons on the remote to snap pictures or record footage.
- Basic Settings: Make sure to check some settings:
- First, adjust the camera resolution to your preference—whether you want images or videos in 4K.
- Look for the “Return to Home” feature. This is essential to set up, as it ensures that your drone can find its way back to you safely if connection is lost or the battery runs low.
Every now and then, I still remember my first flight. Nervous yet excited, I felt a rush of adrenaline when I took off. With the DJI 3’s user-friendly controls, I quickly became more comfortable navigating the skies. Before you launch, it’s beneficial to do a brief pre-flight check, ensuring everything is in top shape. Take a deep breath, channel that excitement, and prepare to explore the world from a whole new perspective! With the DJI 3’s features and your newfound skills, the sky is literally the limit!

Mastering Aerial Photography Techniques
Capturing Stunning Aerial Shots
Now that you’ve got your DJI 3 Drone up and running, it’s time to elevate your photography game by mastering aerial shots. Capturing stunning perspectives requires both creativity and a bit of technique, but don’t worry; I’ve got some tips to help you shine in the sky. First, consider your composition. A great shot doesn’t just happen; it’s carefully framed:
- Rule of Thirds: Imagine your frame is divided into a 3×3 grid. Position key elements along these lines or at their intersections for a balanced view.
- Leading Lines: Use natural features like rivers, roads, or pathways that draw the viewer’s eye through the photo. It creates depth and leads them on a journey through the image.
- Foreground Interest: Including something in the foreground, like a tree or a rock formation, can add depth to your photo. It creates layers that make your image more engaging.
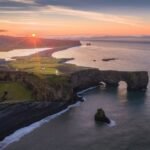
Next, pay attention to the time of day you choose to fly. The golden hour—an hour after sunrise or before sunset—offers perfect lighting for breathtaking shots. The soft warm tones can add a magical quality to your images, making them stand out. During one of my early morning flights, I captured a quaint coastal village bathed in golden light, and it felt like a scene from a movie. The gentle waves reflecting the sun created a composition that storytelling enthusiasts would rave about. Lastly, take some time to experiment with different heights and angles. Try shooting straight down for a unique perspective or fly a bit higher to capture expansive landscapes.
Tips for Perfect Aerial Video Footage
While stunning photographs are impressive, mastering aerial video footage can take your skills to the next level. Here are some tips to ensure your videos are smooth, engaging, and cinematic:
- Plan Your Shots: Just as you would with photography, having a shot list can help. Outline what you want to capture and the angles you’d like to showcase.
- Use Your Gimbal: The DJI 3’s 3-axis gimbal is your best friend for steady footage. Always ensure it’s calibrated before you fly. If you find your shots shaking, consider practicing some basic flying maneuvers to stabilize your video.
- Smooth Movements: Avoid jerky motions. Focus on transitioning your drone smoothly from one angle to another. For example, practice slow pans (turning the drone’s camera left or right) and gentle ascents/descents.
- Vary Your Shots: Mix aerial shots with ground-level views. This can bring a sense of scale to your footage. For instance, start high above a mountain, then descend to showcase the details of the trails below.
- Post-Production: Editing software can greatly enhance your footage. Add transitions, correct colors, or overlay music to give your videos a professional touch. Software like Adobe Premiere Pro or DaVinci Resolve can work wonders.
When I created my first aerial video showcasing a local hiking trail, I mixed high-altitude shots with close-ups of the walkers, adding a new dynamic to the narrative. The end result was a vibrant representation of our community’s love for nature. Whether it’s capturing striking aerial shots or crafting perfect video footage, incorporating these techniques will not only enhance your skills but also allow your creativity to flourish. So, get out there and let your DJI 3 Drone help you tell your story from the skies!

Advanced Shooting Modes
ActiveTrack and Point of Interest
Now that you’re feeling comfortable with the basics of aerial photography, let’s dive into some of the advanced shooting modes that the DJI 3 Drone offers. Two of the most exciting modes are ActiveTrack and Point of Interest, both designed to add a new layer of creativity to your flying experience. ActiveTrack is a phenomenal feature that lets the drone automatically track a moving subject. Whether you’re filming someone cycling, running, or even surfing, this mode allows you to focus on capturing stunning shots while the drone handles the navigation. Here’s how you can make the most of ActiveTrack:
- Select Your Subject: Use the app to draw a box around the person or object you want to track. The drone will lock onto them and follow their movements.
- Choose Your Mode: You can select different tracking options, like Trace (follows from behind), Profile (follows from the side), or Spotlight (stays focused on the subject while you control the drone).
I remember my friend decided to give surfing a go, and I used ActiveTrack to film him catching waves. The result was breathtaking footage with smooth transitions that made it look like we were shooting for an action film! Point of Interest allows you to create more dynamic shots by focusing on a specific subject or landmark. The drone will circle around the object automatically, maintaining a steady altitude and maintaining focus. To use Point of Interest effectively:
- Select the Subject: Fly to your desired location and set the desired object as the center.
- Set the Radius and Altitude: You can customize how far the drone will circle and at what elevation.
This mode is excellent for capturing dramatic shots of unique environments, and I often use it during outdoor festivals or concerts to highlight the energy of the event.
Waypoints and Follow Me Mode
The DJI 3 also features Waypoints and Follow Me Mode, both of which can significantly enhance your aerial photography experience. Waypoints enable you to plan a custom flight path. You can pre-set multiple GPS locations for the drone to fly to, allowing it to create a smooth and organized shot sequence. This is especially useful for capturing sweeping landscapes or intricate urban shots. To use Waypoints:
- Set Your Waypoints in the App: You can tap on the map to create your flight path.
- Adjust Speed and Altitude for Each Point: Tailoring these settings will create a more dynamic flight experience.
Once, I used the Waypoints feature to capture a beautiful trail winding through a dense forest. The drone flew through the trees and emerged over a stunning vista, all while remaining completely stable and in control. Follow Me Mode is another nifty feature that allows the drone to follow you wherever you go. This can come in handy for capturing your adventures during activities like hiking, biking, or even dance performances. Simply activate Follow Me, and the drone will keep you in its sights. It’s incredibly empowering to have the drone handle the movements while you’re free to enjoy the moment, knowing you’re capturing everything on film. Once, I took it hiking to a nearby peak, where it gracefully followed me while I enjoyed the view, resulting in some epic footage. Harnessing these advanced shooting modes will elevate your aerial photography to new heights. With the DJI 3 Drone’s capabilities, you’re well-equipped to capture stunning visuals, tell compelling stories, and explore new creative avenues. So, strap in, hit the skies, and let your imagination soar!

Post-Processing Tips for Aerial Photos
Editing Software Recommendations
After capturing stunning aerial shots with your DJI 3 Drone, the next exciting phase is post-processing. This is where your images can truly shine! However, with so many editing software options available, choosing the right one can be a bit overwhelming. Here are some recommendations to help you get started:
- Adobe Lightroom: This is a favorite among photographers for its robust features focused on enhancing images. The intuitive interface makes it easy to apply adjustments like exposure, contrast, and color correction while maintaining the integrity of your files. Import your aerial shots and watch them transform!
- Adobe Photoshop: If you’re looking to dive deeper into editing, Photoshop is essential. It allows for intricate retouching, layering, and masking, giving you the power to create composite images or fine-tune details in your photographs.
- Capture One: Known for its excellent color correction capabilities, Capture One is great for photographers who want a bit more control over their editing process. With its tethering ability, it’s perfect for professionals working with large batches.
- Affinity Photo: This is a cost-effective alternative to Photoshop, offering similar features for advanced retouching and editing. It’s perfect for those who want powerful editing tools without breaking the bank.
- Skylum Luminar: This software leverages AI technology to enhance images quickly. With sliders for sky enhancement and other features, it’s user-friendly and ideal for beginners who want beautiful results without spending a lot of time.
When I first started editing, I was unsure which software to use. I dabbled with Lightroom, and soon found myself lost for hours tweaking every little detail. It was during those long sessions that I truly fell in love with the editing process!
Enhancing Aerial Photos Like a Pro
Now that you’ve got your editing software, let’s explore some essential techniques to enhance your aerial photos like a pro.
- Color Correction: Aerial shots often benefit from color adjustments. Play with saturation and vibrancy to make those hues pop, but be cautious not to overdo it. A subtle touch goes a long way.
- Contrast and Exposure: Fine-tuning contrast will give your images more depth. Adjust the exposure slider carefully; start by increasing it slightly to brighten the photo, but don’t let it wash out details.
- Sharpening: Aerial images can sometimes appear soft; adding some sharpening can enhance the clarity. Pay attention to the edges but avoid excessive sharpening, which can introduce artifacts.
- Spot Removal: While flying, dust on your camera sensor can sometimes create spots in your photos. Use healing tools to eliminate these distractions. It’s like giving your images a little spring cleaning!
- Cropping and Framing: Sometimes, a well-placed crop can transform an image. Follow the rule of thirds and consider altering the aspect ratio to create a more balanced composition.
- Use Presets: If you’re short on time or looking for consistency in your style, consider using presets. Many photographers create and sell presets that simulate specific looks, making it easy to apply a polished finish with one click.
Remember, the editing process is about fine-tuning rather than drastically altering the original vision you had when capturing the image. With these tips and the right software tools at your fingertips, you’ll be enhancing your aerial photos like a seasoned professional in no time! So go ahead, dive into the world of post-processing, and watch your aerial photography transform into breathtaking works of art! Enjoy the journey of bringing your vision to life!

Safety Guidelines for Aerial Photography
FAA Regulations and Permissions
As you embark on your aerial photography journey, understanding safety guidelines is essential—not just for your safety but also for the safety of others around you. One of the main regulatory entities to be aware of is the Federal Aviation Administration (FAA). They have established clear regulations that you must follow when operating a drone for photography or any other purpose. Here’s what you need to know:
- Register Your Drone: If your drone weighs over 0.55 pounds (250 grams), you must register it with the FAA. The registration process is simple and involves providing your information online. You’ll receive a unique ID to label your drone.
- Stay Below 400 Feet: To ensure that you’re not interfering with other aircraft, keep your drone below 400 feet. This altitude guideline helps maintain a safe distance from commercial air traffic.
- Line of Sight: Always maintain visual line-of-sight with your drone. This means that you should be able to see your drone at all times during flight without the aid of binoculars.
- No Flying Over People: Avoid flying directly over crowds, as this can pose significant risks. Monitor where people are situated and find alternative locations for your shots when necessary.
- Time of Operation: Drones should not be flown after dark unless you have the proper exemptions and lighting equipment. Daylight hours provide better visibility for both flying and observing surrounding obstacles.
Before my first big photoshoot, I took the time to familiarize myself with these FAA guidelines, and I can’t stress enough how confident it made me feel knowing I was operating within legal boundaries. It’s essential to be responsible and avoid any unnecessary fines or complications.
Pre-flight Safety Checklist
In addition to understanding FAA regulations, having a pre-flight safety checklist can prevent accidents and ensure your photographs go off without a hitch. Here’s a handy list to guide you through preparing for your flight:
- Check Battery Levels:
- Always ensure that both your drone’s and remote controller’s batteries are fully charged. Carrying an extra battery is also a smart idea for longer shoots.
- Inspect the Drone:
- Conduct a physical inspection of your drone. Look for any signs of damage, loose propellers, or dirt on the lenses. A pristine drone is a happy drone!
- Update Firmware:
- Before each flight, check for any firmware updates. Keeping your drone’s software up to date ensures optimal performance and access to the latest safety features.
- Set the Home Point:
- Set your home point in the app. This feature allows your drone to return to the takeoff location in case of connection issues or low battery.
- Weather Conditions:
- Always check the weather before taking off. Windy or rainy conditions can significantly affect your flight stability and camera performance.
- Notify Others:
- If you’re flying in a crowded area or near residential properties, inform people nearby. This shows respect and helps avoid potential safety concerns.
- Have a Flight Plan:
- Map out the locations you intend to shoot. Knowing where you’re flying can help manage your time effectively and reduce impulsive decisions mid-air.
Implementing these guidelines and checks will ensure a smooth and enjoyable aerial photography experience. Over time, it becomes second nature, allowing you to focus more on your creative vision rather than worrying about the logistics. So gear up, follow safety regulations, and get ready to capture some awe-inspiring aerial shots! Remember that safety is just as important as your artistic endeavors in the enchanting world of aerial photography. Happy flying!
Troubleshooting Common Issues
Dealing with Connection Problems
As thrilling as flying your DJI 3 Drone can be, connection problems can occasionally tarnish the experience. When your drone loses communication with the remote controller, it can lead to panic. However, most connection issues are manageable with a little patience and preparation. Here are some strategies to tackle connection problems:
- Check the Signal Strength: Always monitor the signal strength displayed on your app. If it drops significantly, consider changing your position or elevation; sometimes, a few feet can make a huge difference!
- Avoid Interferences: Digital devices like Wi-Fi routers or cellular towers can create interference in drone communications. Before launching, do a quick scan of your surroundings for potential sources of interference.
- Update Firmware: Ensure both your drone and remote controller firmware are up to date. New updates can fix bugs and improve connection stability. It’s a simple task that can save you a lot of headaches!
- Restart Your Devices: If you experience connection issues, try restarting both the drone and the remote controller. This often resolves temporary glitches in communication.
- Reset the Controller: If problems persist, consider resetting the remote controller settings to defaults. This can clear up any unusual configurations that might be causing disruptions.
I remember a moment during a photography session when my connection momentarily flickered, and I felt the rush of panic. I quickly checked the signal, repositioned myself, and restarted the controller—problem solved! It was a simple reminder that staying calm and methodical helps keep your journey smooth.
Battery Life Management
Another critical aspect often overlooked is battery management. Effective battery life management ensures that your DJI 3 can function properly throughout your shooting session, preventing any unexpected short flights. To maximize your drone’s battery life, consider these tips:
- Understand Your Flight Time: The DJI 3 offers an impressive flight time of about 23 minutes under optimal conditions. However, aggressive maneuvers or windy conditions can drain the battery more quickly. Always be mindful of how your flying style impacts battery consumption.
- Monitor Battery Levels: Keep a close eye on the battery percentage in the app at all times. If you find yourself below 30%, it’s wise to land the drone to avoid a forced descent in an unintended location.
- Plan Your Flights: When you’re mapping out your shooting locations, factor in the distance and flight time. Prioritize spots that can be reached without exceeding your battery limits.
- Avoid Extreme Temperatures: Drone batteries don’t perform well in extremely hot or cold environments. Try to fly in moderate temperatures. If you must fly in extreme conditions, let your batteries acclimate before you launch.
- Use Energetic Mode Wisely: When activated, this can improve performance for quick shots, but using it can drain the battery faster. Use it strategically for key moments rather than continuously.
After my first day of shooting, I learned the hard way about the importance of battery management when I had to land unexpectedly during an exciting sequence. Since then, I’ve developed a habit of checking battery health before every flight. By staying informed about connection issues and managing battery life effectively, you can enhance your flying experience and focus on what matters most: creating breathtaking aerial imagery. So gear up, stay prepared, and enjoy your drone adventures!

Inspiring Aerial Photography Projects
Showcase of Creative Drone Shots
Aerial photography opens up a whole new perspective on the world, allowing you to capture unique angles that can leave viewers in awe. Let’s explore some inspiring projects that showcase the beauty and creativity that can be achieved with a drone.
- Urban Landscapes: Capturing the hustle and bustle of city life from above can create striking compositions. Aerial shots of skyscrapers, bridges, and rooftops often reveal patterns that go unnoticed from the ground. I once shot downtown during sunset, where the golden light illuminated the buildings, creating breathtaking reflections.
- Weddings from the Sky: Adding a drone to weddings can turn a beautiful day into an unforgettable visual feast. Consider capturing shots of the wedding party from above as they dance or release balloons. Putting this into practice at a friend’s wedding provided a fantastic perspective that beautifully complemented the traditional photography.
- Nature and Wildlife: Aerial photography contributes greatly to showcasing preservation efforts. Drones can capture hard-to-reach places like expansive forests, rivers, or wildlife in their habitats. For a project on local wildlife, I flew over wetlands at dusk and captured stunning footage of birds returning to their nests, highlighting the natural beauty of our environment.
- Sports and Adventure: Whether it’s mountain biking, surfing, or climbing, drones can capture adrenaline-pumping moments in a spectacular way. I remember filming a mountain bike race and followed the riders down thrilling trails, providing viewers with a front-row seat to the action.
These projects are only a glimpse of what’s possible with aerial photography. There’s truly no limit to the creativity you can express when you allow yourself to explore the skies!
Tips for Planning Aerial Photography Missions
Before embarking on your aerial photography mission, it’s crucial to have a solid plan in place. Here are some helpful tips to streamline your process:
- Research Your Location: Study your intended shoot location ahead of time. Whether it’s a national park, a bustling city, or a secluded beach, familiarize yourself with the area, including potential obstacles, flight restrictions, and stunning spots to capture.
- Scout Out a Flight Path: Knowing where you want to fly can save you valuable time during the shoot. Use tools like Google Earth to visualize your flight path and identify specific angles that will enhance your images.
- Create a Shot List: Outline the specific shots you hope to capture. Diverse angles, such as high-altitude vistas, close-ups of unique structures, or overhead shots of natural patterns, can add variety to your project.
- Timing is Everything: The best time to shoot is often during the golden hour—shortly after sunrise or before sunset—when the light is soft and warm. Check the weather forecast to ensure favorable conditions on the day of your shoot.
- Stay Flexible: While having a plan is essential, sometimes the unexpected can lead to the best shots. If something catches your eye in the field, be open to deviating from your shot list and experimenting with new angles.
- Safety First: Don’t forget to review safety guidelines. Always be aware of your surroundings to avoid potential hazards, and prioritize the safety of people and property during your flights.
Each aerial photography mission is an opportunity for creativity and exploration. I’ve found that careful planning paired with a spirit of adventure can lead to breathtaking visuals that truly inspire. So grab your drone, plan your mission, and prepare to uncover the wonders of the world from above! Happy flying!