Benefits of Indoor Drone Flying
Flying drones indoors can be a thrilling experience, and there are plenty of benefits that come with it! Let’s dive into why you might want to consider flying drones within the walls of your home or at an indoor venue.
- Controlled Environment: One of the most significant advantages of indoor drone flying is the control you have over your environment. Unlike outdoor flying, where unpredictable weather conditions can spoil your fun, indoor settings eliminate the influence of wind, rain, or sudden temperature changes. You can focus entirely on mastering your flying skills without the element of surprise.
- Skill Development: Indoor flying is an excellent way to hone your piloting skills. You can practice basic maneuvers like hovering, turns, and figure-eight patterns, which can be challenging in an outdoor environment. As a personal experience, I remember starting my drone journey on a rainy day, using the living room as my playground. It felt rewarding to see my skills improve without distractions!
- Convenience: No need to travel to a dedicated flying field or park! With indoor flying, you can practice at your convenience, whether it’s during a lunch break or after dinner. Plus, you don’t have to worry about lugging gear around to find the perfect location.
- Engaging Family and Friends: Indoor drone flying can also be a fantastic social activity. You can invite friends or family members to join you in navigating obstacle courses or racing challenges in your living room or garage. I’ll never forget the laughter and fun we shared while flying drones around furniture and dodging each other!
- Learning and Experimentation: Flying indoors allows you to experiment with different drones and features without the pressure of outdoor conditions. This is particularly useful for beginners who want to familiarize themselves with their equipment.
- Safe Exploration of Technology: Lastly, indoor flying can serve as a safe space to explore the latest drone technology. You can test out new features, camera capabilities, and even advanced software without the constraints of outdoor settings.
Safety Precautions to Consider
While flying drones indoors can be super fun, it’s essential to prioritize safety. Here are some precautions to consider before you take flight:
- Choose the Right Drone: Not all drones are created equal when it comes to indoor flying. Opt for lightweight models designed for indoor use. Drones with propeller guards can help prevent potential damage to your walls, ceilings, and furniture.
- Clear the Area: Ensure the space is free from obstacles. Remove fragile items, furniture, and pets out of the flying zone. A clutter-free environment will help minimize the risk of collision, making your flying session safe and enjoyable.
- Establish a Safe Zone: Designate a specific area for flying, and make sure everyone around you is aware that a drone is in the air. It’s crucial to maintain clear boundaries to avoid accidental bumps or startling anyone.
- Avoid Low Ceiling Spaces: Keep in mind the height of your drone. Ensure the area has sufficient vertical space for safe flight. Drones can easily bump into ceilings, leading to potential damage to your machine or the property.
- Practice Battery Management: Make sure your drone’s battery is fully charged before your flying session. Low battery levels can lead to erratic behavior while flying, risking a crash. Keep spares on hand for extended fun!
- Supervise Children: If kids are involved in indoor flying, supervise them closely. Drones can be unpredictable, and it’s essential to teach them about responsible flying from the start.
- Respect Noise Levels: Drones can be louder than you might expect! Be mindful of your surroundings and flying times, particularly in shared or close living spaces to avoid disturbances.
By keeping these benefits and safety precautions in mind, you can create an enjoyable indoor drone flying experience. Get ready to take your skills to new heights—literally! 🌟
Types of Indoor Drones
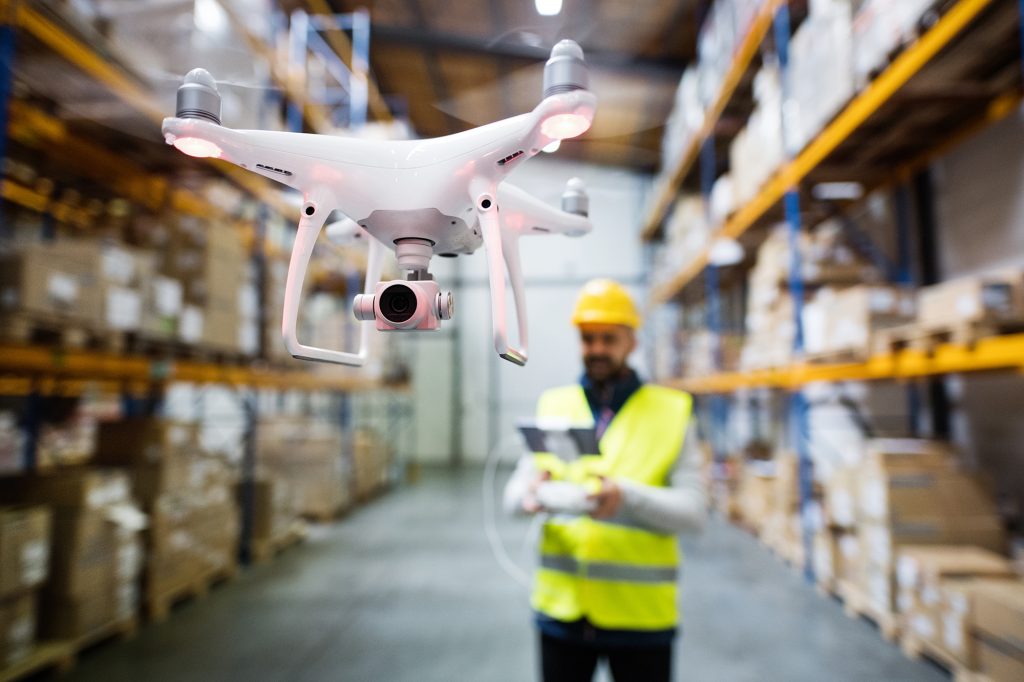
Understanding the various types of indoor drones can significantly enhance your flying experience. Each type caters to different needs and skill levels. Here’s a rundown of the most popular indoor drone categories:
- Nano Drones: These tiny drones are perfect for beginners. Their small size allows them to easily navigate through tight spaces, making them ideal for indoor flying. They’re lightweight and often come with stability features that make it easier to control. I vividly remember my first nano drone; I started zooming around my living room, and the excitement was contagious!
- Micro Drones: Slightly larger than nano drones, micro drones are also a fantastic choice for indoor flying. They often have more robust features such as cameras for aerial photography. Micro drones strike a balance between agility and stability, allowing you to perform tricks without the bet on crashes.
- Quadcopters: These are some of the most versatile options on the market. Quadcopters have a symmetrical shape, allowing them to hover and make precise movements. They can come equipped with advanced stabilization technology, making them perfect for those seeking a little challenge. Plus, if you’re like me and enjoy sharing stunning views, many quadcopters come with camera attachments!
- Racing Drones: While primarily designed for speed and responsiveness, certain racing drones can be used indoors, especially in large open spaces. If you’re considering indoor racing with friends, these models will keep your heart racing! Just be sure to pick areas free of obstacles to avoid damages.
- Toy Drones: These are often the most affordable option, making them a great choice for children and newcomers. Toy drones offer a fun way to learn the basics of flying without breaking the bank. You can effortlessly conquer indoor spaces with ease, as they are more forgiving in terms of crashes.
How to Choose the Right Indoor Drone
Choosing the right indoor drone isn’t merely about the type; it’s about what fits your specific needs and environment. Here are several factors to consider before making your purchase:
- Skill Level: Consider your experience with drones. If you’re starting out, a nano or toy drone may be ideal. For those with more experience, a micro or quadcopter can provide a richer flying experience with more features.
- Purpose: Ask yourself why you want a drone. Is it for fun, photography, racing, or educational purposes? Determine if you’ll be using it primarily for leisure flying or capturing stunning aerial shots. This will guide you in selecting a drone that suits your goals.
- Indoor Space Size: Evaluate the size of your indoor area. In smaller spaces, nano or micro drones are often the best fit. If you have access to a larger indoor venue like a gym, you might want to consider slightly larger quadcopters that offer advanced features.
- Battery Life: Check the drone’s battery specifications. Indoor flying can sometimes be quick, but having a drone with longer flight times can enhance your experience. Aim for a drone that provides at least 10 to 15 minutes of flight on a single charge for good measure.
- Camera Quality: Many indoor drones come with cameras, but not all are created equal. If photography or videography is your goal, look for drones that offer HD camera capabilities, good stabilization features, and possibly even live video streaming.
- Budget: Finally, establish a budget. There’s a range of drone options at various price points. While it’s tempting to go for the cheapest option, investing in a quality drone may save you money in the long run, as it’s likely to last longer and perform better.
With these insights under your belt, you’ll be well-equipped to select an indoor drone that matches your flying aspirations. Remember, every flight is a step toward mastery, and picking the right drone will make all the difference! Happy flying! 🛸✨

Remote Controllers and Transmitters
When it comes to indoor drone flying, your remote controller or transmitter is like your steering wheel. It’s the tool that allows you to maneuver and control the drone effectively. Here’s what you need to know about remote controllers and why they matter so much.
- Types of Controllers: There are primarily two types of remote controllers for indoor drones.
- Basic Controllers: These come standard with most beginner drones. They provide essential controls like throttle, yaw, and pitch, allowing you to perform basic maneuvers. I’ve had my fair share of fun with these basic controllers, especially while mastering hovering and simple turns.
- Advanced Controllers: For those looking for more control and customization, advanced controllers offer additional features like programmable buttons, customizable flight modes, and even screen displays with telemetry data. If you enjoy diving deeper into the mechanics of flight, investing in an advanced controller could be beneficial.
- Ergonomics Matter: Choose a controller that feels comfortable in your hands. Battery-operated remote controllers are convenient, but wired options offer the bonus of never running out of battery in the middle of an exciting flight. My first remote was a bit bulky, leading to sore fingers during long sessions, so it’s essential to find a model that is both ergonomic and user-friendly.
- Range and Responsiveness: Consider the range of your remote controller. A good controller should have adequate range for indoor flying while being responsive to your inputs. You don’t want delays that could lead to the drone colliding with furniture. Test the responsiveness during your initial flights, and adjust if necessary to ensure a smooth flying experience.
- Compatibility: Ensure your controller is compatible with your drone model. Some drones may come with specific controllers, while others may allow you to use third-party options. Double-check the specifications before purchasing to avoid any mismatches.
Importance of Spare Parts and Batteries
Now that you have a solid understanding of controllers, let’s talk about spare parts and batteries, which are essential for keeping your indoor drone running smoothly.
- Batteries: Having extra batteries is crucial for uninterrupted flying. Most indoor drones have limited flight times, typically ranging from 10 to 20 minutes per charge. I made sure to invest in a couple of spare batteries right when I started flying, and it was one of the best decisions I made! This way, during my practice sessions, I could swap batteries and keep the fun going without waiting around for charging.
- Battery Maintenance: Don’t forget about proper maintenance! Always avoid overcharging your batteries, and store them in a cool space when not in use. Follow the manufacturer’s guidelines to ensure long-lasting performance.
- Propellers: These are often the first casualties during indoor flying. It’s a good idea to have multiple spare propellers on hand. During my flying adventures, I’ve had my drone collide with walls a few times, leading to the inevitable need for replacements. A spare set can save you a lot of frustration!
- Frames and Bodies: Accidental crashes can sometimes lead to frame repairs or replacements. Many drone models have spare parts available for purchase, so if your drone has a removable frame or body parts, consider keeping one or two in your toolkit. Fixing my drone after a slight crash brought a whole new sense of accomplishment!
- Camera Accessories: If your drone is equipped with a camera, consider having additional accessories like lens filters or protective cases to enhance your flying experience. These not only protect your camera but can also improve your aerial photography.
- Tools: Invest in a small set of tools for assembling or disassembling your drone. Having screwdrivers, tweezers, and other essentials at your disposal can assist you during repairs or when swapping out parts.
By understanding the importance of remote controllers and maintaining a stock of spare parts and batteries, you’ll ensure that you’re prepared for any indoor flying occasion. With proper equipment and some planning, your indoor drone flying experience will only get better. Fly safe and have fun! 🛩️✨
Hovering and Stability Control
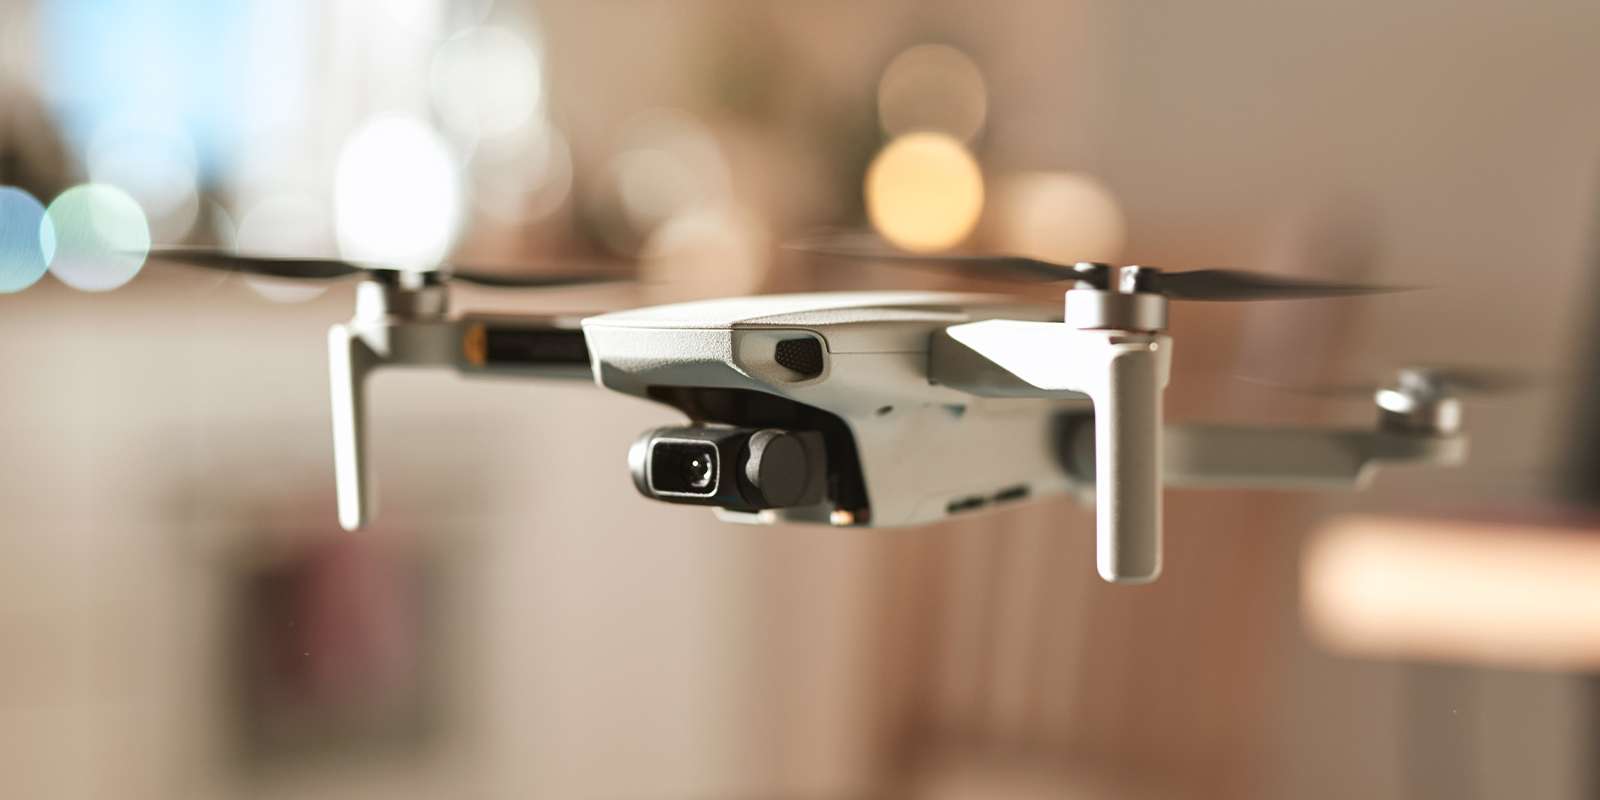
Mastering hovering and stability control is the cornerstone of indoor drone flying. It’s where you’ll build confidence and develop the necessary skills to handle your drone effectively. Here’s how to get started!
- Understanding Hovering: Hovering is the act of keeping your drone in one position in the air. It may seem simple, but it requires delicate balance and control. Start at a low altitude with your drone about a foot off the ground. Gently push the throttle to gain altitude, keeping a close eye on your drone’s orientation.
- Practice Makes Perfect: One of my favorite practices was to set a timer for five minutes each day just to work on my hovering skills. This routine helped me get used to the controls and understand how my drone responded to different movements. Here’s a quick exercise you might find useful:
- Take off slowly and aim to keep the drone in one spot.
- Adjust the throttle as needed to maintain altitude.
- Try to keep your drone stable without any side-to-side or forward movements.
- Use Stability Modes: Many drones come with various stability settings or flight modes. Beginners should make use of these modes, as they often offer self-leveling features that can help maintain balance. When I transitioned to my first stability mode, it felt like the drone had a mind of its own—just hovering there while I focused on getting comfortable with the controls!
- Lean on Visual References: When you’re starting to hover, it can be very helpful to use visual references around your room. A picture frame or a light fixture can serve as a point of stability to help you gauge whether your drone is drifting. This is particularly useful for learning how to correct your movements accurately.
- Reduce Sensitivity Settings: If your drone allows it, consider lowering the sensitivity settings during the initial stages of learning. This provides a more forgiving flying experience as you grasp the basics.
Maneuvering Through Obstacles
Once you’ve mastered hovering, the next step is learning how to maneuver through obstacles. This skill is especially rewarding and can be a lot of fun. Here are some tips to help you navigate tight spots and tricky turns.
- Set Up an Obstacle Course: Create your indoor obstacle course using items you have around the house. Coffee tables, chairs, and even hula hoops can work wonders for this practice. I remember using couch cushions to create a “tunnel” that my drone had to fly through—it was a hit! Here’s a simple course layout to get you started:
- Start Point: Take off from a designated spot.
- Path: Navigate around furniture, fly through occasional narrow spaces, and try to land on a target area.
- End Point: Land safely, ideally with precision.
- Focus on Turning Techniques: To maneuver through obstacles, learning how to execute smooth turns is crucial. Practice gradual yaw movements to keep your drone oriented while turning. A good technique is to turn slowly and consistently so that your drone remains steady.
- Use Drift Control: When navigating close, be mindful of the drone’s drift. Drones can unintentionally move to the left or right if you’re not careful. Before proceeding, practice using minimal throttle to find the right balance and keep your drone on course without veering off.
- Anticipate Movements: Understanding your drone’s speed and responsiveness is key. When approaching an obstacle, start thinking a few steps ahead about your next moves. For instance, if you’re flying toward a chair, start turning away a little earlier than you think you need to, giving yourself ample time to react.
- Practice, Practice, Practice: The more you practice, the more intuitive maneuvering will become. I spent hours just weaving through bookcases and larges pieces of furniture, sometimes even timing myself to add a little competition into the mix. Each flight gets you that much closer to mastering the art of indoor drone flying.
By focusing on these basic techniques of hovering and maneuvering, you’ll build the foundation necessary for more advanced flying skills down the road. Remember, patience is key—every experienced pilot was once a beginner! Happy flying! 🌟🙌
Performing Flips and Tricks
Once you get comfortable with basic controls and maneuvers, it’s time to elevate your indoor flying experience by adding some flips and tricks! Not only does it make flying more fun, but these advanced techniques also show how much you’ve grown as a pilot.
- Understanding Flip Commands: Most modern drones have a specific command or button for performing flips. Whether you’re working with a quadcopter or a racing drone, familiarize yourself with these controls. When I first tried to flip my drone, I didn’t realize how quickly you had to activate the command—I nearly sent it spiraling into my wall! So, knowing your drone’s mechanics is essential.
- Choose the Right Space: Flipping takes space, so ensure you have enough room to practice. An open area free of obstacles is your best bet. I found that clearing out my living room made it the perfect practice zone, and my dog loved watching the action from a safe distance. Just remember to keep an eye on any breakables around!
- Begin with Simple Flips: Start with basic aerial flips, like forward and backward flips. Here’s how to approach your first flip:
- Gain Altitude: Fly at a comfortable height, ideally around 10 to 15 feet.
- Prepare for Flip: Gradually increase your throttle to gain speed.
- Execute the Flip: Pull back or push forward on the control sticks to initiate the flip. Wait until the drone completes the rotation before leveling it out for a smooth landing!
- Practice Additional Tricks: Once you’ve mastered the basic flips, you can explore other fun maneuvers:
- Barrel Rolls: Roll the drone sideways while keeping it level.
- Yaw Spins: Twirl the drone in place using yaw controls without changing your vertical position.
- Sideward Flips: Combine yaw and pitch to achieve flips in various directions.
- Record Your Tricks: If your drone has a camera, you might want to film your performances. It’s not only exhilarating to see your skills on video, but it also provides insights into areas you can improve!
Mastering Precision Flying Techniques
Now that you’re flipping with style, let’s delve into precision flying techniques, which will take your indoor flying to a whole new level. Precision is crucial—whether you’re completing an obstacle course or just showing off to friends!
- Target Landing: Setting up targets around your flying area can help enhance your precision skills. Small cushions or marked areas on the floor can be your benchmarks. Start navigating to a target and practice landing as softly as possible. I remember my attempts at landing on a cup were downright hilarious—but they helped me nail down this skill!
- Slow Movements: When precision is your goal, slow and controlled movements make all the difference. Instead of darting around, practice making deliberate, gentle inputs on the sticks. This approach allows you to gauge how your drone responds. Think of it like moving through a maze—slow and steady wins the race!
- Utilize Visual Cues: Keeping an eye on objects and using them as reference points helps a lot. You may adjust your drone’s position based on these cues to maintain accuracy. For instance, when landing near a wall, use the edge as a guide to line up your approach.
- Focus on Hovering Over Targets: Practice hovering above specific targets to develop stability. This technique trains your hands to work together and allows you to understand how to manage controls while staying in a defined area. Try hovering slightly and then gently landing.
- Adjust Sensitivity Settings: Fine-tuning your controller’s sensitivity can help achieve smoother movements. Find a balance where your controls allow you to navigate without overreacting. Experiment to see what feels right for your flying style!
- Practice Makes Perfect: Set aside regular practice sessions to work on your precision flying. I dedicated evenings to practice and found that I improved dramatically over time. Plus, incorporating fun challenges for yourself keeps your interest alive!
By honing your flips, tricks, and precision flying techniques, you’ll not only enhance your skill set but also enjoy a sense of accomplishment and creativity in indoor drone flying. Embrace the challenge and keep experimenting—you never know what aerial artistry you might discover! 🛸✨

Creating a Safe Flying Environment
Setting up a dedicated indoor flying space is crucial for honing your drone skills while ensuring safety. A well-thought-out practice area not only enhances your flying experience but also minimizes the risk of accidents. Here’s how you can create a safe and enjoyable flying environment.
- Choose the Right Location: Ideally, select a spacious room or an area where there are fewer obstacles. A large living room, garage, or even a basement can serve as your practice zone. I turned my dining room into a drone sanctuary, moving chairs away and marking off a flying area—little did I know, friends would soon get fascinated watching my practice!
- Declutter the Area: Before you take to the skies, remove any potential hazards. Old furniture, fragile decorations, electronics, and pets should be out of the way. I once had a near-miss with my cat who, intrigued by my drone, darted under it just as I was practicing. Let’s just say it was a wake-up call to clear the air!
- Create Buffer Zones: Establishing buffer zones around your flying area can prevent accidents. Use cushions, mats, or even soft items near the edges to cushion any potential crashes. This added layer of protection offers peace of mind.
- Sound and People Management: Make sure your practice time doesn’t overlap with loud noises, like a TV or music, as this can distract you from controlling your drone effectively. Inform any family members or housemates about your flying sessions—especially if you live in a busy household. Sharing my flying schedule helps everyone stay informed, and they often enjoy watching my progress!
- Safety Gear: Consider wearing safety goggles while flying, especially if your drone is new or you’re still mastering your skills. While I thought it was a bit overkill at first, I can attest that it’s better to be safe than sorry, particularly if you’re learning to execute tricks.
Optimizing Lighting Conditions
Once you have a safe environment, optimizing the lighting conditions is essential for effective indoor flying. Here’s how you can make sure your space is well-lit and conducive to flying.
- Natural Light: Whenever possible, make use of natural light. Choose a time of day when sunlight streams into your practice area. It illuminates obstacles and helps you gauge altitude better. I often schedule my flying sessions in the afternoon when the sun is at its peak, and it’s incredible how much easier it is to see everything clearly.
- Use Artificial Lighting: If natural light isn’t an option, invest in bright LED lights that illuminate the space adequately. Avoid dim or flickering lights, as they can hinder your spatial awareness and increase the risk of accidents. Soft white lights are often better than harsh yellow or blue lights, as they create a more comfortable environment.
- Avoid Glare and Shadows: Position lights in a way that minimizes shadows and glare. Place them around the room, and avoid placing them directly above where the drone will fly. Shadows can be deceptive, especially when you’re learning to judge distances. I learned this lesson the hard way on a cloudy day, and it prompted me to reconfigure my lighting setup!
- Test Visibility: Before you begin your practice, do a quick walkthrough to evaluate visibility. Can you see all obstacles clearly? If not, adjust the lights or the position of furniture until everything is easy to see.
- Reduce Reflections: If you have any reflective surfaces, like mirrors or shiny countertops, take those into consideration. They can confuse your spatial awareness as the drone moves. Try to avoid flying directly near those areas.
- Experiment with Settings: Finally, don’t hesitate to tweak your lighting based on the time of day or specific flying techniques you’re practicing. Some tricks may require precise visibility, while others might call for a dimmed atmosphere, creating an exciting challenge!
By creating a safe flying environment and optimizing lighting conditions, you’ll ensure that your indoor practice sessions are not only effective but also enjoyable. Ready for takeoff? 🎮🌟 Keep practicing, and soon you’ll be flying like a pro!

Dealing with Signal Interference
While indoor flying can be incredibly fun, it comes with its unique set of challenges, one of the most common being signal interference. This disruption can lead to loss of control, erratic behavior, or even crashes if not addressed correctly. Here’s how you can tackle this issue effectively.
- Understand Signal Interference: First, it’s essential to know what causes signal interference. Items like Wi-Fi routers, microwaves, and even Bluetooth devices in your home can emit signals that disrupt your drone’s communication with its remote controller. My first experience with this was a bit distressing when my drone started zig-zagging during a flight because the router was too close to my practice area!
- Keep Distance from Wi-Fi Routers: A good rule of thumb is to keep your drone’s flying area away from any Wi-Fi routers or other electronic devices. If possible, choose a location that minimizes potential clashes with these signals. When I rearranged my flying space to be farther from my router, I noticed a significant improvement in my drone’s stability.
- Use Signal Filters: Some drones come with built-in signal filters to mitigate interference. If your drone has this feature, enable it before flying. If not, consider investing in an external signal filter or booster that can help improve reception, especially if you fly in environments with lots of electronic devices.
- Switch Frequencies: If you experience frequent interference, check if your drone operates on multiple frequencies (e.g., 2.4 GHz and 5.8 GHz). Switching to a less crowded frequency can reduce interference. I had a persistent issue flying in my friend’s apartment, and switching frequencies completely solved the problem!
- Prioritize Clean Airspace: Before each flight, ensure your environment is as free from electronic interference as possible. Turn off nearby devices, and test flight controls before launching. Instead of just jumping right in, I’ve learned to spend a few minutes conducting a range check before serious flying.
Handling Indoor Navigation Challenges
Indoor navigation presents its own set of challenges, but with a bit of practice and strategy, you can learn to navigate like a pro. Here are some tips to help you tackle indoor navigation:
- Familiarization with the Space: The first step in maneuvering safely is understanding your flying area. Take time to walk through the space on foot, identifying potential hazards, tight spots, and areas to avoid during flight. The first time I flew in my slightly cluttered garage, I discovered hidden obstacles I hadn’t noticed during my initial walkthrough.
- Establish a Practice Course: Set up a simple obstacle course to improve your navigation skills. Use everyday items like chairs, cushions, or boxes to create a course. For instance, I created a makeshift tunnel out of hula hoops and a few stools, which allowed me to practice precision flying while weaving in and out of obstacles.
- Start Slow: When navigating indoors, it can be tempting to fly quickly, but this often leads to challenges when it comes to precision. Start with slow and controlled movements, gradually increasing your speed as you become more confident. It took me a bit of practice to realize that slow, mindful flying produced better results than trying to zip around like a racecar.
- Leverage Visual References: Use visual cues to maintain your position and direction. Looking for patterns in the floor or using furniture as guideposts can help you navigate more effectively. I often look for lines or edges in the floor to help gauge distances, especially when performing tricky maneuvers.
- Utilize the Drone’s Features: Many modern drones come equipped with features like obstacle detection and altitude hold, which can be incredibly helpful indoors. Take advantage of these features! On one occasion, I forgot to enable obstacle detection, resulting in an unexpected crash into the side of the sofa. Lesson learned!
- Post-Flight Analysis: After each flying session, take a moment to reflect on your experiences. What worked well? What challenges did you encounter? Keeping a quick log of your flights has helped me track my progress and identify navigation issues I needed to improve on.
By proactively addressing signal interference and honing your indoor navigation skills, you’ll be better prepared to tackle the challenges of flying indoors. Keep experimenting and have fun—every flight is an opportunity to learn and grow! 🚀✨


