
Introduction
Overview of DJI Drones
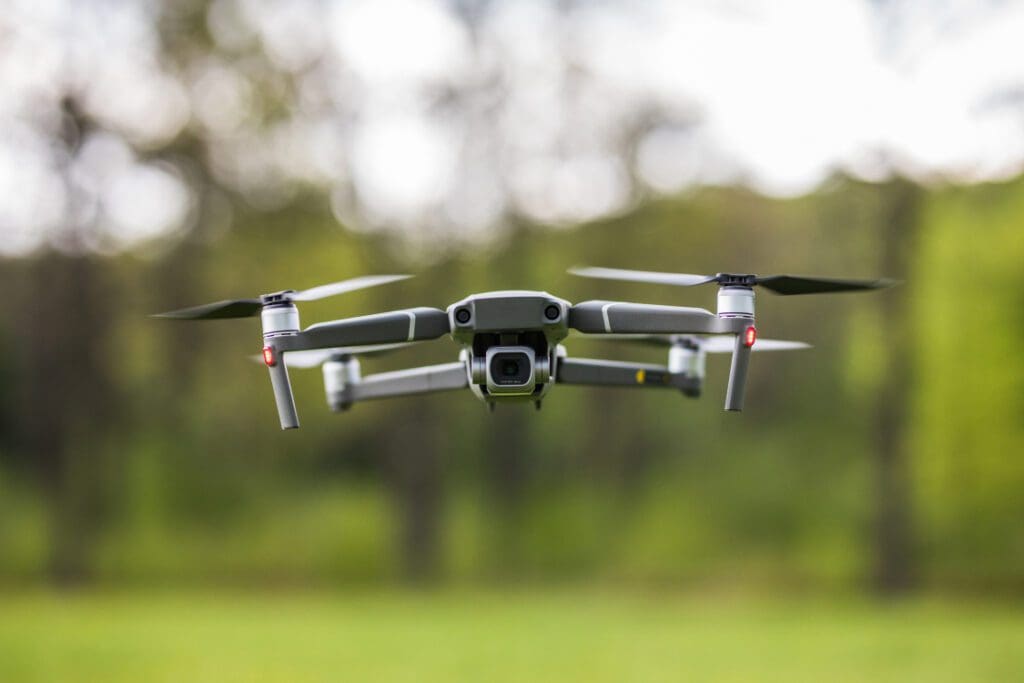
When it comes to aerial photography and videography, DJI drones reign supreme. As a pioneer in the drone industry, DJI has revolutionized how we capture breathtaking views from above. Whether you’re a professional filmmaker or a hobbyist, there’s a DJI drone tailored to meet your needs. The Phantom series is perfect for beginners, while the Inspire and Mavic lines cater to advanced users looking for premium performance. The beauty of DJI drones lies in their advanced technology. With features such as:
- GPS stabilization: Ensures precise positioning, so your shots are steady even in windy conditions.
- Intelligent flight modes: Including ActiveTrack, Waypoints, and Point of Interest, each designed to help you capture stunning shots effortlessly.
- High-quality cameras: Most DJI drones come equipped with 4K cameras or higher, allowing you to capture crystal-clear videos and images from the sky.
I remember the first time I flew a DJI Mavic Pro. It was during a visit to the Grand Canyon, and the aerial shots I captured have become some of my favorites. The ease of use and reliability made it a delightful experience. No wonder millions of users around the world trust DJI for their aerial imaging needs!
Benefits of Using Android Devices
Now, if you are considering pairing your DJI drone with an Android device, you’re in for a treat. Using Android devices to control your drone opens up a world of possibilities and benefits. Let’s dive into some of the major advantages:
- User-Friendly Interface: Android devices offer a simple and intuitive user interface that makes operating DJI drones enjoyable. The touchscreen experience adds a layer of convenience that traditional controllers can’t match.
- Diverse App Ecosystem: Numerous apps in the Google Play Store can enhance your drone flying experience. From mapping to flight planning, these apps often provide features that a standard controller might lack.
- Customization: Most Android devices allow you to tailor settings according to your preferences. You can choose different flight modes or adjust camera settings with just a few taps.
- Real-Time Data: Android devices offer a wealth of telemetry data at your fingertips. From battery life to GPS coordinates, having access to this information helps you fly confidently and safely.
- Portability: Many Android devices are lightweight and portable, making them a fantastic option for taking into the field. You can easily stow them in your backpack alongside your drone gear, allowing for quick access when you’re ready to fly.
- Picture Sharing: One of my favorite features of using an Android device with my DJI drone is the ease of sharing photos and videos. Whether it’s instant sharing on social media or sending high-definition clips to friends and family, it’s seamless.
Overall, using an Android device with your DJI drone not only boosts your flying experience but also simplifies the technical aspects. Imagine flying your drone, capturing stunning footage, and instantly sharing those memories with friends—all from the comfort of your handheld device! In summary, DJI drones paired with Android devices form a powerful duo that enhances your aerial photography experience. They merge cutting-edge technology with ease of use, making aerial exploration accessible and enjoyable for everyone. Let’s move ahead and explore how to get you set up for your first flight!

Getting Started
Setting Up Your DJI Drone
Now that you’re excited about flying your DJI drone and using your Android device, it’s time to get everything set up! Setting up your DJI drone is a simple process, and with a few steps, you’ll be ready to take to the skies in no time. First things first: unboxing your drone. When I unwrapped my DJI Mavic Air for the first time, I was thrilled. It came with everything I needed for an optimal flying experience. Here’s what you should look for:
- Drone body: Make sure all the arms are intact and functioning.
- Batteries: Make certain your battery is fully charged.
- Propellers: Check that you have at least four propellers, as they are essential for flight.
- Remote Controller: Familiarize yourself with the controller and its buttons; it’s crucial for controlling the drone.
Steps to Set Up Your Drone
- Charging the Battery: Connect your battery to the charger and let it charge fully. A complete charge will ensure you have enough flight time.
- Attaching Propellers: Carefully attach the propellers to the drone. They need to be installed correctly to ensure safe takeoff. A helpful tip: match the propeller colors with the motors—they usually have unique color codes for easy pairing.
- Calibrating the Drone: Before your first flight, you’ll need to calibrate your drone. This step turns your drone into a reliable airborne vehicle—important for those stunning aerial shots! Follow the instructions in the DJI app or user manual to complete this step efficiently.
Each model may have slight variations, but generally, this setup is applicable across the DJI lineup.
Connecting Your Android Device
Now that your drone is set up, the next big step is connecting your Android device to the drone. I can’t stress how crucial this part is; connecting properly allows you to fully utilize the features of both the drone and your device. Here’s a step-by-step guide to getting your devices synced up:
- Download the DJI Go App: Head over to the Google Play Store and download the DJI Go app (or DJI Fly app, depending on your drone model). This free app is the core of your flying experience.
- Open the App: Once installed, open the app on your Android device. You may be prompted to create an account or log in. It’s straightforward, and having an account lets you save your flying data and photos.
- Connect the Remote Controller:
- Use the appropriate cable from your remote to your Android device. The connection varies by device, so make sure you’re using the correct cable.
- Once plugged in, your Android device should recognize the remote. You might see a prompt asking if you want to allow certain permissions; go ahead and authorize those permissions for optimal performance.
- Pair Your Drone with the App: Follow the on-screen prompts to connect the drone with the DJI Go or Fly app. The app will check the drone’s firmware and ask for updates if necessary, ensuring you have the latest features.
- Preflight Checks: After connecting, the app will guide you through some basic pre-flight checks. It’s like a friendly checklist to ensure you haven’t missed any crucial steps. Take a moment to check:
- Battery levels
- GPS signal
- Camera functionality
Once your drone and Android device are connected, you’ll have access to live views from the camera, flight data, and more. I can remember how exhilarating it was to see the live feed the first time I flew my drone. It truly feels like you’re in the pilot’s seat! By following these steps, you’ll set a strong foundation for flying your DJI drone safely and effectively. Let’s gear up for the thrilling adventure of flying and mastering those controls next!

Mastering Flight Controls
Understanding DJI Flight Modes
Congratulations on getting your DJI drone set up and your Android device connected! Now, we’re diving deep into mastering flight controls—this is where the fun really begins. One of the key aspects of flying a drone is understanding its flight modes, which can greatly enhance your flying experience and help you capture stunning footage. DJI drones come equipped with various flight modes, and each one serves a distinct purpose. Here’s a rundown of the most common modes:
- GPS Mode: This is the default mode for most scenarios. The drone maintains stable positioning using GPS signals, making it easier for beginners to fly and capture steady shots. You can enjoy hands-off flying by simply letting the drone hover while you frame your shot!
- Sport Mode: Perfect for experienced pilots. This mode increases the drone’s responsiveness and speed, allowing it to reach impressive speeds for thrilling flying experiences. Just be careful—quick turns and maneuvers can be challenging!
- Tripod Mode: If you’re aiming for precise movements, this mode reduces the drone’s speed and increases stability. It’s perfect for capturing slow-motion shots or shooting in tight spaces, like between trees or buildings.
- Follow Me Mode (ActiveTrack): A game changer! When activated, your drone will automatically follow you while keeping the camera focused on you. It’s fantastic for outdoor activities like biking or hiking. Many of my most spontaneous “action shots” came from just pressing a button and letting the drone do the rest!
- Waypoints: This mode allows you to pre-program specific routes for your drone to fly. You can go grab a coffee while your drone captures footage of a scenic route!).
Understanding these modes doesn’t just help in flying; it allows you to choose the right one for the shot you want. Take some time to practice switching between modes to get a feel for their differences.
Tips for Smooth Flying
Now that you understand the flight modes, let’s delve into tips that will help you fly smoothly and gain confidence in the air. Smooth flying is the key to capturing professional-looking footage, and with these simple practices, you can elevate your skills.
- Start Slow: For your first few flights, practice in a wide-open area. Begin with gentle moves—slow ascents, descents, and turns. This will give you a feel for the controller and how the drone responds.
- Keep an Eye on Battery Life: Always monitor your battery levels during flight. Your device will display this information, so make it a habit to check. This helps avoid those nail-biting moments of unexpected landings!
- Avoid Obstructions: Look out for trees, power lines, and buildings while flying. Keep your drone within line of sight, which not only helps you avoid collisions but also gives you a better frame of reference for your shots.
- Use Wind Wisely: Wind can affect stability. If you’re flying in windy conditions, take advantage of it by flying with the wind when ascending and descending, but be cautious on takeoff and landing.
- Practice Landing: A smooth landing is just as important as a good takeoff. Try to land in a controlled descent and avoid sudden movements. The more you practice, the more confident you’ll become, and the better your landings will be.
- Maintain a Consistent Height: Try to keep your drone at a consistent altitude while filming to minimize distracting changes in perspective.
When I first learned to fly my drone, I followed these tips closely, and they made all the difference. Smooth control translates directly into better footage. As you practice and experiment, you’ll develop your style, gain confidence, and discover how much fun flying can be! Ready to capture some epic footage? Let’s move on to learn how to get the best out of your camera.

Capturing the Best Footage
Camera Settings and Features
Now that you have a handle on flight controls and are confidently navigating your DJI drone, it’s time to focus on what you came here for: capturing stunning footage! The camera on your DJI drone is one of its most impressive features, and understanding its settings can really take your aerial photography and videography to the next level. To get the best results, let’s explore some key camera settings and features you should be familiar with:
- Resolution and Frame Rate:
- 4K vs. 1080p: If your drone supports 4K resolution, use it! The crispness and detail in 4K videos can make a huge difference, especially if you plan to edit the footage later. I remember flying in a picturesque landscape and capturing everything at 4K; it made the final edit look so professional.
- Frame Rate: Adjusting frame rates allows you to create different effects. For example, using 60 fps is ideal for smooth motion shots, while 120 fps (or more) allows for slow-motion footage during editing.
- ISO Settings: The ISO controls the camera’s sensitivity to light. For bright conditions, keep your ISO low (100-400) to avoid graininess, but in lower light situations, you may need to increase it. Just remember, higher ISO can introduce noise into your videos, so find the balance that works.
- Shutter Speed: A good rule of thumb is to use a shutter speed that’s double your frame rate for natural motion blur. So, if shooting at 24 fps, set your shutter speed to 1/50 sec. This small adjustment can significantly enhance the quality of your footage.
- White Balance: Adjusting the white balance will help maintain color accuracy. For sunny days, set it to ‘Sunny’ or ‘Daylight.’ Experimenting with different settings will allow you to find the perfect look that fits your project.
- ND Filters: Neutral Density (ND) filters help control light entering the camera, allowing you to use wider apertures and slower shutter speeds even in bright conditions. It can be a game changer if you want that professional look with smooth motion blur.
Before flying, I recommend spending some time in the app’s camera settings. Familiarize yourself with each setting and see how it affects your shots before heading out for the big capture!
Shooting Techniques
With your settings dialed in, it’s time to focus on techniques to capture stunning aerial footage. Here are some helpful tips to take your shots from average to breathtaking:
- Plan Your Shots: Always scout your locations before recording. Having a clear idea of what shots you want—whether it’s a sweeping landscape or following a moving subject—will save time and result in stunning video sequences.
- Use Composition Techniques: Familiarize yourself with basic composition rules, like the Rule of Thirds. Position key elements of your scene along the grid lines or at their intersections to create balanced and engaging images.
- Smooth and Slow Movements: When flying, practice moving the drone slowly to achieve smooth pans, tilts, and tracking shots. Fast movements can make your footage look jerky. When I first began, I noticed that slower movements always led to visually pleasing results.
- Varied Perspectives: Don’t be afraid to experiment with altitude and angles. Fly lower to the ground for dynamic shots or higher for expansive views. Capture footage from various heights and angles to create visual interest.
- Utilize Automated Flight Features: Take advantage of intelligent flight modes like “Rocket,” “Dronie,” or “Circle” that come with the drone’s software. These preset movements can create stunning shots without needing to master manual control.
- Practice, Practice, Practice: The more you shoot, the better you’ll get! Don’t hesitate to retake scenes or try different settings. Review your footage after each flight to see what you can improve for next time.
Capturing great footage is a blend of understanding your gear and harnessing your creativity. Each flight helps you learn what works best for your style. Don’t forget to enjoy the journey; every shot is a chance to create something beautiful! Now, let’s explore how to utilize DJI’s specialized apps to enhance your aerial adventures even further.
Utilizing DJI Apps
Overview of DJI Go App
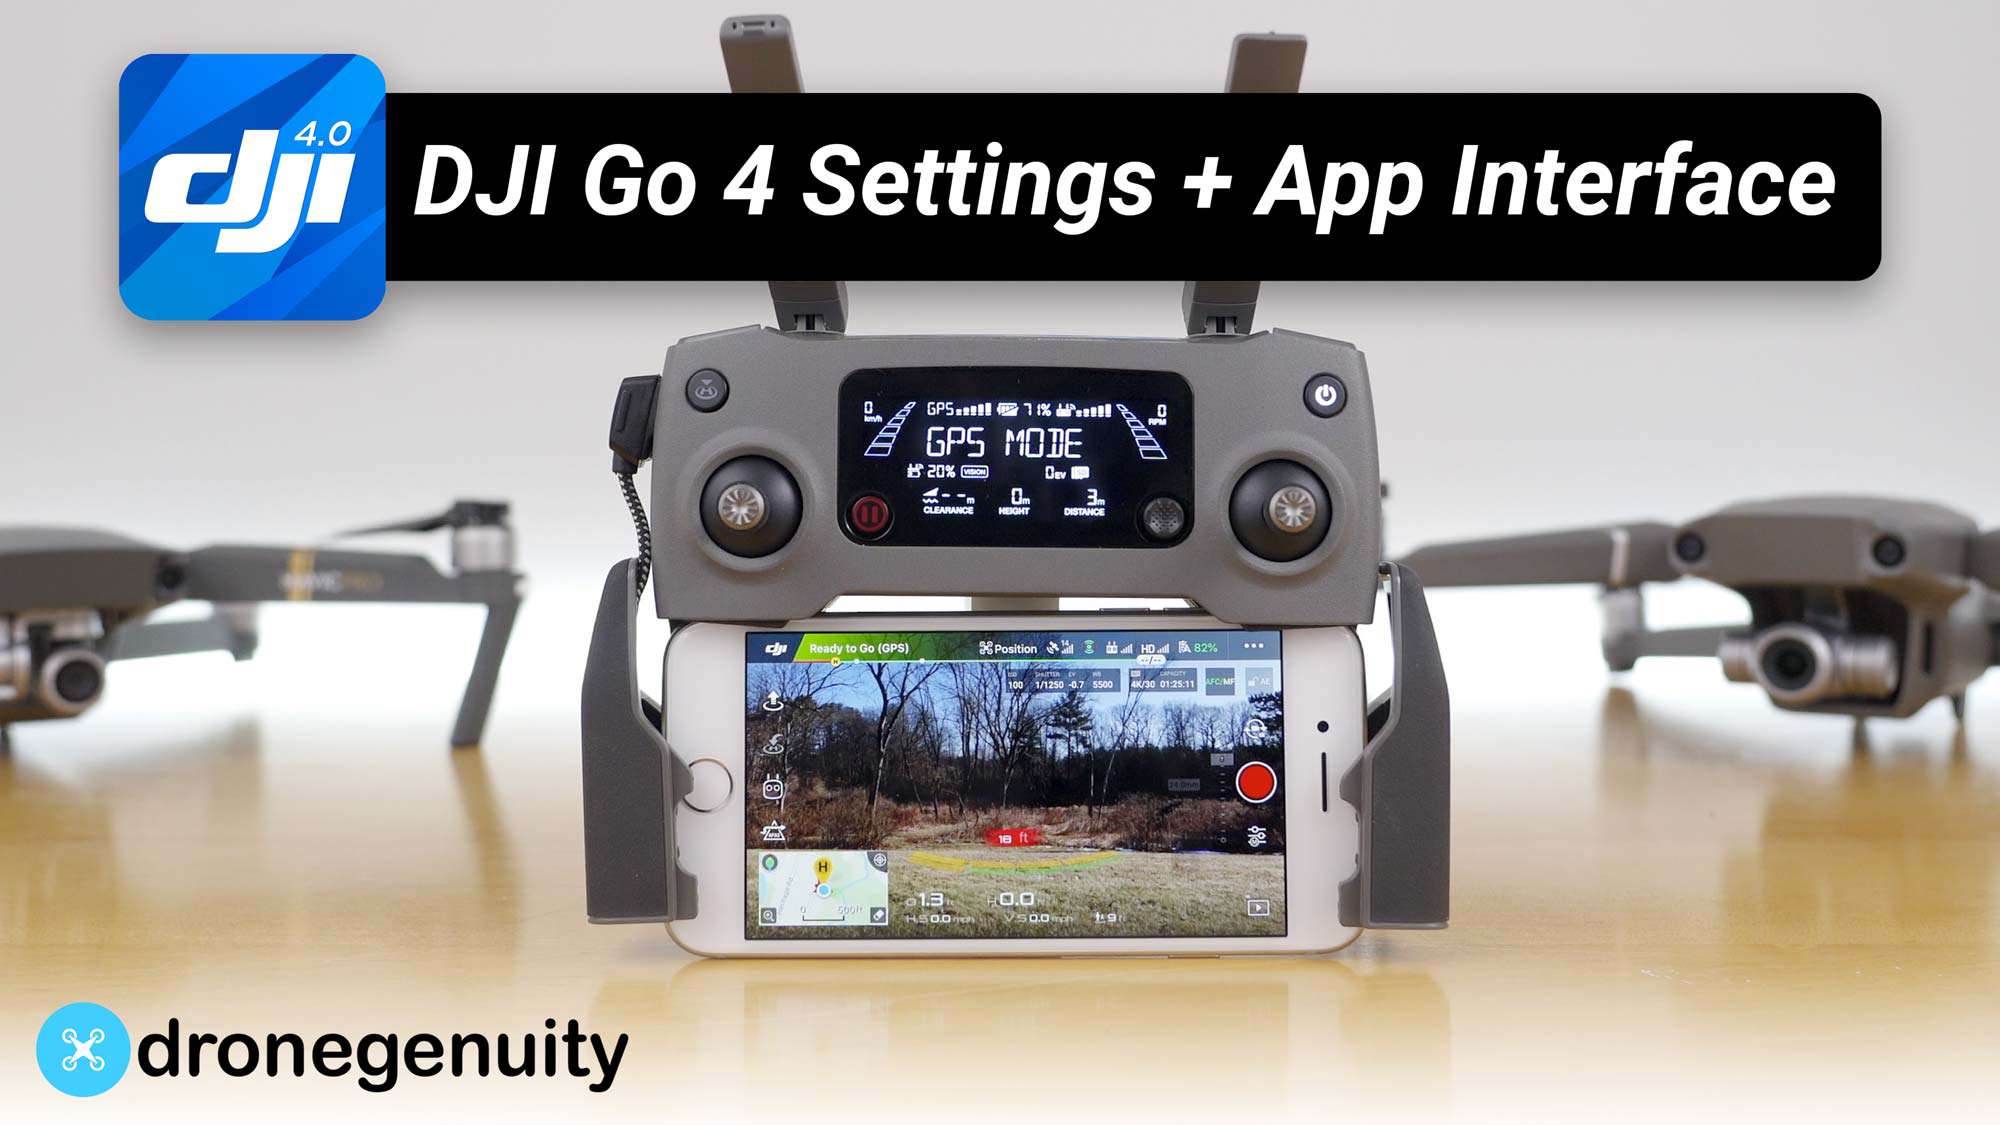
Now that you’ve learned about capturing fantastic footage, it’s time to discuss the tools that can enhance your experience even further: DJI apps! The DJI Go app, a staple for DJI drone users, is your primary companion for operating and optimizing your drone experience. What Can the DJI Go App Do? The DJI Go app is packed with features that help you manage your flights, access advanced camera settings, and analyze your footage. Here are some of the app’s essential features:
- Live Camera Feed: When connected, you can see a live video feed from the drone’s camera directly in the app. This allows you to frame your shots perfectly. I recall being able to capture an amazing sunset just because I could see how the colors reflected off the landscape in real-time.
- Flight Information Display: The app provides crucial flight data like altitude, GPS signal strength, battery life, and distance. Always keep an eye on this information; it’s vital for safe flying!
- Intelligent Flight Modes: Access DJI’s intelligent flight modes, like Follow Me and Waypoints, directly from the app interface. These modes can facilitate stunning footage without requiring advanced piloting skills.
- Camera Controls: Adjust settings like ISO, shutter speed, and white balance right from the app! You can toggle options without needing to fiddle with the physical camera settings, which is especially handy during dynamic shoots.
- Editing Tools: The DJI Go app also offers basic editing features that let you trim clips, add music, and share directly to social media. After your flights, I find it practical to quickly create a highlight reel right in the app.
- Firmware Management: The app notifies you of firmware updates to ensure your drone is functioning at its best. Keeping your drone updated is essential for optimal performance and new features.
The DJI Go app is user-friendly and designed to maximize your flying experience. I highly recommend taking some time to explore all the features it offers. You’ll discover functionalities you didn’t even know you needed!
Advanced Features in DJI Pilot App
For professional pilots and advanced users, the DJI Pilot app is a game-changer. While the DJI Go app serves as an excellent companion for casual flying, the DJI Pilot app caters to those requiring more robust features. What Makes DJI Pilot App Stand Out? Here are some of the advanced features it provides to elevate your flying experience:
- Customizable Interface: The DJI Pilot app allows for a highly customizable interface. You can choose which flight data metrics to display, making it more suited to your needs. If you’re a data enthusiast like I am, this can drastically improve your flying experience.
- Advanced Flight Modes: While the Go app offers good modes, the Pilot app features advanced options like “Terrain Follow,” which can automatically adjust your flight height based on the terrain, ensuring a smooth flying experience. This is particularly useful for drone surveying and mapping tasks.
- Obstacle Avoidance: The Pilot app includes a more sophisticated obstacle avoidance system, allowing you to fly with confidence, especially in complex environments. I once flew through a grove of trees, and the app helped navigate without collisions!
- Enhanced Mapping and Surveying Tools: Ideal for professionals, the DJI Pilot app provides enhanced mapping functionalities that allow for detailed area coverage and data collection. This feature can be invaluable for agriculture, construction, and real estate professionals.
- Real-Time Data Transfer: For those in need of immediate feedback, the app allows for real-time video transmission and data collection. This capability can be a huge asset in industries that require immediate analysis.
- User Management: In corporate scenarios, the DJI Pilot app supports multiple pilots and users, consolidating flight data for large projects or teams.
Getting comfortable with both the DJI Go and Pilot apps can hugely benefit your flying workflow and overall experience. Experiment with both apps depending on your needs – for casual flying and fun, the DJI Go app is perfect, while for advanced projects, reach for the DJI Pilot app. As you become more adept at utilizing these tools, you’ll unlock the full potential of your drone and create stunning aerial content. Let’s now shift our focus to enhancing your photos and videos further with editing techniques that can take your content from good to great!
Enhancing Your Photos and Videos
Editing Tools on Android Devices
With your stunning aerial footage captured through your DJI drone and arranged beautifully using DJI apps, the next step is to enhance your photos and videos. Editing on Android devices has become incredibly accessible, and you have a plethora of tools right in your pocket. Let’s explore some of my favorite editing tools that can significantly elevate your work!
- Adobe Lightroom Mobile: This is my go-to app for photo editing. Adobe Lightroom offers robust features including cropping, exposure adjustments, color grading, and applying presets. It’s user-friendly, making it ideal for beginners and suitable for seasoned pros. You can sync your edits across multiple devices, too.
- KineMaster: For video editing, KineMaster is a powerful tool that allows multi-layer video editing. You can cut, splice, and stitch together clips effortlessly. The app offers various transitions, effects, and text options. When I edited my first drone video using KineMaster, I was amazed at how easy it was to create cinematic effects!
- Quik by GoPro: Quik is an intelligent video editing app that quickly stitches together videos and photos into a seamless montage. It analyzes your footage and selects the best moments, adds music and transitions, making it perfect for quick edits. I love using Quik when I want to share highlights on social media fast.
- Snapseed: Snapseed is a fantastic app developed by Google that offers a variety of editing tools for enhancing photos, including filters, selective adjustments, and perspective corrections. Its “Healing” feature is a gem for removing unwanted objects that may have accidentally made it into your shots.
- FilmoraGo: Another excellent video editing app is FilmoraGo. It includes features like templates, themes, and music, allowing you to create fun and engaging videos. It’s great for someone just starting and wanting to dive into quick edits for enjoyment without complexity.
- InShot: InShot uniquely combines photo and video editing capabilities. With features for video trimming, background music, and sticker overlays, it’s a versatile tool. It’s also intuitive, making it easy to overlay your drone footage with cool sound effects, personal anecdotes, or get creative with text overlays!
Once you’ve chosen your editing tools, you can transform your aerial captures into stunning visual stories. I suggest trying out a few of these apps to see which ones resonate with your editing style.
Tips for High-Quality Results
While having powerful editing tools is essential, knowing how to use them effectively makes all the difference. Here are my top tips for getting high-quality results from your aerial footage and photos:
- Plan Your Edits: Start with a clear vision of what you want to achieve. Before jumping into the editing tools, jot down the intended storyline or mood for your video. It helps you stay focused while editing.
- Maintain Original Quality: Always work with the highest resolution files. Whenever possible, avoid compressing or exporting in lower quality formats until you’re completely finished with your edits. I’ve learned this the hard way, where I lost detail in my amazing coastal shots!
- Use Color Grading: Color grading can significantly enhance your videos. Adjusting colors, brightness, and contrast can help create a specific mood based on your preferences. Take time to experiment with color grading; it can often enhance landscapes dramatically.
- Transitions Matter: Use transitions thoughtfully; they shouldn’t distract from the content. Simple fades or cuts work well in most scenarios. Too many fancy transitions can make your video feel cluttered.
- Sound is Key: Don’t overlook sound design! Use music that complements the visuals, and consider adding sound effects to bring your video to life. I always make sure my music choices align with the pace and mood of my footage.
- Keep It Concise: Avoid making excessively long videos. A 2-3 minute highlight reel can often be far more engaging than a longer piece. Focus on showing the best moments to keep your audience captivated.
- Review Your Edits: After editing, give yourself a break, and then rewatch the video with fresh eyes. You might catch little details that need adjusting or fixes you didn’t notice before.
Once you begin implementing these editing techniques, you’ll find your photos and videos not only improve significantly but also develop a unique aesthetic that reflects your style. Now, with your edited masterpieces ready, let’s shift gears and discuss the important aspects of safety and legal considerations when flying your drone!

Safety and Legal Considerations
Drone Flying Regulations
Now that you’ve mastered the art of capturing and editing stunning photos and videos with your DJI drone, it’s crucial to address one of the most important aspects of flying: safety and legal considerations. Knowing and adhering to drone regulations will not only protect you but also ensure respectful and responsible flying within your community. Drone regulations vary by country, and sometimes even by region within a country. Therefore, always check the specific rules in your flying area. However, here are some general regulations that you should keep in mind:
- Registration: In many countries, you’re required to register your drone if it exceeds a certain weight (often around 0.55 pounds or 250 grams). In the U.S., for instance, registration is mandatory for drones weighing more than 0.55 lbs. Make sure you take care of this before your first flight!
- Altitude Restrictions: Most countries impose altitude limits, often capping drones at 400 feet (120 meters) above ground level. This regulation helps prevent interference with manned aircraft. Keeping below this limit can also ensure you aren’t flying into restricted airspace.
- No-Fly Zones: Familiarize yourself with no-fly zones like schools, airports, and military bases. In the U.S., for instance, the FAA has a mapping tool available to highlight airspace restrictions. Ignoring these zones can lead to fines or potentially dangerous situations.
- Visual Line of Sight: Many regulations require you to maintain a visual line of sight with your drone while flying. This rule means you should be able to see the drone without using any technological aid, like binoculars.
- Privacy Laws: Respect the privacy of individuals when flying your drone. Many places have laws against taking pictures or videos of people without their consent, especially in private spaces.
When I first got my drone, I spent a day reviewing the local regulations to ensure I understood the rules of the sky. It gave me comfort and confidence to fly responsibly, knowing I was acting within the law.
Precautions for Safe Operation
Now that we’ve covered the regulations, let’s talk about practical precautions you should take to ensure safe drone operation. Flying safely not only protects you and your property but also helps to maintain the drone community’s reputation.
- Pre-Flight Checks: Always conduct a pre-flight check of your drone. Inspect the propellers, check battery levels, and ensure the camera is functioning properly. I never skip this step; taking a few minutes beforehand can save you from mid-flight complications.
- Fly in Good Weather: Avoid flying in adverse weather conditions, including strong winds, rain, or fog. If you feel that a flight could become risky, it’s better to postpone. Remember that low visibility can lead to losing sight of your drone.
- Choose Open Spaces: Stick to wide-open areas when flying, especially as you’re learning. Avoid crowded places where bystanders could accidentally wander into a flight path. I remember my early flights at a local park; it was spacious and allowed me room to practice safely.
- Use a Spotter: When attempting more complicated maneuvers or flying in challenging environments, consider having a friend as a “spotter.” This person can keep an eye on the drone while you focus on controlling it.
- Monitor Battery Life: Always keep an eye on your drone’s battery level during flight. I’ve learned the hard way that voltage can drop faster than expected. Set a threshold for returning to your launch point when the battery gets low.
- Keep Your Distance: Maintain a safe distance from people, animals, and property. Ignoring this precaution can lead to accidents or collisions. A good rule of thumb is to stay at least 50 meters away from people and structures.
- Stay Calm in Emergencies: Despite your precautions, things can still go wrong. If you find your drone behaving unexpectedly, stay calm. Don’t panic – try to regain control and land it safely. This mindset has helped me in a couple of nerve-wracking moments!
By following these regulations and safety precautions, you’re not just ensuring your safety but also respecting the airspace and community around you. It’s our mutual responsibility as drone enthusiasts to fly responsibly and help foster trust and acceptance for our hobby or profession. With all this in mind, you’re well-equipped to embark on your aerial adventures! Let’s now dive into troubleshooting common issues you may encounter while flying your drone.

Troubleshooting Common Issues
Connectivity Problems
Now that you’re well-versed in safety regulations and operational precautions, it’s essential to be prepared for any hiccups that might occur while flying your DJI drone. One of the most common challenges drone pilots face is connectivity issues. Losing connection to your drone can be alarming, but don’t worry; with a little knowledge, you can troubleshoot these problems effectively. Common Connectivity Issues
- Weak Signal: One of the main reasons for connectivity loss is a weak signal between the remote controller and the drone. This can happen when you’re flying within an area filled with obstacles like buildings or trees. To combat this, always try to fly in open spaces and avoid flying behind large structures.
- Interference from Other Electronics: Other electronics, particularly those operating on similar frequencies, can interfere with your drone’s signal. If possible, avoid flying near Wi-Fi networks or other drone users. I remember feeling frustrated on a day when a nearby festival was affecting my signal, which made me realize the importance of researching local events.
- Outdated App or Firmware: Make sure that both your DJI Go or Pilot app and your drone’s firmware are up to date. Outdated software can create compatibility issues, leading to unstable connections. Regular monitoring for updates has become a routine before my flights!
- Controller Malfunction: Occasionally, the remote controller itself may have problems. If you’re experiencing persistent connectivity issues, try restarting both the controller and the drone before attempting to reconnect. This simple reset often clears minor glitches.
- Environment and Weather: Flying in areas with heavy foliage, urban environments, or extreme weather can also influence connectivity. Always check your surroundings before launching—if you see a lot of trees, consider a different spot for your flight.
Tips for Handling Connectivity Problems
- Always have a plan for re-establishing connection. Checking for obstacles and ensuring open lines of sight is essential.
- Make sure your drone’s antennas are correctly aligned. Adjusting the angle of your remote controller can sometimes improve reception drastically.
The key here is to remain calm. If you find yourself in a connectivity bind, follow these tips and don’t panic!
Battery and Firmware Concerns
In addition to connectivity issues, another common headache for drone pilots is battery and firmware concerns. Your drone’s battery is one of the most crucial components, and taking care of it ensures reliable flight times. Battery-related Issues
- Battery Life Monitoring: Always keep an eye on battery levels during your flight. Most drones give you plenty of warning when the battery is low. I’ve developed a habit of checking my estimated flight time before each takeoff to avoid those dreaded unplanned landings!
- Overheating: If you’ve been flying for a while, especially in hot conditions, your battery may overheat. If this happens, land the drone immediately and allow it to cool down. Avoid flying in extreme temperatures, as this can severely affect battery performance.
- Battery Storage: When not in use, store your drone batteries at around 50% charge for optimal lifespan. I learned this lesson after I noticed my batteries losing capacity faster than expected; now, I always keep a charging schedule!
- Regular Calibration: Calibrating your drone’s battery ensures the onboard computer is accurately reading battery levels. It’s good practice to familiarize yourself with this process; refer to the user manual for specific steps to calibrate your model correctly.
Firmware Concerns
- Up-to-Date Software: Keeping your drone firmware updated is crucial for performance and safety. Regularly check the DJI Go or Pilot app for available updates. I’ve avoided a few potential in-flight issues simply by keeping my firmware current.
- Post-Update Protocol: After completing a firmware update, perform a brief test flight to ensure everything is functioning as designed. Any irregularities can often be flagged during these tests, allowing you to rectify issues early.
- Factory Reset: If you experience persistent issues following an update, consider performing a factory reset on your drone. This will clear any software issues but remember to back up your data!
By being conscious of connectivity and battery issues, you can mitigate potential disruptions during your flying sessions. Troubleshooting can be a breeze once you’ve grasped the basics. The key is to stay informed, act sustainably, and always be prepared. With that said, let’s wrap up by discussing how you can further refine your drone flying skills to get the most out of this exciting hobby!