Introduction
Importance of Battery Life
When it comes to flying drones, one of the most crucial factors that often gets overlooked is battery life. Imagine you’re all set for an adventurous day out with your DJI Mini 3, ready to capture breathtaking aerial footage. But just as you get the perfect angle, the battery indicator flashes red, signaling that your time in the air is running low. Frustrating, right? That’s why understanding and optimizing battery life is key to enhancing your flying experience. Battery life isn’t just about how long your drone can stay airborne; it directly influences the quality and quantity of your footage, the flexibility of your flight patterns, and, of course, the overall enjoyment of your drone experience. A well-managed battery allows you to:
- Capture more extended shots without interruption.
- Experiment with different flight maneuvers.
- Return safely to home without the panic of losing your drone.
In this fast-paced world of drone photography and videography, having a plan for your battery management can be the difference between a successful flight and missed opportunities. It’s essential not only for casual flyers but also for professional drone pilots who depend on their devices for capturing stunning visuals.
Overview of DJI Mini 3
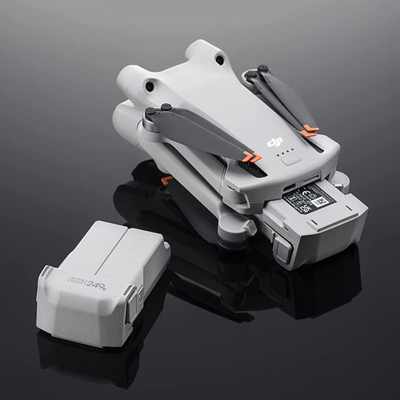
The DJI Mini 3 is a remarkable piece of equipment that packs a lot of features into a compact design. This little powerhouse is known for its lightweight structure, ease of use, and impressive camera capabilities. Weighing just around 249 grams, it’s perfect for those looking to carry it around without feeling bogged down. What sets the Mini 3 apart from its predecessors? Here are some highlights:
- Camera Quality: With a 4K resolution and crisp imaging, you have the ability to capture your adventures in stunning detail.
- Obstacle Avoidance: Equipped with intelligent sensors, the Mini 3 helps you navigate safely around obstacles, reducing the risk of crashes.
- Flight Time: Expect an impressive flight duration of up to 38 minutes with the most recent battery technology—something that truly stands out in the drone market.
- User-Friendly Design: Many who are new to drones appreciate how easy the Mini 3 is to operate, making it a fantastic option for beginners and advanced users alike.
- Intelligent Flight Modes: The Mini 3 offers various pre-programmed flight modes that not only enhance your creative options but also help manage battery life more effectively.
Imagine using the Mini 3 to capture a mesmerizing sunset over a mountain range—you’d want it to stay airborne long enough to get the perfect shot! The combination of its excellent features and thoughtful battery design means you can plan lengthy flights without fear of landing prematurely. In essence, the Mini 3 is designed with the modern drone pilot in mind. It seamlessly blends advanced technology with ease of use, catering to both photography enthusiasts and casual hobbyists. Whether you’re just starting your drone journey or looking to advance your skills, knowing how to manage battery life effectively allows you to maximize the capabilities of the DJI Mini 3. So, let’s dive deeper into how you can ensure your drone stays in the air longer and captures everything you desire!

Understanding Battery Basics
Battery Capacity
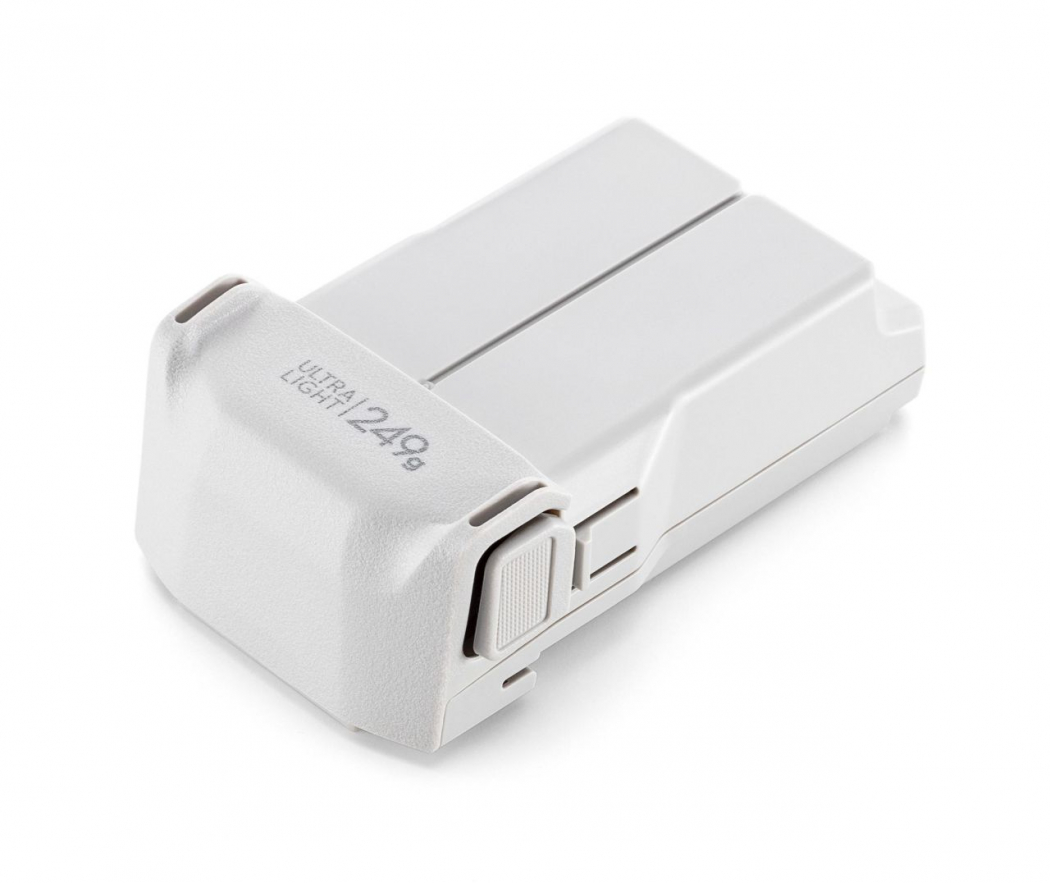
Now that you’ve got a grasp on the importance of battery life and the fantastic features of the DJI Mini 3, it’s time to dive into one of the most critical aspects of drone performance: battery capacity. Essentially, battery capacity refers to how much energy a battery can store and is typically measured in milliamp-hours (mAh). In simpler terms, it dictates how long your drone can stay in the air before needing a recharge. For the DJI Mini 3, the battery capacity is about 2,500 mAh, translating to that impressive flight time of up to 38 minutes under optimal conditions. But here’s the catch—all batteries are not created equal, and several factors can influence how that capacity translates into actual flight time. For instance:
- Weight Load: The heavier your drone is (thanks to additional accessories or payloads), the more energy it consumes.
- Flight Conditions: Windy or turbulent conditions can increase battery drain as the drone works harder to maintain stability.
- Flight Behavior: Rapid maneuvers and high-speed flying will generally lead to quicker battery depletion.
To maximize battery capacity, always consider the load you’re attaching to your Mini 3. If it’s just you and the drone, you’re likely to achieve the maximum flight time. However, if you’re planning to carry additional equipment, do some calculations ahead of time to estimate flight duration. When I first began flying with my Mini 3, I naturally wanted to test its limits. I loaded it down for a photography project, thinking I could capture more shots. I was surprised when, halfway through, the battery started warning me to return home. Lesson learned: knowing your battery capacity and adjusting your load accordingly is essential for a smooth flight experience!
Battery Maintenance Tips
Proper battery maintenance can significantly extend the lifespan and performance of your drone’s battery. Here are some tips you can implement right away:
- Regular Charging: Always recharge your battery after a flight, even if you didn’t deplete it fully. Lithium-polymer (LiPo) batteries, like the one in the Mini 3, prefer being stored at around 50-60% charge if you’re not planning a flight soon.
- Temperature Control: Keep an eye on the temperature! Batteries should ideally operate between 20°C and 30°C (68°F to 86°F). Cold or hot conditions can strain your battery and reduce flight time. During one particularly cold winter day, I noticed my Mini 3 drained much faster. I learned to keep my batteries warmer for better performance.
- Storage Practices: When not in use, store your battery in a cool, dry place. Avoid leaving them in direct sunlight to prevent swelling or damage.
- Cycle Your Batteries: If you have multiple batteries, cycle through them regularly. This means using each battery evenly to ensure no single battery is overworked.
- Check for Damage: Regularly inspect your battery for swelling, tears, or any signs of damage. A compromised battery is not only less efficient but can also pose a safety risk.
- Avoid Full Discharge: Never let your battery drain completely. This can lead to reduced capacity over time. If you find yourself running low during a flight, it’s a good practice to enable the return home feature, allowing your Mini 3 to land safely before reaching the critical battery level.
With these maintenance tips in mind, you can enjoy longer-lasting and more efficient flights with your DJI Mini 3. Understanding battery capacity and how to take care of your drone’s battery opens up a whole new world for capturing stunning footage while ensuring the longevity of your equipment. So, let’s keep soaring through the skies with confidence!
Pre-Flight Preparation
Full Battery Charge
Before you take to the skies with your DJI Mini 3, one of the most essential steps in your pre-flight checklist is ensuring your battery is fully charged. It seems simple, but having a full battery can mean the difference between a successful flight and a scramble to get grounded before running out of power. You might think, “Why should I bother checking? I charged it last time.” Trust me, I’ve made that mistake before. I was super excited for a weekend photography adventure only to find my battery percentage at 30%—enough for a quick test flight but nowhere near sufficient for the epic sunset shots I had planned. As a result, I missed capturing some of the most picturesque moments of the day. To help you avoid a similar experience, here’s a quick checklist to ensure a full battery charge:
- Use Official Chargers: Always use the charger that comes with your DJI Mini 3 or any official accessories. This ensures the correct voltage and maximizes the safety and efficiency of charging.
- Charge Time: Typically, it takes around 60-75 minutes to charge the battery fully. Plan ahead and get into the habit of charging your batteries the night before your intended flight.
- Battery Indicators: Familiarize yourself with the battery indicator on the drone and remote. If you notice any discrepancies or if the charging light isn’t working consistently, it may be time to troubleshoot.
- Check Connections: Ensure that the charger and battery connections are clean and secure. Any dirt or debris can lead to improper charging and could impact battery performance in the air.
With your battery charged and ready to go, you’ll feel much more confident about your flight. A full charge allows for that extra time to capture unexpected shots, explore new angles, and react to the ever-changing dynamics of outdoor filming.
Optimizing Settings
In addition to a fully charged battery, optimizing your settings is crucial for ensuring you’re getting the most out of every flight. DJI provides numerous camera and flight settings that can enhance your flying experience and help you maximize battery life. Here’s how to set up your drone for optimal performance:
- Flight Mode Selection: Begin by choosing the appropriate flight mode. If you’re flying in open areas, you might opt for “Sport Mode” for speed—or if you’re new, stick with “Position Mode” for steadiness. Different modes have varying impacts on battery consumption, with Sport Mode usually draining your battery faster.
- Camera Settings: Adjust the camera settings to align with the conditions you’ll be filming in:
- Resolution and Frame Rate: Shooting in lower resolution or frame rate can save battery life. Consider 1080p at 30fps for everyday shots instead of defaulting to 4K all the time.
- Auto-exposure and White Balance: Setting these to automatic can help conserve battery during dynamic lighting conditions.
- GPS and Return to Home Function: Enabling GPS helps with precise navigation. Set up your “Return to Home” altitude based on the surroundings—keeping it high enough can prevent your drone from crashing into obstacles when returning automatically.
- Visual Indicators: Use visual aids like the onscreen telemetry to monitor battery levels, signal strength, and distance from home. Keeping an eye on these metrics will help you make better decisions during your flight.
- Pre-Flight Checklist: I recommend creating a quick pre-flight checklist that you can run through. It should include battery level, camera settings, navigation parameters, and physical drone condition.
By following these tips for pre-flight preparation, you’re setting yourself up for success in the air. A well-charged battery and optimized settings not only enhance your flying experience but also allow for richer, more satisfying footage. So gather your gear, optimize those settings, and prepare to explore the skies like a pro! Happy flying! ✈️🌟

In-Flight Tips
Flight Modes
Now that you’re prepped for your flight with a full battery and optimized settings, let’s talk about how to make the most of your time in the air with the DJI Mini 3. One of the coolest features of this drone is its various flight modes, each tailored to different flying styles and needs. When I first started using the Mini 3, I was enamored by its nimbleness and precision. However, I soon realized that selecting the right flight mode could completely change my flying experience. Here’s an overview of the key flight modes you’ll want to consider:
- Position Mode: Ideal for beginners, this mode allows for stable flights with smooth and controlled movements. It’s perfect for capturing scenic shots without stressing about drone control.
- Sport Mode: If you’re looking for an adrenaline rush, Sport Mode is where it’s at! It enables faster speeds but demands a bit more skill, as the controls respond quicker. Just be mindful—battery life decreases more rapidly in this mode.
- Tripod Mode: This slow and steady mode is fantastic for precision shots and is particularly useful when flying indoors or in tight spaces where movement needs to be cautious. The maximum speed is significantly reduced, allowing you to make minute adjustments in your framing.
- Follow Me Mode: A game-changer for capturing yourself in action! The Mini 3 will autonomously follow your movements, allowing you to focus on your activity while it handles the filming. Just ensure you have a clear path ahead for the best results.
Choosing the right flight mode can significantly impact not only your shooting style but also your battery life. For example, if you’re aiming to film a lengthy outdoor event, you might choose Position Mode for longer endurance. Also, keep in mind that practicing in different modes can prepare you for various shooting scenarios. During one of my early flights, I accidentally switched to Sport Mode while trying to frame a sunset picture and ended up zipping away from my intended shot! Thankfully, I had practiced enough to regain control, but it reminded me to be mindful of my mode selection.
Avoiding Extreme Conditions
Just like a seasoned pilot would check the weather before a flight, you need to be aware of the conditions for your DJI Mini 3. The environment plays a significant role in how successfully you can operate your drone, especially when it comes to battery life and overall performance. Here are some conditions to be particularly cautious of:
- Wind: Strong winds can quickly drain your battery and jeopardize stability. I learned this the hard way when filming along a cliffside. The gusts were so strong that my Mini 3 struggled to maintain altitude even in Position Mode. Ideally, keep your flights for days when the wind is calm—generally, winds below 15 mph are favorable for a smooth flight.
- Temperature Extremes: The DJI Mini 3 operates best within a temperature range of 20°C to 30°C (68°F to 86°F). I once flew my drone in chilly early spring conditions, thinking I could get some stunning early blooms, only to experience a rapid drop in battery life. Following that, I always check the forecast and plan flights for milder days.
- Rain and Moisture: Your Mini 3 isn’t waterproof. Flying in the rain can not only affect battery performance but also pose risks of damaging the drone’s electrical components. If there’s even a hint of precipitation, it’s better to sit it out for another day.
- High Altitudes and Humidity: Be mindful of flying at high altitudes. While the Mini 3 is capable, high humidity and altitude can affect propeller performance and wireless signals. I recommend sticking to altitudes that you are comfortable with and within the drone’s limitations for best performance.
Being cautious of these extreme conditions doesn’t just ensure the safety of your drone; it also helps you capture better and more stable footage while extending your battery life. Thus, you’re more likely to leave with exceptional shots rather than a heart-sinking feeling of losing control. With the right flight mode and weather awareness, you’re setting yourself up for a successful and enjoyable flight! So, strap in and get ready to explore the skies safely. 🌤️🚀

Enhancing Efficiency During Flight
Proper Storage
As you soar through the skies with your DJI Mini 3, ensuring efficiency isn’t just about flying smart—it’s also about how you manage your gear throughout the flight. One often-overlooked aspect is the proper storage of your drone and its accessories during flights. Proper storage minimizes wear and tear and can extend the overall life of your equipment. Let me share a little story. During one of my early drone adventures, I was excited to film a stunning landscape. I threw my Mini 3 in my backpack without a second thought. A few hours later, I noticed a small scratch on the lens cover. It was minor, but it made me realize how crucial it is to store the drone securely during transport and while on the ground. Here are some tips for ensuring the optimal storage of your drone and batteries:
- Use a Hard Case: Invest in a sturdy hard-shell case that can protect your drone from bumps and drops. Many of these cases also come with custom foam inserts that fit the Mini 3 perfectly, ensuring it remains secure during transportation.
- Battery Management: Keep your battery in a padded compartment within your case. Battery terminals should be covered to prevent short-circuits and dangerous discharges. I often use a battery bag made of fire-retardant material for extra safety.
- Propeller Safety: Remove the propellers when storing the drone for extended periods, or if you feel they might get damaged. A prop guard can also help in this scenario.
- Avoid Overheating: If you’re flying in a warm climate, let the drone cool down in a shaded area when you’re not in the air. Storing the Mini 3 in direct sunlight can lead to overheating, which in turn may impact performance and battery life.
- Organized Packing: Use compartments or pouches within your backpack to keep cables, spare batteries, and other accessories organized. Trust me, fumbling through a tangled mess in the excitement of a flight can be frustrating!
Taking these simple steps not only protects your investment but also ensures that when it’s time to fly, you’re ready to go in an instant.
Monitoring Battery Levels
One of the most critical factors contributing to efficient and enjoyable flights with the DJI Mini 3 is keeping an eye on your battery levels. Knowing exactly how much juice you have left can help you make critical decisions mid-flight, ensuring you land safely without any drama. I still vividly recall a flight where I was focused on capturing a breathtaking panorama. I got so engrossed in the moment that I neglected to monitor the battery level, and suddenly, the low-battery warning startled me! Thankfully, I had set the “Return to Home” feature, which I activated just in time. It was an effective reminder of how important it is to keep tabs on battery status throughout the flight. Here’s how to keep your battery levels in check:
- Utilize the App: Use the DJI Fly app to monitor battery levels in real-time. The app provides a clear display of your remaining battery percentage, flight time left, and even distance from home—keeping you informed at a glance.
- Set Alerts: Configure your battery alert settings to notify you when you’re approaching critical levels. This feature can be a lifesaver.
- Estimate Power Consumption: Plan your flight path according to the anticipated power usage. High-speed flights and aggressive maneuvers consume more battery. If you foresee engaging in such actions, consider returning home earlier than expected.
- Pay Attention to Distance: Keep a mental note of how far you’ve flown from your takeoff point, especially when you’re capturing stunning views. Many pilots set a distance limit on their fly app or remote to avoid going too far out.
- Follow the 20% Rule: As a standard practice, I aim to start heading back when my battery dips below 30%, ensuring that I have enough power for a safe return. Once it hits about 20%, I make it a hard rule to land.
By implementing these tips for monitoring battery levels and storing your gear effectively, you’ll be well on your way to enhancing the efficiency of your flight experience with the DJI Mini 3. Proper preparation allows you to focus on what really matters—capturing those stunning aerial shots, all while enjoying the thrill of flying! So, get out there and make memories; just remember to keep an eye on that battery! ✈️🔋📸

Utilizing DJI Mini 3 Features
Low Battery Return Home Feature
As you’re leveraging everything the DJI Mini 3 has to offer, one feature that stands out for its utility and peace of mind is the Low Battery Return Home function. Imagine being engrossed in capturing panoramic shots when suddenly, your battery indicator drops to a concerning level. Instead of panicking, you can rely on this clever feature to ensure your drone returns safely home. When I first became acquainted with the Mini 3, I was hesitant about relying on automated functions. However, during one flight, I decided to experiment with the Low Battery Return Home feature. Just as I was about to switch gears and capture one last shot, the app notified me that my battery was getting low. I hit the Return Home button, and to my amazement, the drone gracefully navigated back, avoiding any obstacles. The whole experience was seamless! Here are the key points to consider about the Low Battery Return Home feature:
- Configuration: Before flying, ensure that you have activated this function in your settings. You can usually select the battery percentage at which the Mini 3 will initiate the return. I recommend setting this to around 30% to give yourself plenty of time to return safely.
- Obstacle Avoidance: While returning home, the Mini 3 uses its sensors to detect and avoid obstacles in its path. This feature is vital, especially if you’re flying in areas with trees, buildings, or other structures.
- Testing: Don’t shy away from testing this feature during a controlled flight. Just like during my practice session, you might feel more comfortable knowing how the feature operates before a high-stakes flight.
- Visual Indicators: The drone presents visual cues on the screen when the low battery alert is triggered. Keep an eye on these notifications, as they can help you make more informed decisions during your flight.
In essence, this feature not only enhances safety but also encourages you to explore new locations without the dread of losing your precious drone!
Battery-saving Flight Techniques
While the DJI Mini 3 is equipped with fantastic features, your flying style can also enhance battery efficiency significantly. Implementing certain battery-saving flight techniques can allow you to maximize your flight time while ensuring you capture all the breathtaking views you wish. Over the years, I’ve learned that adopting a few smart flying practices can enhance not only flight time but also stabilize your shots. Here are several effective techniques:
- Gradual Ascents and Descents: Instead of jerking the controls for immediate altitude changes, make smooth movements. Rapid ascents can drain battery power quickly. Gradually rising and descending enhances control and efficiency.
- Steady Speed: Maintaining a constant speed reduces battery drain. I often find that keeping the drone at a moderate speed while filming helps improve stabilization, giving me clearer shots without the need to edit out jittery footage.
- Flight Paths: Plan your flight path ahead of time to ensure efficiency. If possible, stick to a straight line rather than circling back to get a better angle. This helps conserve battery life. Plus, it minimizes unnecessary backtracking, allowing you to capture a broader area in less time.
- Utilizing Wind Direction: If you’re flying outdoors, always pay attention to the wind conditions. Fly against the wind on your outward journey and ride the wind back, essentially conserving battery during your return leg. I’ve been caught in crosswinds and had to fight them off, using up a lot of my battery power!
- Look for Environmental Factors: Flying at lower altitudes in areas with foliage can reduce wind resistance, leading to more energy-efficient flights. Trees can act as natural shields from the wind.
- Use Intelligent Modes Smartly: The Mini 3’s various intelligent flying modes, such as QuickShots and Follow Me, can help manage your battery better. For instance, using these modes can often result in smoother flight patterns which are kinder to battery life.
By combining these battery-saving techniques with the built-in features like the Low Battery Return Home, you’ll maximize your DJI Mini 3’s performance and enjoy extended flights. Not only will you be able to capture more of those stunning views, but you’ll also have the confidence that your drone will return home safely, no matter what. So, take to the skies and let your creativity soar! 🌤️✨📷

Advanced Battery-saving Strategies
Adjusting Camera Settings
When it comes to flying the DJI Mini 3, maximizing your battery life can be as much about your flying technique as it is about your camera settings. The camera capabilities of the Mini 3 are impressive, but if you’re not careful, they can also drain your battery faster than necessary. After some experimentation and a few misplaced flights, I’ve learned a thing or two about optimizing camera settings to extend that precious flight time. Here are some strategies for adjusting your camera settings to enhance battery efficiency while capturing stunning footage:
- Resolution and Frame Rate: Higher resolution and frame rates look amazing but can significantly impact battery life. For everyday filming, I often opt for 1080p at 30 FPS instead of 4K. This still provides great quality while consuming less power.
- Auto Settings: Using automatic settings for exposure and white balance can save energy because the camera adjusts on the fly without needing constant manual tweaks. I remember spending too much time adjusting settings manually on one occasion and witnessing my battery levels plummet as a result.
- Turn Off Unused Features: Features like HDR and hyper-lapse may improve footage quality but at a cost to battery life. If you don’t need them for a specific shot, it might be best to turn them off. I find that keeping things simple helps conserve battery while you capture essential footage.
- Preview Quality: Reducing the quality of the live feed on your mobile device can also contribute to saving battery life. You may not need the highest quality preview, especially if you’re just lining up your shots.
- Use ND Filters: Neutral Density filters can help maintain appropriate shutter speed for your footage without having to crank up your ISO, which can use more power. During one of my outdoor shoots, using ND filters helped increase battery life while allowed me to achieve a cinematic look in bright sunlight.
With a few tweaks to your camera settings, you can significantly extend your flying time, allowing you to capture all those beautiful shots you envision without the worry of running low on battery. Smart adjustments can make all the difference!
Using Intelligent Flight Modes
The DJI Mini 3 is not just a high-tech drone; it’s also equipped with advanced intelligent flight modes designed to make the most of your battery life while giving you the freedom to capture stunning visuals. Utilizing these modes can provide both safety and efficiency, letting you focus on your creative pursuits without constantly monitoring battery status. Here are some intelligent flight modes you’ll want to leverage:
- Waypoint Navigation: This feature allows you to pre-program flight paths, which can save battery life by ensuring your drone follows a direct route rather than flying erratically. I once used waypoint navigation to capture footage of a hiking trail, allowing the Mini 3 to follow an efficient path while I hiked along to capture ground shots.
- Follow Me: This mode is fantastic for dynamic shots where the drone follows you or a subject, automatically adjusting its positioning. The efficiency comes from the drone managing its changes in elevation and direction without you having to manipulate the controls continuously, which can drain battery quicker.
- Point of Interest: By selecting a Point of Interest, the Mini 3 will orbit around a specific object or location, creating visually striking footage. The drone can manage its energy effectively by maintaining altitude and distance, reducing the need for extensive manual input that consumes battery power.
- QuickShots: These predefined flight patterns capture stunning shots without requiring complex piloting skills. Using a QuickShot lets you maintain steady, smooth movements while your drone snaps the action, helping to save on the wear and tear—and ultimately, battery usage—associated with manual flying.
- Check intelligent mode settings: Before every flight, double-check that the intelligent flight modes are configured for your specific needs. Small adjustments can lead to more efficient battery usage. During one particularly ambitious shoot, I forgot to configure the Follow Me mode, leading to unnecessary flight time, and thus drained my battery.
By harnessing the power of intelligent flight modes in conjunction with your camera settings, you can not only enhance the quality of your footage but also significantly conserve battery life. Your aerial adventures will become more efficient and enjoyable, allowing you to maximize your time in the air. With these advanced strategies in hand, you’re ready to take your drone flying to the next level. So, get out there, capture stunning visuals, and let your creativity take flight! 🌄🚁✨
Post-Flight Care
Cool Down Period
After an exhilarating flight session with your DJI Mini 3, it’s easy to just pack everything up and call it a day. However, taking a moment for proper post-flight care is crucial to maintaining your drone’s performance and longevity. One of the most essential parts of this care is allowing your drone, especially the battery and motors, to cool down. When I first started flying drones, I had a tendency to dive right into the next flight, eager to capture more footage. I quickly learned that pressing the limits without giving the drone a cooling-off period can lead to overheating issues. After one particularly hot day of flying, I noticed my battery performing sub-optimally during my next flight. Lesson learned! Here are some tips for ensuring a proper cool down period:
- Let the Drone Rest: After landing, make sure to give the drone a moment to breathe. Allow it to sit idle for about 10-15 minutes before packing it away. This time allows the internal components, especially the motors and battery, to return to normal operating temperatures.
- Avoid Sudden Temperature Changes: If you’ve been flying in a hot environment, suddenly bringing the drone into an air-conditioned space can cause condensation to form inside. Avoid this by letting it acclimate gradually before moving it indoors.
- Monitor Your Battery: After the cool down, check the battery’s temperature. A good practice is to feel the battery—if it’s warm to the touch, give it more time to cool. Heating can be a sign of overuse, so make sure to monitor these signs closely.
- Keep the Drone Outdoors: If you’re flying during hot weather, leave your drone outdoors to cool down. This is particularly useful if you’re in a hot climate; just avoid direct sunlight.
Taking these simple steps to allow your drone to cool down helps prevent premature wear and ensures optimal performance for your next aviation adventure.
Battery Storage Guidelines
Proper battery storage is another key aspect of post-flight care that can’t be overlooked. The DJI Mini 3 uses lithium-polymer (LiPo) batteries—wonderful components but also ones that require special attention to maintain their health and longevity. After an exciting day of flying, here are essential guidelines for storing your drone batteries effectively:
- Recharge to Storage Levels: If you won’t be flying for a while, ensure you charge your battery to around 50-60%. Storing it fully charged or completely drained can lead to reduced capacity over time. Utilize a smart battery charger that can help you maintain this ideal storage level.
- Use a Battery Bag: Invest in LiPo bags for added safety. If you’re storing your batteries, these bags are designed to contain and minimize risks associated with LiPo battery fires.
- Store in a Cool, Dry Location: Find a suitable storage location, away from direct sunlight and humidity. Ideally, a temperature range of 20°C to 25°C (68°F to 77°F) is best for battery longevity. I have a designated drawer in my office where I keep my batteries, ensuring they are safe and stored properly.
- Avoid Overheating: Just as cooling down is crucial after a flight, keeping batteries out of hot garages or storage areas will prevent overheating, which can shorten battery life.
- Inspect Regularly: Every month or so, check your batteries for any signs of swelling, punctures, or damage. A swollen battery can signal a serious issue that requires immediate disposal.
- Cycle Your Batteries: If you own multiple batteries, make an effort to rotate through them regularly. This will help ensure that all your batteries are used and maintained evenly, maximizing their lifespan.
By implementing these battery storage guidelines along with allowing a proper cool-down period, you ensure your DJI Mini 3 stays in top condition, keeping you ready for your next adventure. Taking these minimal steps post-flight will prevent headaches and sky-high anxiety during your future drone escapades. So, take a breather, store your gear right, and get ready to fly again! 🌥️🛩️🔋