Introduction
Evolution of Drone Technology
It’s fascinating to witness the meteoric rise of drone technology over the past few years. What once felt like a futuristic dream has now become an accessible hobby for many tech enthusiasts and photographers alike. In the early days, drones were primarily used for military purposes, equipped with basic cameras and limited battery life. Fast forward to today, and you’ll find an impressive range of drones that cater to various needs—from aerial mapping and surveying to breathtaking photography. Drones have transformed significantly:
- Small and Lightweight: Modern drones are compact and lightweight, making them much easier to transport and maneuver.
- Advanced Cameras: With high-resolution sensors and stabilization technology, you can capture vivid images and videos that were once exclusive to high-end photography gear.
- User-Friendly: Many drones come with intuitive interfaces and apps that simplify operation, even for beginners. You don’t need to be a tech wizard to fly one.
- Autonomous Features: Drones are now equipped with GPS and return-to-home features, giving you peace of mind while capturing stunning aerial shots.
Personally, I remember being in awe when I first saw a drone seamlessly gliding through the air, capturing incredible views of a sunset. The thought of having such technology at my fingertips was exhilarating. It’s this excitement that has led many people to explore night sky photography—a beautiful and challenging niche where drones excel.
Importance of Night Sky Photography
Night sky photography isn’t just an artistic pursuit; it’s an exploration of beauty that lies hidden in darkness. Capturing the cosmos from the ground is one thing, but using a drone to gain altitude can provide a whole new perspective. Here are a few reasons why this genre is so important:
- Connection to Nature: Observing celestial bodies can instill a sense of wonder and connection to the universe. It reminds us that we are just a small part of something much larger.
- Scientific Use: Astrophotography can aid in observing celestial events, tracking weather patterns, and studying light pollution. Enthusiasts often contribute to citizen science projects that enhance our understanding of the night sky.
- Stunning Imagery: The beauty of capturing the Milky Way, shooting stars, or the Northern Lights through a drone’s lens is simply captivating. These images can evoke emotions and inspire others to engage with astronomy.
- Social Sharing: In today’s age of social media, sharing your night sky images can create community and spark conversations. It’s amazing how a single photo can encourage someone to look up and wonder about the cosmos.
Picture this: you’ve planned the perfect night out under the stars, armed with your drone and camera setup. Suddenly, you feel a rush of excitement as the drone rises, revealing a vast sea of twinkling stars in the inky blackness above. You’re not just photographing a starry sky; you’re experiencing a moment of pure magic that many never get to witness. In preparation for capturing these breathtaking nightscapes, both amateur and seasoned photographers need to explore the right tools and techniques that will enhance their ability to shoot the stars accurately. Embracing both the technological advancements of drones and the beauty of the night sky opens up a world of creativity and knowledge. In the sections that follow, we will discuss how to choose the right drone, optimize camera settings, and employ essential techniques for stunning night sky photography. So, whether you’re a stargazing novice or a seasoned astrophotographer, let’s embark on this journey together and uncover the secrets to capturing the night sky like never before! 🌌
Choosing the Right Drone for Night Sky Photography
As you embark on your night sky photography journey, choosing the right drone is crucial. Not all drones are created equal—especially when it comes to capturing the magic of the cosmos. With so many options available, how can you determine which features are essential for this specific style of photography? Let’s dive into the considerations you’ll want to keep in mind.
Features to Consider
When selecting a drone for night sky photography, several key features will significantly influence your ability to capture stunning celestial images:
- Camera Quality: Look for a drone equipped with a high-resolution camera. At least 12MP is a good start for photographing the night sky. The ability to shoot in RAW format is a bonus, as it allows for better editing flexibility later on.
- Low-Light Performance: Night time means low light, so a drone that performs well in those conditions is essential. Look for drones with larger sensors (like the 1-inch sensor) to excel in low-light situations, reducing noise in your images.
- Stabilization Technology: Drones equipped with gimbal stabilization can reduce the impact of wind and other vibrations, ensuring you capture sharp, steady images, which is particularly important for longer exposures.
- Manual Camera Controls: Having the ability to adjust settings like ISO, shutter speed, and aperture manually can dramatically improve your night sky images. This flexibility lets you adapt to varying conditions and achieve the desired look.
- Battery Life: As you focus on celestial captures, aim for drones with longer flight times (25 minutes or more) to maximize your shooting potential while up in the air. You don’t want to land just as the stars start to shine!
- Intelligent Shooting Modes: Some drones offer features like “Follow Me,” which can help you frame your shots perfectly as you move around a location. This feature can be particularly beneficial when spotlighting different elements of the night sky.
Remember, the right balance of features will make all the difference in your night sky photography experience.
Popular Drone Models for Night Sky Photography
With so many drones available, it’s helpful to narrow down your choices. Here are a few popular models that excel specifically in night sky photography:
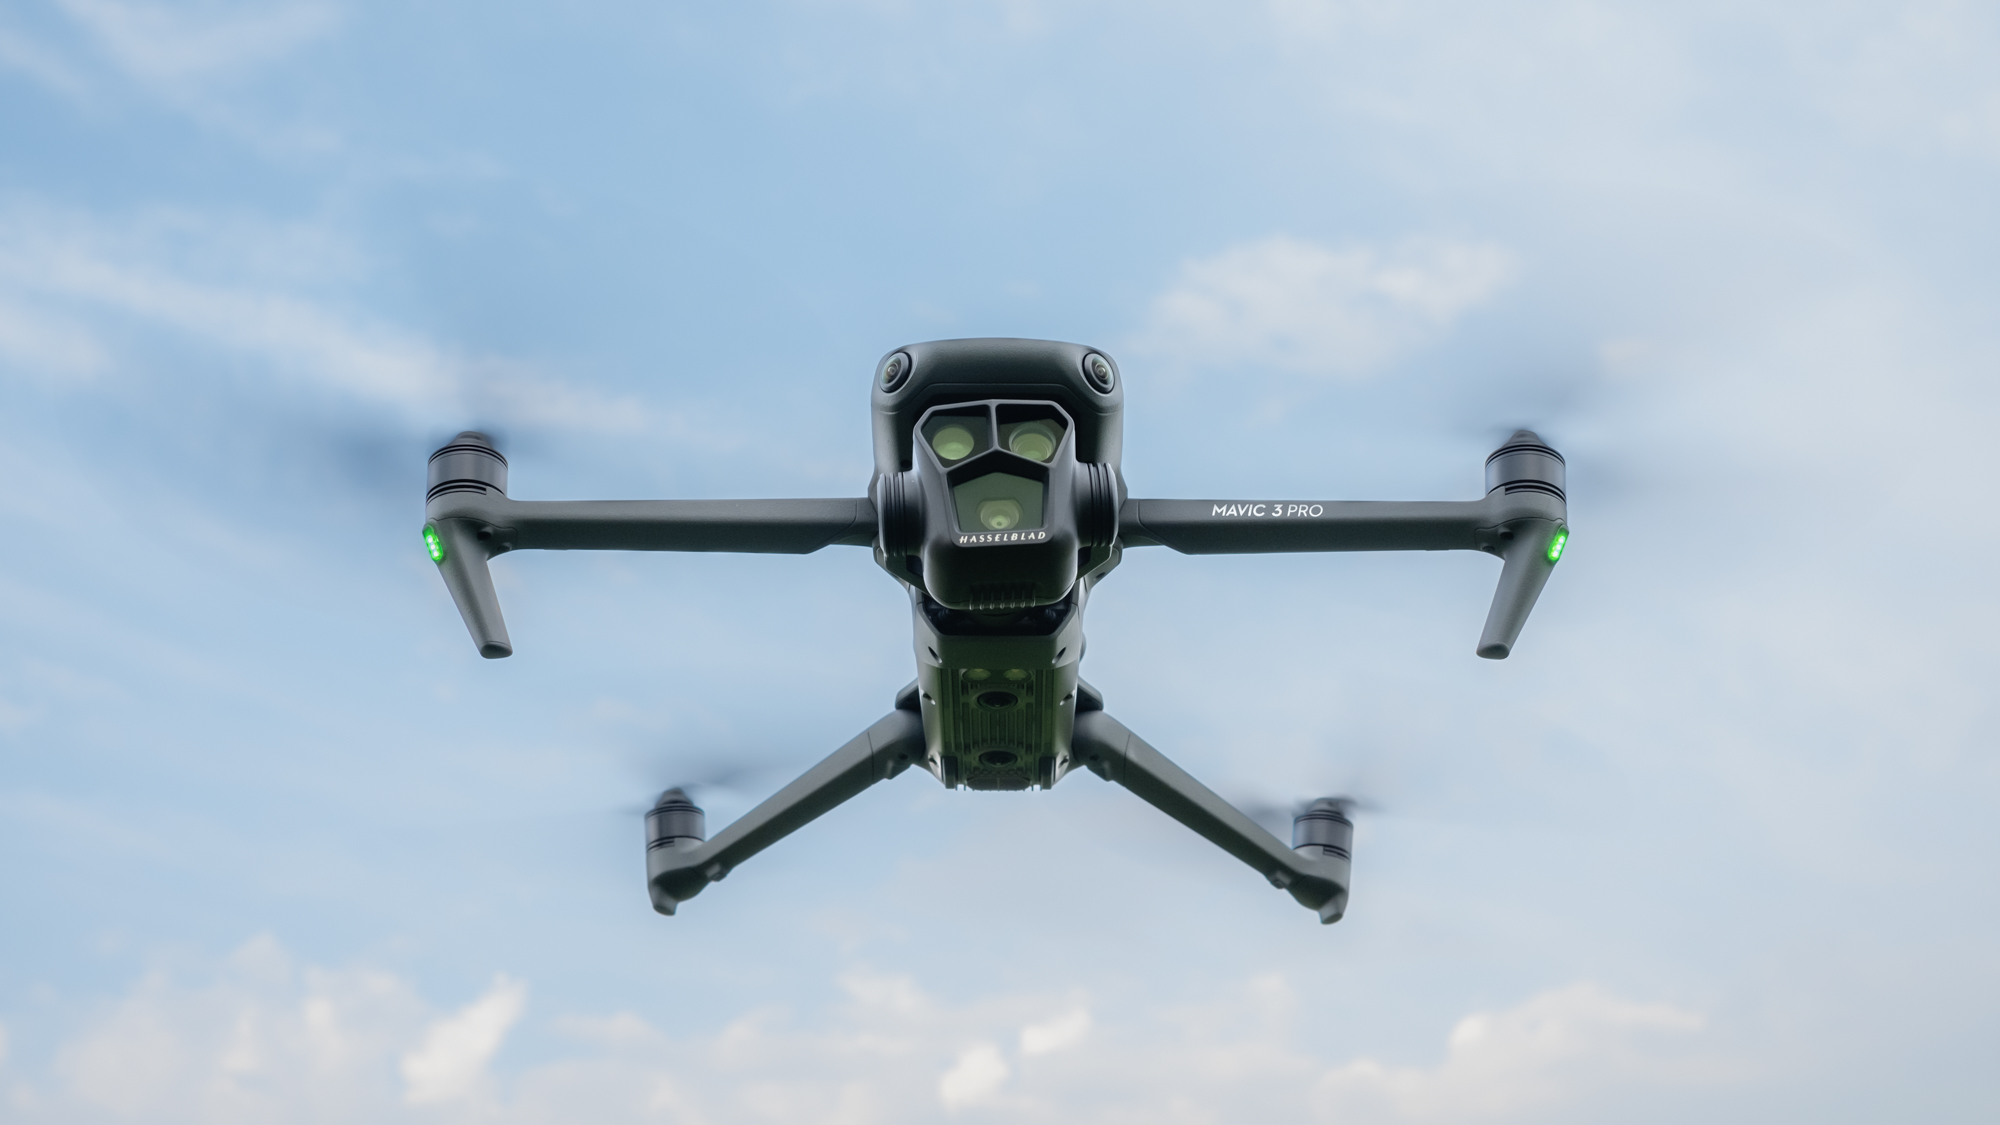
- DJI Mavic 2 Pro
- Camera: Hasselblad L1D-20c with a 1-inch CMOS sensor
- Max Flight Time: 31 minutes
- Features: 4K video, hyperlapse capabilities, excellent low-light performance.
- Why It’s Great: The camera’s impressive sensor allows you to capture stunning detail in lower light conditions, making this a top pick for night photography enthusiasts.
- DJI Phantom 4 Pro V2.0
- Camera: 1-inch CMOS sensor with a mechanical shutter.
- Max Flight Time: 30 minutes
- Features: 20MP stills, 4K video at 60 fps, and advanced obstacle avoidance.
- Why It’s Great: The mechanical shutter reduces motion blur, which is crucial for capturing celestial images without distortion.
- Autel Robotics EVO Lite+
- Camera: 1-inch CMOS sensor with 50MP capability.
- Max Flight Time: Up to 40 minutes
- Features: Adjustable aperture (f/2.8 to f/11), 6K video, and incredible low-light performance.
- Why It’s Great: This drone’s adjustable aperture allows you to fine-tune your exposure, making it an excellent choice for capturing the stars.
- Skydio 2
- Camera: 12MP with 4K video.
- Max Flight Time: 23 minutes
- Features: Autonomous flight capabilities and advanced obstacle avoidance.
- Why It’s Great: The autonomous features give you the freedom to focus on your photography without worrying about piloting.
Every drone has its unique advantages, and your choice will ultimately depend on your personal preferences and budget. Exploring millions of stars in the night sky is an incredible venture, and having the right drone makes all the difference in translating that experience into stunning images. ✨ As we prepare to delve into camera settings that will help optimize your night sky photography, remember that the right drone is just the beginning—exciting adventures await you!
Camera Settings for Night Sky Photography with Drones
Now that you’ve selected the perfect drone for your night sky photography adventures, it’s time to delve into the nitty-gritty of camera settings. Understanding how to adjust aperture, ISO, and shutter speed will be pivotal in capturing the stunning night sky images you envision. Let’s break it down into digestible pieces.
Aperture, ISO, and Shutter Speed
These three settings—the holy trinity of exposure—play a significant role in your photography results. Here’s how each one contributes:
- Aperture (f-stop):
- Aperture controls the amount of light entering your camera. A lower f-stop number (e.g., f/2.8) means a wider opening, allowing more light to hit the sensor. This is crucial for night sky photography, as you want to capture as much light from the stars as possible.
- Tip: Start at around f/2.8 or f/4 for night sky photography. If your drone supports variable aperture, adjust based on your specific needs for sharpness and light.
- ISO:
- ISO measures the sensitivity of your camera’s sensor to light. A higher ISO (e.g., 1600 or 3200) will brighten your image but may introduce noise (graininess). Striking a balance is key.
- Tip: Begin with an ISO of 1600 to 3200 for most night sky shots, and watch for noise. Experiment to find the highest ISO your drone can manage without producing noticeable grain.
- Shutter Speed:
- Shutter speed determines how long the camera sensor is exposed to light. For night sky photography, longer exposures (e.g., 10-30 seconds) are typically used to gather enough light to reveal stars. However, you want to avoid star trails unless that’s your intent.
- Tip: Use the “500 Rule” as a guideline. Divide 500 by the focal length of your camera (remember to account for any crop factor). For example, if you’re using a 24mm lens, aim for a maximum exposure time of around 20 seconds (500 / 24 = ~21 seconds).
Combining these settings requires some hands-on practice, and you may need to spend time tweaking them to perfection. There’s something immensely gratifying about capturing a brilliant star-filled sky, and finding the right balance of light is essential to achieving that!
Using Manual Mode vs. Auto Mode
Now that you have a grasp on camera settings, let’s talk about modes. You may be tempted to stick with Auto mode for simplicity, but if you’re serious about night sky photography, Manual mode should become your new best friend.
- Manual Mode:
- This mode allows you to take full control over all your camera settings (aperture, ISO, and shutter speed). Manual mode is particularly beneficial for night photography, where specific adjustments matter greatly.
- Advantages:
- Tailor each setting to the unique challenges of the scene.
- Adjust on-the-fly as conditions change, like varying light levels or cloud cover.
- Capture long exposures without worrying about the automatic settings making adjustments that could ruin your shot.
- Auto Mode:
- While Auto mode can simplify photography for beginners, it often makes decisions for you that may not align with your artistic vision. The camera may choose a faster shutter speed, which can result in underexposed images in low light.
- Disadvantages:
- Limited control over exposure settings.
- Automatic modes might introduce unwanted variability in your shots.
I remember the first time I used my drone in Auto mode, thinking it would save me time and guarantee perfect shots. It wasn’t until I reviewed my photos at home that I realized they lacked the depth and richness I envisioned. Switching to Manual mode opened up a world of creative possibilities. As you prepare for your night sky photography adventure, mastering these settings will elevate your image-capturing game. Feel free to experiment and remember that practice makes perfect—don’t hesitate to make adjustments and take several test shots before the magic hour arrives. In our next section, we’ll explore how to plan and prepare for your night sky photography sessions, ensuring you’re ready to capture those breathtaking moments when they arise! 🌌

Planning and Preparing for Night Sky Drone Photography
With your camera settings mastered, it’s essential to shift your focus to the groundwork that can make or break your night sky drone photography experience. Planning and preparation are key to putting yourself in the best position to capture those stunning cosmic landscapes. Let’s explore two critical components: location scouting and the importance of weather conditions and timing.
Location Scouting
The right location can dramatically elevate your night sky photography results. Assuming you want to capture a magnificent view of the Milky Way or some meteor showers, here are some tips for effective location scouting:
- Dark Skies: Light pollution can wash out the stars and hinder your ability to capture the night sky. Use light pollution maps to find dark sky locations near you. Examples include national parks or remote areas away from city lights.
- Landscape Elements: Consider including interesting foreground elements in your shots, such as mountains, trees, or lakes. These features can add depth and context to your images. For example, I once captured the Milky Way reflected in a serene lake, framing the sky beautifully against the water’s surface.
- Accessibility: Make sure the location is accessible and permits drone flying. Check for any restrictions or regulations in drone usage. You wouldn’t want to get to a stunning spot only to find out it’s a no-fly zone!
- Safety and Comfort: Choose a location that feels safe, allowing you to focus on your photography. Bring a flashlight to navigate in the dark and inform someone about your plans, especially if you’re heading to a remote area.
- Scout During the Day: If possible, visit your chosen location during daylight to familiarize yourself with the terrain and look for potential shooting spots. This reconnaissance can help you plan your composition better when the sun sets.
Getting to know your location can spark creativity and excite anticipation for the photo opportunities awaiting you!
Weather Conditions and Timing
Weather conditions and timing can be just as crucial as the location itself. A perfectly clear sky and the right time of year can lead to a breathtaking night sky experience, while clouds and overcast conditions can quickly dampen your plans. Here’s what to keep in mind:
- Clear Skies: Check the weather forecast ahead of time, looking specifically for clear skies during the evenings when you plan to shoot. Apps like Clear Outside or even the standard weather app on your phone can provide useful insights.
- Moon Phases: The moon can impact your night sky photography. A bright moon can outshine the stars, so consider planning your outings around new moons or crescent moons for darker skies. The best time for stargazing is during new moon nights, providing the darkest conditions.
- Timing: The golden hour of twilight (the time just after sunset or just before sunrise) can provide beautiful ambient light for landscape shots alongside the night sky. Aim to start shooting an hour or so after sunset when stars begin to appear.
- Meteor Showers: If you’re looking to capture shooting stars, research meteor showers that coincide with your planned shoot. Websites like the American Meteor Society provide calendars of meteor shower dates and peak viewing times.
- Be Patient: Sometimes, waiting is necessary. If you’re dealing with stubborn clouds or a hiccup in the weather, give it time. The heavens can surprise you, and moments of clarity might break through just when you least expect it.
Once, I geared up for a night shoot only to be met with an unexpected layer of clouds. Instead of heading home in frustration, I set up and waited—and moments later, stars began to peek through the clouds, leading to one of my favorite shots. By carefully scouting your locations and monitoring weather conditions, you’re setting yourself up for incredible night sky photography experiences. Knowing when and where to be will benefit not only your photography but also your enjoyment of the entire process. Next, we’ll explore exciting techniques for capturing stunning night sky images with your drone, so get ready to unleash your creativity! 🌠

Techniques for Capturing Stunning Night Sky Images with Drones
With your preparation firmly in place and your camera settings dialed in, it’s time to explore some exciting techniques that will elevate your night sky drone photography. Let’s delve into long exposure photography and the captivating worlds of light painting and spotlights. With the right approach, you’ll be able to create breathtaking images that truly capture the beauty of the cosmos.
Long Exposure Photography
Long exposure photography is a brilliant technique for night sky photography, allowing you to capture more light and create ethereal images of stars and celestial events. Here’s how to get started with long exposures:
- Choose Your Settings: Utilize the camera settings we previously discussed. Maintain a low f-stop for maximum light entry, a higher ISO for sensitivity, and a longer shutter speed to allow your sensor to gather enough light.
- Use a Stable Drone: Ensure that your drone is equipped with good stabilization technology. Gyroscopic stabilization will reduce vibrations, ensuring crisp images, especially during longer exposures. If you find that your drone’s movements cause blurriness, consider using a slightly shorter shutter speed.
- Plan Your Exposures: The duration of your exposure will significantly impact the results. As a starting point, experiment with 10 to 30 seconds, depending on how much light your drone can capture without resulting in star trails. Remember the “500 Rule” as a guideline for the maximum exposure time based on your focal length.
- Capture the Stars: The beauty of long exposure is its ability to capture the movement of celestial bodies. If you want to emphasize this motion, consider using exposure times that might highlight star trails, especially with longer exposures over several minutes.
I vividly recall the first time I attempted long exposure photography with my drone. I set it up, adjusted my parameters, and began the wait under a sky glittering with stars. The results were mesmerizing—the trails of the stars captured across the sky were stunning, making me feel as though I was watching the universe dance above me. There’s truly a feeling of magic in freezing those ephemeral moments!
Light Painting and Spotlights
Now let’s move on to light painting and spotlight techniques to enhance your night sky photos further. This adds a dramatic flair to your compositions, allowing you to create unique and striking visuals.
- Light Painting:
- This technique involves shining a light source on a specific subject while your drone captures a long exposure. It can be used to illuminate foreground elements, creating an eye-catching contrast against the dark sky.
- Tools: Use flashlights, LED sticks, or colored gels to introduce various hues and effects. Bring along friends or family to help create dynamic light trails as you involve them in the shot!
- How-To: While your drone is capturing the night sky in a long exposure, you can manually move the light source over your foreground subject, painting it with light. It’ll create a beautiful, illuminated subject that stands out against the gorgeous starry background.
- Spotlights:
- Incorporating spotlights can transform mundane landscapes into dramatic scenes. Pointing a spotlight at your subject can not only highlight landscape features but will also create captivating shadows and textures.
- Positioning: Use your drone to spotlight various features in the landscape, positioning it at angles that maximize the effect. This technique is particularly effective when aiming at trees, buildings, or rock formations.
- Combining Techniques: Consider combining light painting with drone spotlighting. Illuminate a foreground element while allowing the drone to capture both the painted and spotlighted details against the starry canvas behind.
One night, while experimenting with light painting, I accidentally illuminated a lone tree against the backdrop of the Milky Way. The combination of the star-filled sky and the tree bathed in soft light mesmerized everyone who witnessed it—the image truly brought the scene to life in a way that ordinary photography could never achieve. By mastering long exposure photography alongside light painting and spotlight techniques, you can create breathtaking images that leave viewers in awe. These techniques will not only showcase the beauty of the cosmos but also highlight your creativity and artistic vision. In the next section, we’ll discuss editing and enhancing your night sky drone photos to make those images pop even more. So, let’s get ready to refine and polish your creations! 🌌✨
Editing and Enhancing Night Sky Drone Photos
Once you’ve captured breathtaking night sky images, the next step is editing and enhancement. The post-processing phase offers an incredible opportunity to elevate your photographs from stunning to spectacular. Let’s dive into the best software tools and techniques available, along with some handy tips for achieving a professional finish.
Software Tools and Techniques
Choosing the right editing software is fundamental to optimizing your night sky drone photos. Here are some of the most popular options that cater to various levels of expertise:
- Adobe Lightroom: This powerful tool is excellent for managing large batches of photos and performing non-destructive edits. You can enhance exposure, contrast, and color balance, making it perfect for night sky images.
- Techniques:
- Adjust the Exposure slider to brighten darker areas of the photo.
- Use the Tone Curve to refine contrast further, helping the stars pop against the sky.
- Experiment with the HSL panel to adjust the colors specifically—boosting the blues can enhance the night sky even more!
- Techniques:
- Adobe Photoshop: If you’re looking to delve deeper into detailed edits and manipulations, this software is indispensable.
- Techniques:
- Use layer masks to blend multiple exposures or to selectively edit certain areas.
- Apply the Noise Reduction filter to combat any graininess caused by high ISO settings—especially important in night photography!
- Explore dodging and burning to enhance the highlights and shadows selectively.
- Techniques:
- Affinity Photo: A more budget-friendly alternative to Photoshop, Affinity Photo offers many similar features and is ideal for users seeking advanced editing tools without the subscription fee.
- Starry Landscape Stacker: Designed specifically for astrophotography, this software allows you to stack multiple images to reduce noise while enhancing detail, especially useful when photographing the Milky Way.
Tools like these can suit both beginners and advanced photographers, and my personal journey involved a mix of Lightroom and Photoshop. I remember the first time I imported my night sky shots into Lightroom. It felt like unlocking a treasure chest as I played with the sliders, revealing hidden colors and details I’d never noticed before.
Tips for Achieving a Professional Finish
Editing is where you can unleash your creativity, but there are a few strategies to keep in mind to achieve that polished, professional look in your night sky images:
- Correct Your Horizons: Make sure your horizons are level. An unbalanced horizon can take away from the beauty of your composition. Use the cropping tool to straighten things out as needed.
- Focus on the Stars: Use sharpening tools carefully. Enhance your stars but avoid over-sharpening, which can introduce undesirable noise. Subtlety is key here!
- Enhance Contrast: A crucial aspect of night sky photography is contrast. Play with the contrast slider or use the tone curve to create that rich separation between the dark sky and the luminous stars.
- Color Grading: Adjusting colors can significantly impact the mood of your images. Consider applying gentle hues—perhaps a cooler blue or a warm tint—to create a captivating atmosphere. However, be careful not to overdo it; nature’s colors are often stunning enough on their own.
- Experiment with Presets: Many photographers create presets that provide a base for their edits, which can be a fantastic way to streamline your workflow and establish a distinctive style.
- Make Use of the Crop Tool: Sometimes, a little refinement can make all the difference. Crop your image to improve the composition, focusing on the areas that best tell the story of that moment.
I often revisit older night sky shots, applying new editing techniques I’ve learned over time, and it’s astounding how fresh edits can breathe new life into familiar images. By taking the time to edit and enhance your night sky drone photos using these tools and techniques, you’ll elevate your work and create captivating images that resonate with viewers. As we wrap up, remember that each shot taken under the stars is not just photography; it’s an opportunity to share the magic of the universe with others. In our next section, we’ll explore some essential safety tips specifically for flying drones at night, ensuring that your adventure is not only creative but also safe! 🌙✨

Safety Tips for Flying Drones at Night
As mesmerizing as capturing the night sky can be, it’s essential to prioritize safety while flying your drone after dark. The thrill of piloting your drone through the starry expanse is fantastic, but understanding the legal regulations and following a solid pre-flight checklist will help ensure a smooth and safe experience. Let’s dive right in!
Legal Regulations and Permissions
First things first—know the regulations surrounding nighttime drone operations. Each country has different rules, and in the U.S., the Federal Aviation Administration (FAA) governs aviation activity, including drones. Here are some essential guidelines to keep in mind:
- Night Flight Certification: In the U.S., you’ll need to pass the FAA’s Part 107 test to obtain a Remote Pilot Certificate. To pilot your drone at night, you must also complete an additional training session, which covers proper nighttime operations.
- Visual Line of Sight (VLOS): Always maintain visual contact with your drone. At night, this can be more challenging, so consider equipping your drone with lights or markers that make it easier to see.
- No Fly Zones: Familiarize yourself with airspace restrictions in your area. Certain zones, such as near airports or national parks, may require special permissions or may be entirely off-limits to drones. Use apps like AIRMAP or DJI’s Fly app to check airspace restrictions before heading out.
- Local Regulations: Always check state or local laws regarding drone flights at night. Some municipalities may have specific rules prohibiting nighttime drone use. It’s better to be informed than to face potential fines!
When I first began flying at night, I spent a good amount of time researching local regulations. I vividly recall checking airspace maps while sitting at my desk, feeling like a detective piecing together crucial information. It might seem tedious, but being knowledgeable about the laws adds an extra layer of confidence when you’re out capturing those stunning night shots!
Pre-flight Checklist for Nighttime Operations
Before launching your drone into the night sky, having a comprehensive pre-flight checklist is a must. Here are crucial points to cover:
- Battery Check: Make sure your drone and remote controller batteries are fully charged. Flying at night can be more demanding, so it’s wise to have extra batteries on hand. You definitely don’t want to lose power mid-flight!
- Light Up the Night: Ensure your drone is equipped with LED lights or reflective tape. These enhancements not only make it easier to see your drone but also help with visibility for other pilots, ensuring safer operations.
- Calibrate Your Drone: Always perform compass calibration before flying, especially at night, when your drone’s GPS signals might be compromised. Take a moment to double-check settings to ensure your drone is ready for flight.
- Emergency Plan: Know where you will land in case of unexpected situations. Always have a planned emergency landing area visible and relatively close by.
- Check the Weather: Look at the weather conditions before heading out. Windy nights can be challenging, and increased wind exposure at night can lead to erratic drone behavior.
- Gather Gear Wisely: Bring essential gear such as a flashlight for yourself, a phone or tablet with mapping apps, spare propellers, and any tools you might need for minor adjustments.
I can’t tell you how important it is to double-check equipment before flying at night. One evening, I neglected to check my battery status, and just as I was starting to capture the Milky Way, my drone’s battery alarm went off! Thankfully, I was able to land it safely, but it was definitely a lesson learned. As you gear up for your nighttime drone adventures, staying informed about regulations and following a thorough pre-flight checklist will help ensure not only a successful shoot but also a memorable experience. Remember, with every flight comes responsibility—stay safe, and enjoy the magic of the night sky! In our next section, we’ll recap everything covered and inspire you to take to the skies with confidence. 🌌🚁✨
